


In Rocky, starting a simulation can involve any of the following three scenarios:
You have finished setting your simulation parameters and are ready to start processing it.
You have stopped a simulation that was already processing and want to resume processing it from where it left off.
You have stopped a simulation that was already processing and want to start the processing over from the very beginning.
What would you like to do?
See Also:
When you start processing a simulation, you select whether you want CPU, GPU, or Multi GPU processing. If CPU processing is chosen, then you are asked to choose the number of processors. If GPU is selected, then you choose which one graphics card you want to use. If Multi GPU is selected, you choose which two or more graphics cards you want to use, and what slicing direction you want processing to occur.
Note: Even when you select GPU or Multi GPU processing for your simulation, Rocky still requires the use of at least one CPU core to complete certain pre-processing tasks. These tasks include calculating what particles will be released into the simulation (all Inputs) and for Volume Fill Inputs specifically, generating and positioning the particles prior to processing. After these pre-processing tasks are complete, Rocky can use either CPU, GPU, or Multi GPU to process the simulation.
When any amount of GPU is selected, you also have the option of viewing details of the GPU card(s) you selected by clicking the GPU Information button, which will display details in a separate dialog (Figure 1).
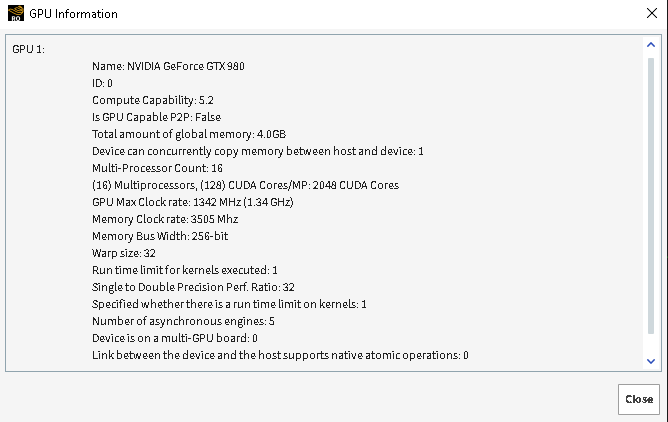
Figure 1: GPU Information dialog
While the simulation is processing, you are able to use Rocky to review your simulation settings, create charts, graphs, and 3D Views of the data collected thus far, and more.
The only task you are unable to do while a simulation is processing is change the set up parameters. Doing this would affect the calculations that Rocky is solving. To change the setup parameters, first stop the simulation, change your parameters, and then start your simulation over from the beginning.
In addition to the information in the Rocky Title Bar (see also: Refer to the Rocky Title Bar for Simulation Progress Details), a separate progress bar is provided to help you track the progress of your simulation, and provides Stop and Refresh capabilities (Figure 2).
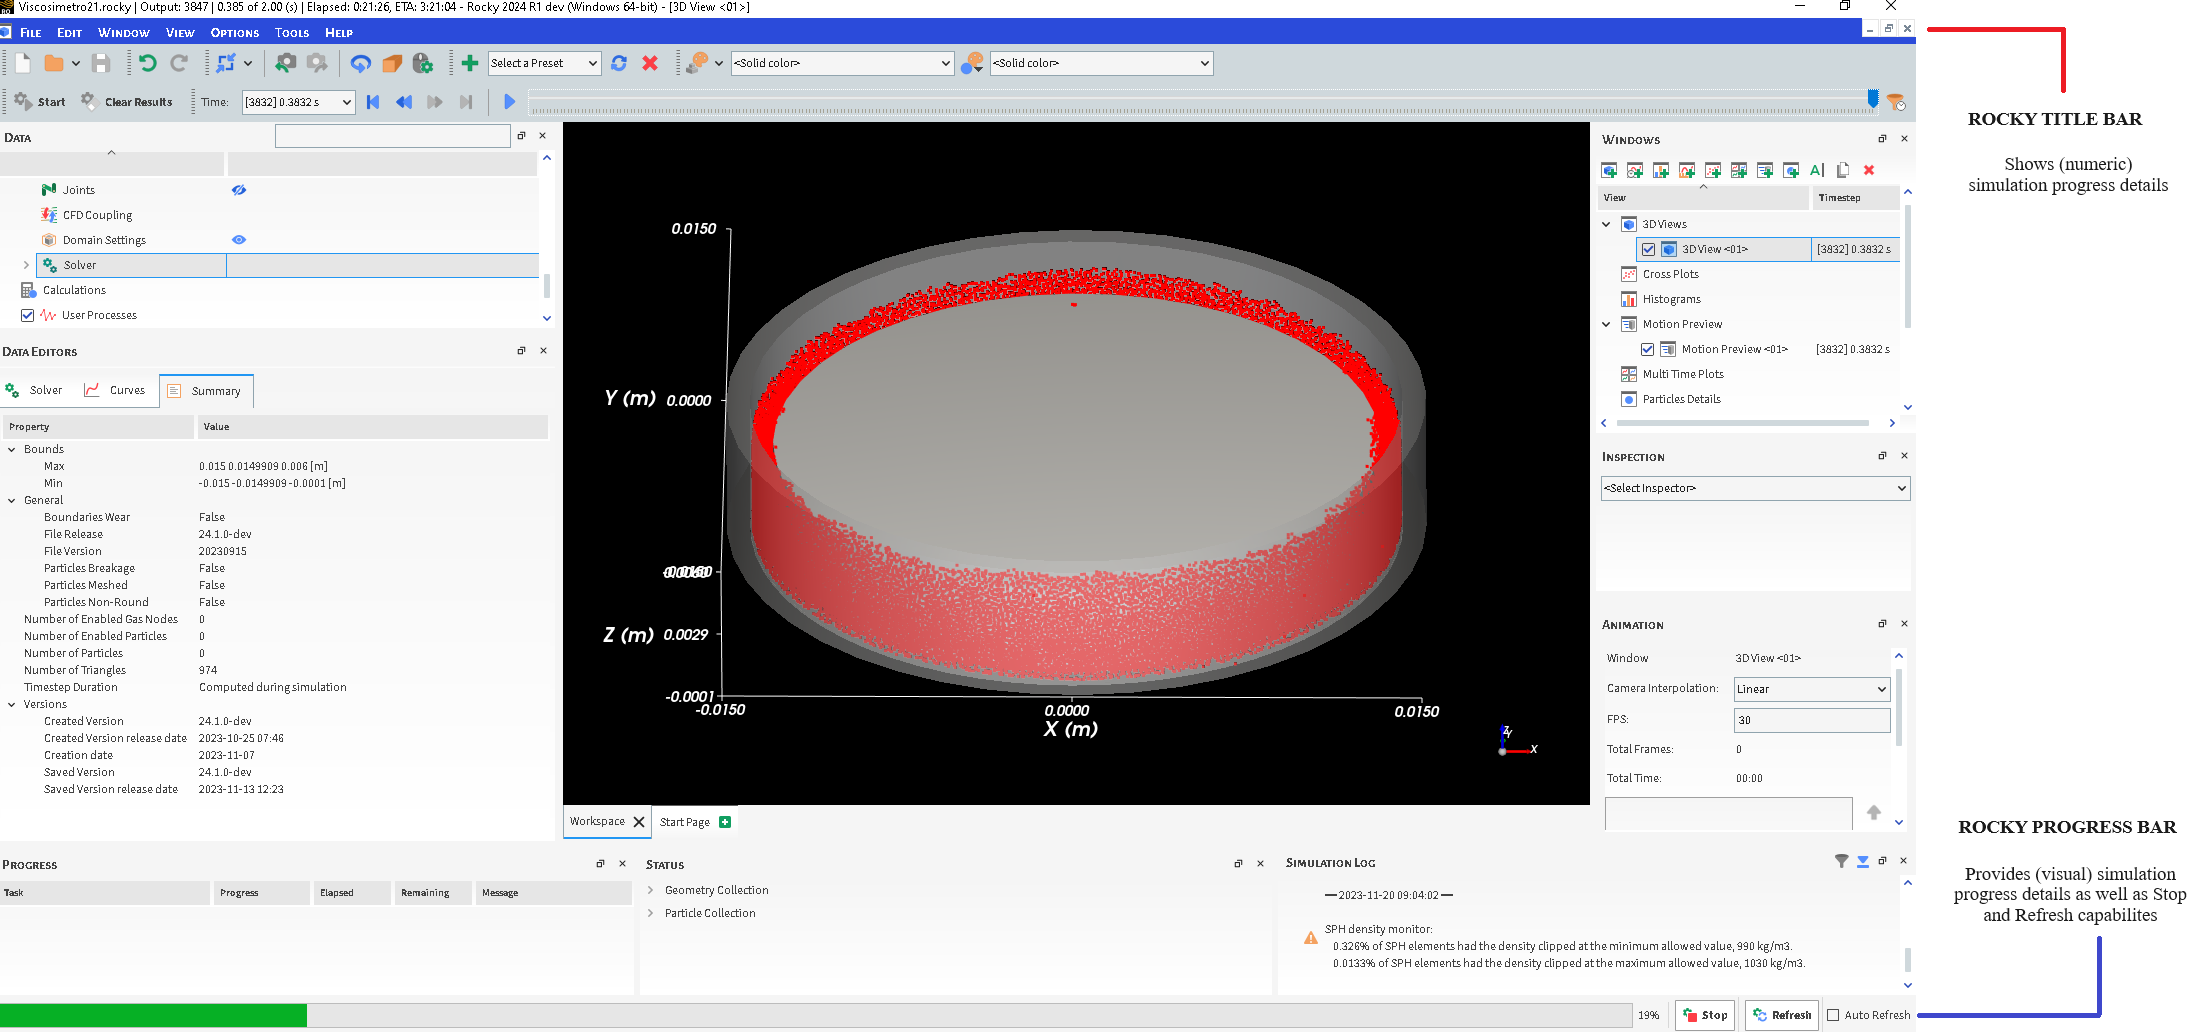
Figure 2: Rocky simulation progress options during processing
Because processing is so resource intensive, Rocky does not automatically update the 3D Views and graphs windows with the new information it calculates. Rather, you can choose to refresh your views manually at any time, or can even choose to override the default setting and have the views refreshed automatically at each timestep.
Important When choosing to processes very long or complex cases over a network, it is important to periodically check the status of your simulation to ensure that loss of connectivity or other issues haven't stopped it from processing. (See also I get a "Failed to write the log" message while processing my simulation.)
Note: As of Rocky v4.3.0, all simulation files will be made smaller during processing through compression, which takes up less storage on your computer. Because choosing to process your simulation without compression is no longer possible, the option Use Compressed Files was removed.
Solver Execution Parameter Definitions
Use the images and table below to help you understand how to start processing your simulation.

Figure 3: Solver, General parameters in the Data Editors panel when CPU is selected
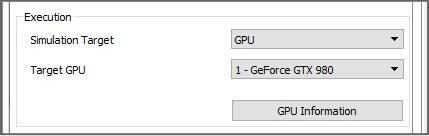
Figure 4: Solver, General, Execution parameters when GPU is selected
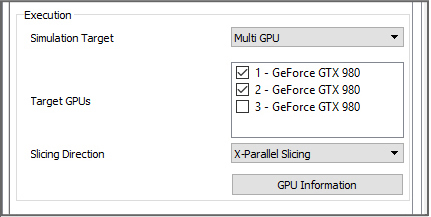
Figure 5: Solver, General, Execution parameters when Multi GPU is selected
Table 1: Solver, General tab, Execution options
Setting | Description | Range |
|---|---|---|
Simulation Target | Enables you to select what portion of your computer will be doing the processing. Notes:
| CPU; GPU; Multi GPU |
Number of Processors | When CPU is selected, sets the number of computer processors (threads) the simulation will use. In general, the more processors used, the faster the simulation will complete. It is recommended that you set this number equal to the amount of available cores (both physical and virtual) for which you have Rocky licenses. Notes:
| Positive values |
Detected Number of Processors | Displays the number of virtual and physical processors that Rocky was able to locate on the current machine. Using this value can help you determine what best to set for Number of Processors. | Display only |
Target GPU(s) | When GPU or Multi GPU are selected, enables you to select which graphics card(s) will be doing the processing. Note: In this version of Rocky, there is no limit to how many GPUs you can use at one time. | Automatically determined |
Slicing Direction | When Multi GPU is selected for Target GPUs, this sets which direction parallel slicing is made during processing. In general, choose the direction that represents the longest boundary component in your simulation. For example, if your longest boundary is a conveyor oriented along the X-axis, choose X-Parallel Slicing. This setting can help reduce processing time. | X-Parallel Slicing; Y-Parallel Slicing; Z-Parallel Slicing |
What would you like to do?
See Also:
From the Data panel, click Solver and then from the Data Editors panel, ensure the Solver | General tab is active.
Enter what you want for the Simulation Target, then do one of the following:
If you chose CPU, then enter what you want for the Number of Processors.
If you chose GPU, then select the one GPU you want from the Target GPU list. Note: To see detailed information about the GPU you selected, click the GPU Information button.
If you chose Multi GPUs, then select one or more GPUs you want from the Target GPUs list, and indicate the Slicing Direction you want. Note: To see detailed information about the GPUs you selected, click the GPU Information button.
Click Start. The Simulation Summary dialog appears, which you can review while Rocky initializes the simulation. (See also About the Simulation Summary.) After initialization is complete, Rocky automatically closes the Simulation Summary dialog and begins processing the simulation. The simulation progress bar appears at the bottom of the screen and processing begins at the zero Timestep. (See also Refer to the Rocky Title Bar for Simulation Progress Details.) When processing is complete, the progress bar disappears.
Important When choosing to processes very long or complex cases over a network, it is important to periodically check the status of your simulation to ensure that loss of connectivity or other issues haven't stopped it from processing. (See also I get a "Failed to write the log" message while processing my simulation.)
Tips:
To see the progress of your simulation in a 3D View window, on the progress bar at the bottom of your Rocky screen, click Refresh and then use the Play Simulation button on the Time toolbar. (See also About the Time Toolbar.)
To always see the latest results, select the Auto Refresh check box on the progress bar. Note: Selecting this option will take up more processing power than choosing to Refresh when you want on a manual basis.
See Also:
From the Solver tab, click Resume. Processing continues from the last Timestep that was saved.
Notes:
Whether or not you have enabled the Collect Contacts Data checkbox on the Contacts entity will determine how quickly your simulation resumes processing. See About Contacts for details.
You may only resume processing your stopped simulation if the simulation was last processed in the same major version of Rocky as the version you are using now. (See also I cannot resume processing my older simulation in the latest version of Rocky.)
See Also: