


Begin your laser powder bed fusion (LPBF) simulation by using the LPBF Setup Wizard. Follow the wizard steps, which are organized into logical tasks for additive simulations. As you proceed through a step, click Apply Changes, which automatically adds objects to the project tree in the Mechanical interface and enters values for object properties. During solution, the settings in the project tree are executed, so it is important to understand that the wizard serves to simplify and focus your workflow for the purpose of setting up the project tree. Unless you are doing some advanced customization, the simulation is ready to solve when you have completed the last step in the wizard. Click Finish or Exit to leave the wizard.
Opening the Wizard
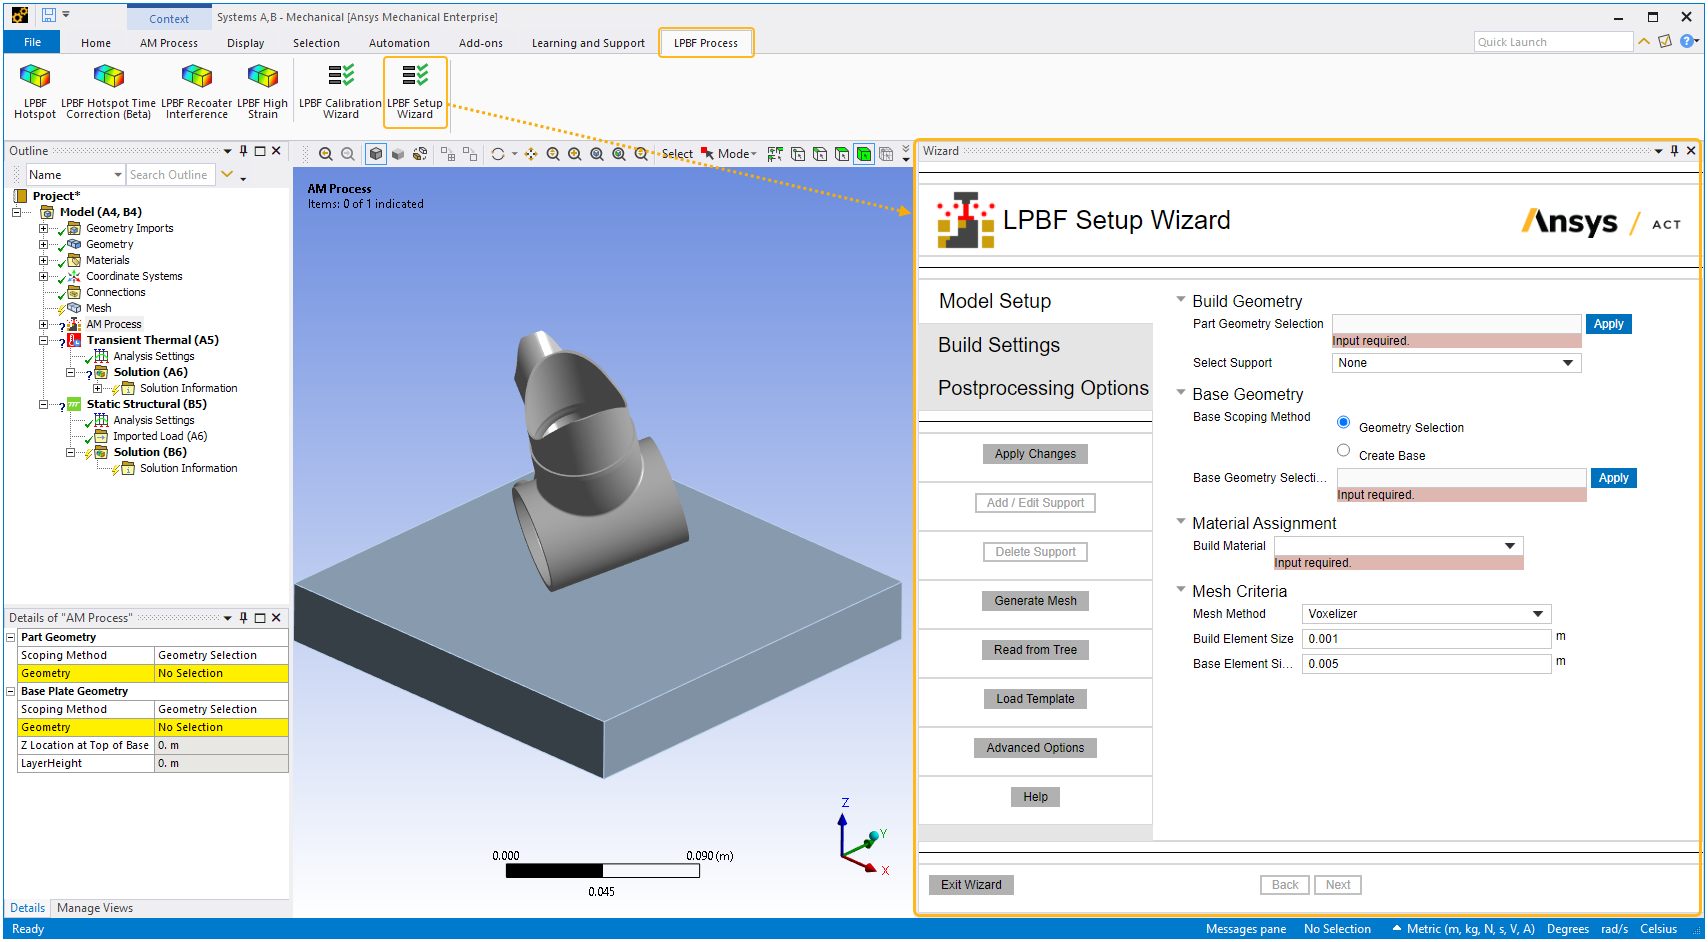
First make sure the LPBF Process Add-on is loaded.
To start the wizard, select the LPBF Process tab and then select the LPBF Setup Wizard button.
Overview of the Wizard Steps
The LPBF Setup Wizard guides you in a step-by-step manner through the following steps:
Identify geometries of the part(s), supports, and base plate. Use Advanced Options for the simulation of powder or non-build items (such as clamps, bolts, etc.), or if you want to take advantage of symmetry.
Select your material. Use Advanced Options if the base plate is a different material than the build items.
Set mesh criteria, such as type and sizing.
Build Settings:
This step is slightly different depending on whether you have an Inherent Strain simulation or a Thermal-Structural simulation.
Simulation assumptions are set by default based on your chosen AM LPBF system. For Inherent Strain simulations, choose among the options for strain definition.
Enter calibration scaling factor(s) as determined from calibration experiments. Use default calibration factors if your goal is simply to examine trends, that is, the effects of variable changes on stress or distortion relative to each other.
Enter machine settings where applicable, which are process parameters that directly influence how the process deposits material. These can include Deposition Thickness, Hatch Spacing, Scan Speed, and a number of other factors.
Enter build and cooldown conditions, which are settings pertaining to the environment around the part during the deposition process and during cooldown. These include Preheat Temperature and gas and powder boundary conditions.
For Thermal-Structural simulations, enter boundary conditions applied on the specified surface of the base, usually the underside surface, during the build and during cooldown. The wizard automatically selects the underside surface of the base by default.
Select the post-build processing steps you want to simulate, such as base unbolting, heat treatment, and base and/or support removal.
Select LPBF result items to be calculated during solution, such as Hotspot, Recoater Interference, and High Strain. Specify criteria for warning and critical thresholds for these items, or add multiple versions with different criteria for comparison.
Recommended Workflow and Best Practices
Know the relationship between the wizard and the project tree objects
As you progress through the wizard and take actions, such as Apply changes, Generate Mesh, etc., the options you specified in the wizard are implemented as objects and options in the project tree. Mesh objects, boundary condition objects and others have been added or changed automatically by the wizard. Review the Details of related objects to see the wizard options you specified. Notice the named selections for the build body, the base body, support bodies, contact connections, and constraint nodes. For convenience, the help for each wizard option lists the affected tree objects.
Use the wizard first to set up your simulation before using more advanced customization
The wizard is capable of reading standard objects relevant to the AM Process from the project tree. These include assigned geometry types, mesh settings, build settings, boundary conditions and heat treatment settings, if applicable. Upon opening, the wizard will pre-populate it's properties based on the given project if the objects have default Ansys names (not custom names). If the project itself was set up using the wizard, the wizard will read all required properties so you can simply jump in and navigate to any step and change any properties as desired.
Important: The wizard is not designed to accommodate advanced custom settings, such as complex mesh or contact settings, that you may set directly in the project tree. As a best practice, we recommend that you use the wizard first to set up the majority of your simulation, Finish or Exit from the wizard, and then tweak the advanced settings in the tree as needed. Advanced custom settings refers to detailed options that are not present in the wizard.
Use Read from Tree to update the wizard for standard setup options
If you change some standard project details (see Important note above) directly in the project tree while a wizard session is open, you can use the Read From Tree button to update the wizard. Think of the Apply Changes and Read from Tree actions as opposite functions. Apply Changes updates the project tree with inputs from the wizard. Read from Tree updates the wizard with inputs from the project tree. The LPBF result items (Hotspot, Recoater Interference, High Strain) in the Postprocessing Options step are an exception to this rule. You can add multiple versions of the same result item in order to set different criteria so the wizard does not track these items.
Know the difference between the Exit and the Finish buttons
Exit leaves the wizard without applying actions. Finish applies changes to all steps sequentially and then exits the wizard. If you've been using the Apply Changes button for each step along the way, we recommend using the Exit button rather than the Finish button because the Finish button will reapply all changes from each step, including meshing, which may take some time. If you prefer to have the wizard execute all steps simultaneously at the end of the wizard, use the Finish button instead of using Apply Changes along the way.
Close the wizard before solving
The wizard does not include a solve step. It is best to complete the wizard using either Exit or Finish and then close the wizard window before solving. If you initiate a solve while the wizard is open and then later click Finish to complete the wizard, the existing result data is cleared and the wizard executes all steps simultaneously again.
Assumptions and Known Limitations for Using the Wizard
The LPBF Setup Wizard, introduced as the default wizard at Release 2023 R2, is not supported on a Linux platform. Linux users will use the Legacy LPBF Setup Wizard instead, which opens by default for Linux users.
Simulation of advanced items such as bolt pretension and other types of conditions are not available in the wizard and need to be defined in the AM Process Sequence worksheet. See Define AM Process Steps.
If multiple mesh sizing objects are created for the build or base prior to opening the wizard, the wizard will use the first mesh sizing object in the tree to define the corresponding Build Element Size or Base Element Size.
Supports can be deleted either all at once or one at a time when using the Delete Support button in the wizard. Deletion of more than one but fewer that all supports can be done outside the wizard. Note that even suppressed supports appear in the Select Support dropdown box and can be edited or deleted although you cannot suppress or unsuppress supports from within the wizard.
When you click Finish, the wizard may overwrite advanced custom settings, such as complex mesh or contact settings, that you may have set in the project tree while the wizard was open. Conversely, the Read from Tree action does not read advanced custom settings. As a best practice, we recommend that you use the wizard first to set up the majority of your simulation, Finish or Exit from the wizard, and then tweak the advanced settings in the tree as needed. Advanced custom settings refers to detailed options that are not represented in the wizard.
The LPBF Setup Wizard is not yet fully supported when using the standalone Mechanical application. For example, if you open the Mechanical application independent of Workbench and use the LPBF Setup Wizard to configure a heat treatment with creep properties, the creep properties will be incorrectly configured. Using creep properties from the wizard necessitates the use of Engineering Data in Workbench.
When you use Creep Properties for heat treatment, the wizard automatically unsuppresses the material model in Workbench's Engineering Data, requiring the wizard to refresh the whole Workbench project. During this process, any other upstream updates to the project, including changes to geometry, will be updated.
Also, when switching from Relaxation Temperature to Creep Properties or vice versa under Properties, you may get this message if Engineering Data was the active tab in Workbench: "Unexpected error while refreshing pane Toolbox: Object not set to an instance of an object." It is safe to close the message and ignore the error. This happens only the first time you switch the heat treatment method. On subsequent changes in the same project, the error message should not pop up.
If you initiate a solve while the wizard is open and then later click Finish to complete the wizard, the existing result data is cleared and the wizard executes all steps simultaneously again.
Clicking X in the upper, right corner to close the wizard window without first clicking either Exit or Finish leaves AM-related highlights (such as the red color for the part and blue color for the base) on the items in the graphics window. Opening and closing the wizard may not reset this.
Limitations related to Generated Supports:
(Mechanical limitation): Generated Supports are available for multibody scenarios only when the bodies have shared topology between them. This means you can use Generated Supports for a multibody part with shared coincident surfaces but not for a multibody part with unshared coincident surfaces, nor for multiple parts separated by space on the build plate.
(Mechanical limitation): Generated Supports are not available when the part is meshed with the Layered Tetrahedral mesh method.
(LPBF Setup Wizard limitation): When you click the "Show Mesh" button and then proceed to select element faces for adding multiple instances of Generated Supports, a problem occurs. This interferes with the highlighting functionality. Hence it is recommended not to use the "Show Mesh" button while using the wizard to add additional Generated Supports via the Element Face Selection option.
(LPBF Setup Wizard limitation): Clicking Finish without having generated a mesh first does not generate the Generated Supports object. Generated Supports depend on an existing mesh of the part so a two-step process is required. The Finish button executes the steps simultaneously. As a best practice, click Apply Changes to establish mesh criteria and then Generate Mesh to establish the part mesh before using Generated Supports.
Closing the Wizard
Upon completing the last step, click Exit or Finish to complete the wizard.
Click the X in the upper, right corner to close the wizard window.
Limitation: Clicking X in the upper, right corner to close the wizard window without first clicking either Exit or Finish leaves AM-related highlights (such as the red color for the part and blue color for the base) on the items in the graphics window. Opening and closing the wizard may not reset this.
If no changes are necessary you are ready to proceed to the solution step. Remember that the wizard is only a tool to help set up the simulation. You should review your setup in the project tree before proceeding to solve.