Setting Up A Machine Model
To set up an RMxprt model, follow this general procedure:
-
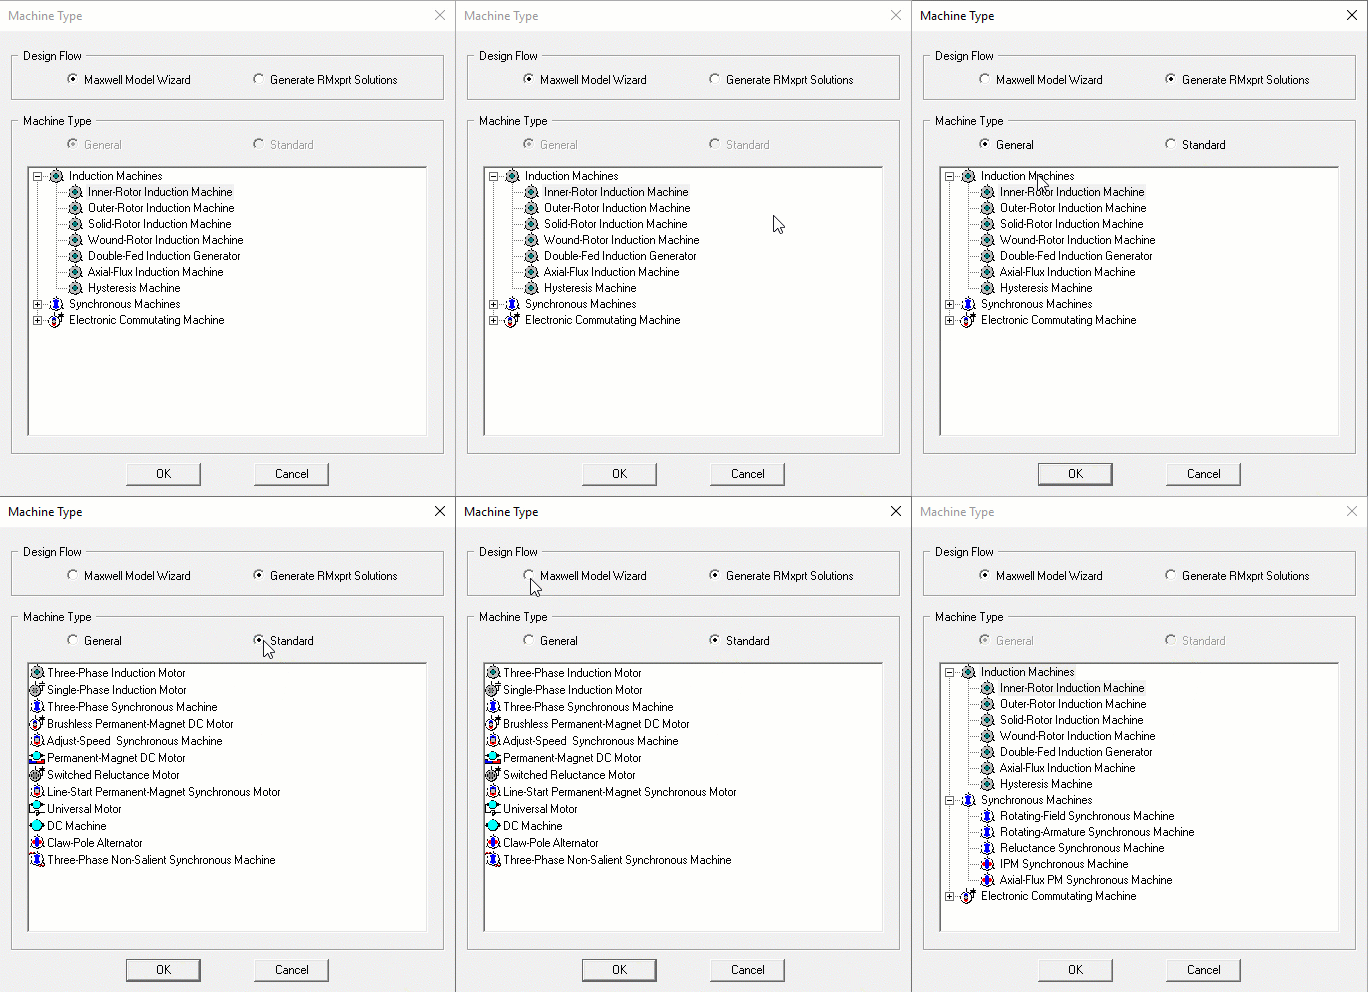
Insert an RMxprt design. (Click Project > Insert RMxprt Design, and specify the machine type from the Machine Type window.) For the Design Flow, choose either Maxwell Model Wizard and select a Machine Type; or Generate RMxprt Solutions.
Generate RMxprt Solutions enables the General and Standard radio buttons. General allows you to pick the desired Generic Rotating Machine (GRM) machine type from the expandable list. Standard changes the listing to the basic RMxprt machine templates.

- Use the Tools menu to specify general options (such as post-processing and auto-save settings), solver options (such as the default process priority), and specific RMxprt options. Also specify the Machine options (such as the units and the wire setting such as the wire shape and gauge).
- Double-click the Machine items in the Project Manager tree, to specify the settings for the various parts of the selected machine parameters.
- Under Definitions in the Project Manager tree, assign any Materials to the machine parts, setting values such as:
- Permanent magnet definition, including the coercivity, energy density, and relative recovery permeability.
- B-H curve parameters.
- Use the Setup functions (either on the RMxprt menu or on the Analysis or Optimetrics submenus via the project tree) to specify variable, parametric, and optimization settings.
- Use the Validate function to validate the design.
- Use the Analyze functions to generate a solution, run a parametric analysis, or run an optimization.
- Use the Results post-processing functions to display the lamination and plot the solutions.
