


The Solution Context tab includes options for writing the Mechanical APDL application input files and for reading the Mechanical APDL application results files.
Go to a section topic:
Writing an Input File
To write an input file:
Highlight the Solution object folder in the Outline.
From the Tools group on the Solution Context tab, select the option.
In the Save As dialog box, specify a location and name for the input file.
Reading Result Files
To read the Mechanical APDL application result files:
Highlight the Solution object in the Outline, open the drop-down menu of the Read Result Files option, and select one of the following options:
: The application copies all files contained in this folder to the Solver Files Directory.
: Using this option, you specify the path to the directory that includes your result files. It does not copy any files. Note that when you are reading files on a server, you could see a performance delay.
A dialog displays that enables you to open a file. Browse to the folder that contains the desired result file, select the file, and then select the button.
Note:When reading result files from a directory other than the solver directory, the current solution is cleared and the result files are deleted.
When reading result files from a directory other than solver directory when using the option, the application changes the job name to "file" when copying the files to the solver directory. For example, "jobname.rst" would be renamed "file.rst."
The target folder should only contain files pertinent to the solution of the selected result file.
The following dialog displays. Select a desired unit system and then click OK.
Note: By default, the application uses the unit system stored in the result file (under the Mechanical APDL /UNITS command). The Select Results in Unit System dialog box displays to have you verify the unit system. If you select a unit system that is different than the one already specified result file, the application displays a warning message.
If the application does not have 1) a specified unit system (/UNITS,0), or 2) the solver input files include the command entries /UNITS,SI or /UNITS,USER commands or 3) the file does not include the /UNITS command, then the application alerts you that you have updated the unit system based on your select on the Select Results in Unit System dialog box. Possible system messages include:
The source result file does not have the unit system information. If the result file was generated in MAPDL, consider using the /UNITS command to annotate the result file with the unit system information.
Since the result file does not indicate the unit system, the following file unit system is assumed…
Once solution files are either copied to the working directory or properly referenced, the application automatically evaluates the solution.
Be sure to review the following:
Warning: When a Mechanical system’s solution is read using the option, and you want to perform a restart analysis on the system, it is recommended to restart from the initial point. Otherwise, the restart analysis can give incorrect results due to a mismatch of the data stored in the result files compared to the solver representation of the current system. This can happen even if you duplicate the system used to create the result files. For example, if your system includes bolt pretensions, the application assigns a unique node id or an identifier set to the element id created for the bolt to each bolt pretension object. This data is used to generate input files. Although the duplicated bolt pretensions may have equivalent properties to that of the bolt pretensions of the system used to generate the result files, internally they may be assigned different node ids or element id identifiers. As a result, the bolt pretension ids don't match with the bolt pretension ids used to generate the result files and can give incorrect results if you restart analysis from a point other than initial point.
To restart from the initial point, set the Current Restart Point property (Analysis Settings > Restart Analysis) to Initial. Note that you can also select the context (right-click) menu option to start your solution from the initial point.
Caution:
Errors occur if the application result files are from a version of Mechanical that is older than the version currently running.
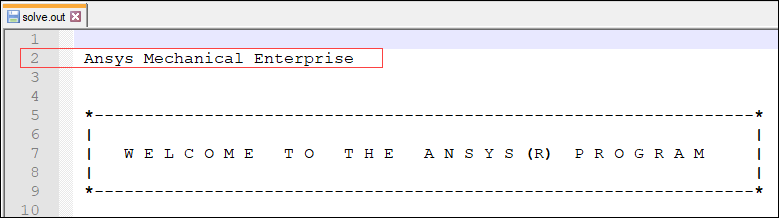
During the process of reading the results files, the application reads the file, solve.out, for the product license. This license name needs to be included on Line 2 of this file. If not, the application could stop processing. Scenarios exist where the application could insert text into the first few lines of this file, cause the license to not be included in Line 2. If you experience processing anomalies, check this file and make sure it is formatted properly.
Limitation: The Read Result File option is not available if a Convergence object is specified in the analysis.
Mechanical APDL Analysis using a Mechanical Mesh
You can use an Mechanical input file in the Mechanical APDL application to take advantage of the meshing capabilities of Mechanical. Generate the mesh in Mechanical and write, using the Write Input File option, the input file to a desired location. Use this input file to complete your analysis in the Mechanical APDL application. The meshed model will contain generic element encoding - only shape and connectivity information. Such elements can then be replaced by others that are appropriate to your desired analysis.
Note: Any named selection group from the Mechanical application is transferred to the Mechanical APDL application as a component according to specific naming rules and conventions.
Using Writing and Reading Files Together
The writing and reading options are useful when used together. You can use the write option, then solve at your leisure on the machine of your choice. When the solution is done, you can use the read option to browse to the directory that contains the Mechanical APDL application output files (for example, result file, file.err, solve.out, file.gst, file.nlh). Workbench will then copy all files into your solution directory and proceed to use those files for postprocessing.
The reading option only requires that the target directory include the result (.rst) file. You can also use uncombined result files from a distributed-memory parallel processing solution instead of a single combined result file. This requires that your Jobname is named “file” and you must also select the file file0.rst (or file0.rth) from the directory. You may find it useful to read uncombined result files from a solution that was stopped before the combination took place or if you requested that the result file not be combined (DMPOPTION,RST,NO).
Note: You must ensure that the mesh in the result file matches the mesh in Workbench. This includes the Workbench generated mesh from the geometry as well as any nodes or elements defined in the input file (such as for contact or remote boundary conditions). Failure to do so could result in incorrect results and unexpected behavior.
The reading Mechanical APDL application file option is available for all analysis types except rigid dynamic analyses and shape analyses.
The writing Mechanical APDL application file option is available for all analysis types except rigid dynamic analyses.
System units must be specified in the Mechanical APDL application result files being read for Result Tracker graphs to display properly. Result Tracker graphs will display in the Mechanical APDL application result file units if the units specified when reading the files are inconsistent with those in the files.