


User defined results enable you to define expressions using mathematical operators. For example, you can enter the mathematical combination
UX+UY in the Expression field and then retrieve a new result.
Go to a section topic:
Insert a User Defined Result
Use one of the following methods to insert the object:
Select the option on the Solution Context tab.
Right-click the Solution object and the select the > option.
After the solution is complete and with the Solution object selected, select the Worksheet option from the Home tab to display the Solution Quantities and Result Summary Worksheet. Right-click on a desired result (row) in the worksheet and select (see figure below).

The application automatically names the object and populates an expression when you use the worksheet to create a user defined result, while the other two insertion methods above require you to manually define the result. Until you become familiar with this feature, it is recommended that you insert user defined results using the worksheet to ensure results are valid and applicable for the particular analysis type and solver used in your simulation.
Note: NMISCxxx and SMISCxxx results are not displayed in the worksheet and can only be accessed by typing in the keyword directly. See User Defined Results for the Mechanical APDL Solver for details.
Specify Properties
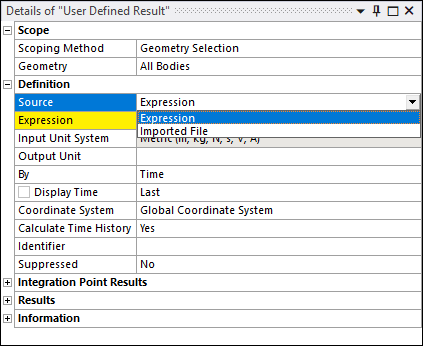
Once you insert a User Defined Result object, specify the properties.
| Manually Define the Result | Automatic Result Generation via Worksheet | ||||
|---|---|---|---|---|---|
Note: See the User Defined Result Expressions and Unit Description sections for more information. |
When you create the result using the Worksheet, the application automatically names the object and populates the Expression property. Except for an Identifier property, all remaining details are also automatically generated based on the information provided by the result type, such as Input Unit System (Metric) and Output Unit (Displacement) as shown in the example below. |
Limitations for Imported Files
Note the following when specifying an imported file:
The data must be based on the same mesh as the current mesh in Mechanical. This feature is currently only supported for solid meshes.
The file must be specified using a supported format (see below).
The result displays basic contours only and does not support animation, time history, deformations, etc.
You cannot change the scoping of imported result data. The application displays result contours based on the scoping included in the imported file only.
File Format Requirements
It is your responsibility to make sure that your result file conforms to the following formats. The format for the following entries is just as if the results were exported from Mechanical or LSPrepPost. As such, syntax rules apply. Any change, especially within a header or a column name, may invalidate the entry.
- Format 1: Exported from Mechanical
<No header>
| Node/Elem Number | Result Value |
1 42.5
2 65.8
…
See the Exporting Results section.
- Format 2: Exported from AM Solve
AM Result File
ANSYS 20## R#         BUILD ##.#    UP20210811    WINDOWS x64
MM/DD/YYYY      00:00:00
Title: Example--Static Structural (A5)
| Node/Element Number | X Coordinate | Y Coordinate | Z Coordinate | Result Value |
1 42.5
2 65.8
…
- Format 3: Exported from LS-DYNA PrepPost
*KEYWORD
$SOLID_ELEMENT_RESULTS
1 42.5
2 65.8
…
…
/END