


Rigid body meshing simplifies the representation of a model by reducing it to the contact regions and the centroid of the model. That is, when a part is defined as a rigid body, the mesher knows to mesh only the contact regions, and to create a single mass element at the centroid of the model. (The centroid is represented by an Inertial Coordinate System. Refer to the discussion of Rigid Bodies in the Mechanical help for more information.)
Rigid body meshing can be used for both 2D and 3D contact. For 2D models, only the edges of the rigid surface in contact are meshed because the surface mesh is not needed for the analysis. Similarly, for 3D models, only the faces of the rigid body in contact are meshed because the volume mesh is not needed. The elements used to mesh the contact surfaces can be quadrilateral or triangular in shape, with or without midside nodes.
The following surface mesh methods can be applied to rigid bodies:
Rigid body contact meshing respects mapped face controls and sizing controls. If 2D inflation is applied, inflation layers are generated for the surfaces in contact.
If a method control is scoped to a rigid body, the Method control is set to by default, but you can change the value to . When Method is set to , an additional option called the Free Face Mesh Type control is available for most analyses and can be set to either (default) or.
For Transient Structural, Rigid Dynamics, and Explicit Dynamics analyses, certain default behaviors related to rigid body meshing differ depending on analysis type and solver. Additionally, the Free Face Mesh Type option is replaced by the Rigid Face Mesh Type option to determine the default element shape for rigid body face meshing. The table below provides information you should be aware of when selecting one of these analysis types from the Toolbox and adding it to a Workbench project.
Table 3: Rigid Body Meshing: Default Behaviors for Rigid Dynamics, Transient Structural, and Explicit Dynamics Analyses
| Standard Analysis Type | Solver | Element Order | Straight Sided Elements | Rigid Body Behavior | Rigid Face Mesh Type |
|---|---|---|---|---|---|
| Rigid Dynamics | Rigid Body Dynamics | - | Not applicable | Full Mesh | Quad/Tri |
| Transient Structural | Mechanical APDL | Program Controlled | No | Dimensionally Reduced | Quad/Tri |
| Explicit Dynamics | Autodyn | Linear | Not applicable | Full Mesh | Quad/Tri |
| LS-DYNA | LS-DYNA | Linear | Not applicable | Full Mesh | Quad/Tri |
For information about generating a full mesh on rigid bodies instead of a surface mesh, refer to the description of the Rigid Body Behavior control.
Using 2D Rigid Body Contact Meshing
This section describes the basic steps for using 2D rigid body contact meshing.
To define a 2D rigid body for contact meshing:
Open the model in the Mechanical application.
In the Tree, expand the Geometry object so that the body objects are visible.
Click the body that you want to define as the rigid body.
In the Details> Definition view for the body, change the value of the Stiffness Behavior control to .
Note: When you change the Stiffness Behavior to , an Inertial Coordinate System object is added to the Tree automatically. This Inertial Coordinate System represents the centroid of the body.
If desired, change the value of the Element Order control.
Generate the mesh by right-clicking on the Mesh object in the Tree and selecting .
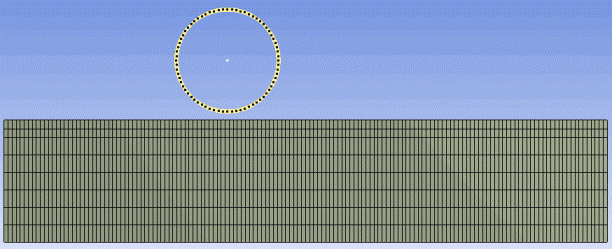
Note: The mesh for the 2D rigid body is created only in the contact region (edges in contact). See the figure below for an example.
In the figure below, which shows a model of a slab and a cylinder, the cylinder has been defined as a rigid body. When the mesh is generated, the cylinder is meshed with line elements as shown.
Using 3D Rigid Body Contact Meshing
This section describes the basic steps for using 3D rigid body contact meshing.
To define a 3D rigid body for contact meshing:
Open the model in the Mechanical application.
In the Tree, expand the Geometry object so that the body objects are visible.
Click the body that you want to define as a rigid body.
In the Details> Definition view for the body, change the value of the Stiffness Behavior control to .
Note: When you change the Stiffness Behavior to , an Inertial Coordinate System object is added to the Tree automatically. This Inertial Coordinate System represents the centroid of the body.
If you wish to control the mesh method, insert a mesh method by right-clicking on the Mesh object in the Tree and selecting .
Note: The Automatic method appears in the Details View.
In the Details View, scope the mesh method to the rigid body.
Note: By default, the Method control is set to for rigid bodies, but you can change the value to . When Method is set to , an additional option called the Free Face Mesh Type control is available and can be set to either (default) or.
If desired, change the value of the Element Order control.
Generate the mesh by right-clicking on the Mesh object in the Tree and selecting .
Note: The mesh for the 3D rigid body is created only in the contact region (faces in contact).