


In Ansys Workbench, you can import FENSAP-ICE mesh files into a FENSAP-ICE based system in one of the following ways:
from the Workbench Project Schematic.
from within the active FENSAP-ICE session.
The information about importing FENSAP-ICE files in Workbench is described in detail in the following sections:
Importing Files from Workbench Project Schematic
Importing Files Directly in FENSAP-ICE
The details on how you can import various file types into a FENSAP-ICE based system from Workbench Project Schematic are provided in the following sections:
Importing Mesh and Config Files
You can import FENSAP-ICE mesh (*.grid) into FENSAP-ICE based systems using the Define from file... command in Setup Flow cell context menu as follows:
Right-click the Setup Flow cell.
From the cell’s context menu, point to Define from file....
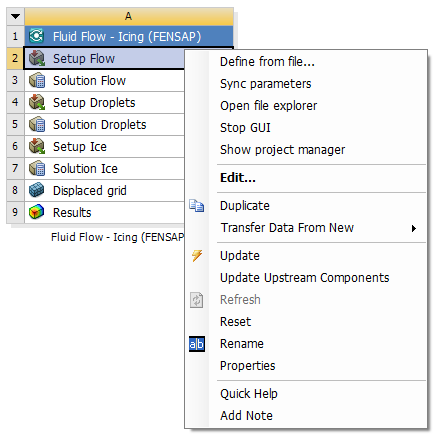
Browse to the location of a specific mesh file and select the file.
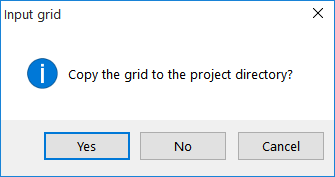
Note: This option will allow you to store the file inside the project. A message dialogue box will appear, giving you a choice to save the file locally or to preserve the file path. Select Yes to save the grid in the project directory, or No to use the file path of its current location.
OR
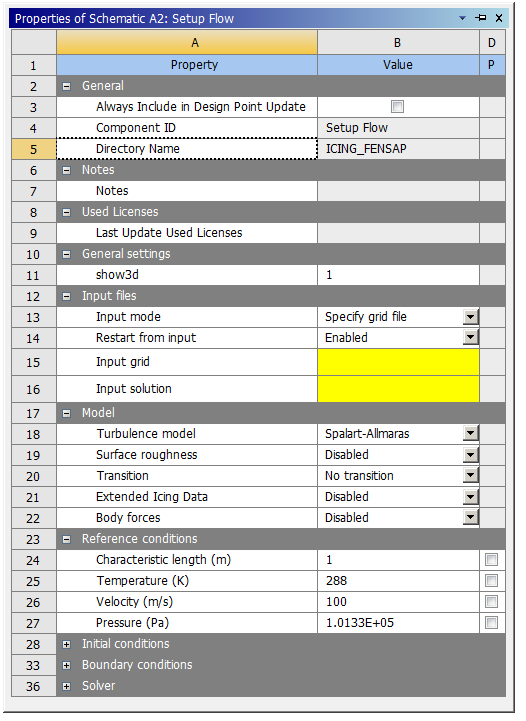
You can import the FENSAP-ICE mesh, using the Properties pane of the Setup Flow cell as follows:
Click the Setup Flow cell.
From the Properties pane, under Input grid enter the file name (including path) or navigate to the file location and select the file.
Important: The Setup Flow of the Properties pane gives the option to input the commonly used settings for most airflow problems. For more detailed setup of the flow problem, you should follow up this step by launching FENSAP.
Tip: To enable the Properties pane, select Properties under the View options of the Menu bar.
Expected Outcome:
Mesh file import: Once the import operation is complete, the Setup Flow cell status becomes Update Required (
 ). You can then launch FENSAP to commence the setup
procedure or set up the problem from the Properties
pane.
). You can then launch FENSAP to commence the setup
procedure or set up the problem from the Properties
pane.Important: In a FENSAP-ICE analysis system, the mesh file must only be defined from the Setup Flow cell, and not, for example, from the Setup Droplets or Setup Ice cells.
You can import FENSAP-ICE solution files as start-up files as described below.
If you want to use the solution (FENSAP) file as a restart file, you can import the following files:
soln: if imported, results match the mesh used at the setup stage.
In the Properties pane for the Setup Flow cell, select Enabled from the Restart from input drop-down list.
In the Input solution cell that appears below Input grid, enter the filename (including path) or navigate to the file location and select the file.
Note: For more information on droplet (DROP3D) and swimsol + ice.grid (ICE3D) file restarts (initialization) see Importing Files Directly in FENSAP-ICE.
Expected Outcome:
Importing an initial data file does not affect the state of the system.
When mesh and "initial" data files
are imported into FENSAP-ICE, Ansys Workbench treats them as start-up files and not
result files. Therefore, the state of the
Solution cell becomes Update
Required ( ) and not Up-to-Date ( ).
).
Alternatively, you can also import pre-existing mesh and solution files from within FENSAP-ICE.
You can import the FENSAP-ICE mesh (*.grid), by double-clicking the Setup Flow cell as follows:
Double-click the Setup Flow cell to launch FENSAP.
From the Model tab, under Input grid file enter the file name (including path) or navigate to the file location and select the file.
For further details, see Grid File Assignment.
You can also import FENSAP-ICE solutions (soln, droplet) as restarts, by double-clicking the Setup Droplets cell as follows:
Double-click the Setup Droplets cell to launch DROP3D.
From the Conditions tab, select Solution restart from the Droplets initial solution drop-down list.
Under Droplets enter the file name (including path) or navigate to the file location and select the file.
For further details, see Restarting a Calculation and Restarting DROP3D.
You can also import ICE3D solution data set (swimsol, ice.grid) as restarts, by double-clicking the Setup Ice cell as follows:
Double-click the Setup Ice cell to launch ICE3D.
From the Model tab, check the box for Restart file and enter the filename (including path) or navigate to the file location and select the file.
Under Ice grid restart, enter the filename (including path) or navigate to the file location and select the file.
For further details, see Restart Conditions.