This procedure shows you how to edit a mapper to adjust the gain, the pitch or the
frequency of a sound function according to a specific input driving parameter.
The sound's components that you can edit through mappers
depend on the type of sound:
- Gain mappers are available for SAF, AVAS, ADAS and HMI sound functions.
- Pitch mappers are available for SAF and AVAS sound functions.
- Frequency mappers are available for the SAF sound function.
-
To access the mapper that you want to edit, refer to the procedure Configuring a SAF Sound Function, Configuring an AVAS Sound Function or Configuring an ADAS or HMI Sound Function.
-
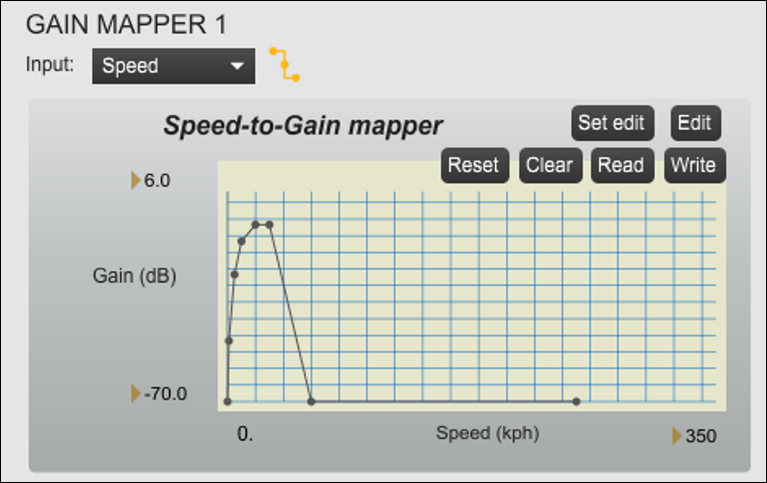
Select the input driving parameter from the drop-down list.
Note: For speed-to-gain mappers for ADAS and HMI sound functions, as well as for the AVAS
speed-to-overall gain mapper, you cannot change the input driving parameter.
-
Click the Edit button on the
Mapper.
A text editor window is opened.
-
In the text editor window, edit the values as needed. The first column is the X axis
and the second column is the Y axis.
Note: For a
Pitch Mapper, although the
displayed lower limit is 0, a hard-coded pitch limit of 0.01 is used for technical
reasons, regardless of mapper data. Additionally, an upper limit of 3 is imposed. It is
worth noting that increasing the pitch X times is mathematically equivalent to
downsampling the signal by the same amount, but without applying the necessary
anti-aliasing (low-pass) filter. As a consequence, you should ensure the high frequency
content (that is, above the sampling frequency divided by the maximum pitch value
considered) in the original
.wav sample is reduced such that no
aliased frequency is created in the output sound when using such high pitch values. This
can be achieved by low-pass filtering the original sample using the
Ansys Sound: Analysis and Specification application.
-
Close the text editor window.
-
Click the Set edit button.
Tip:
You can also edit a mapper directly from the graph:
- click, then drag and drop an existing point to move it,
- click an empty part of the graph to add a point,
- press Shift + click a point to delete it,
- press ALT + click a line between two points, then move the line to add
curvature.
-
If you want to save the mapper, click the Write button.
The mapper is edited. If you want to save your changes in a
preset, refer to Saving a Preset.