


Besides the graphical editor for safety goals/requirements medini analyze also includes table and form based editors for a more detailed specification of these elements.
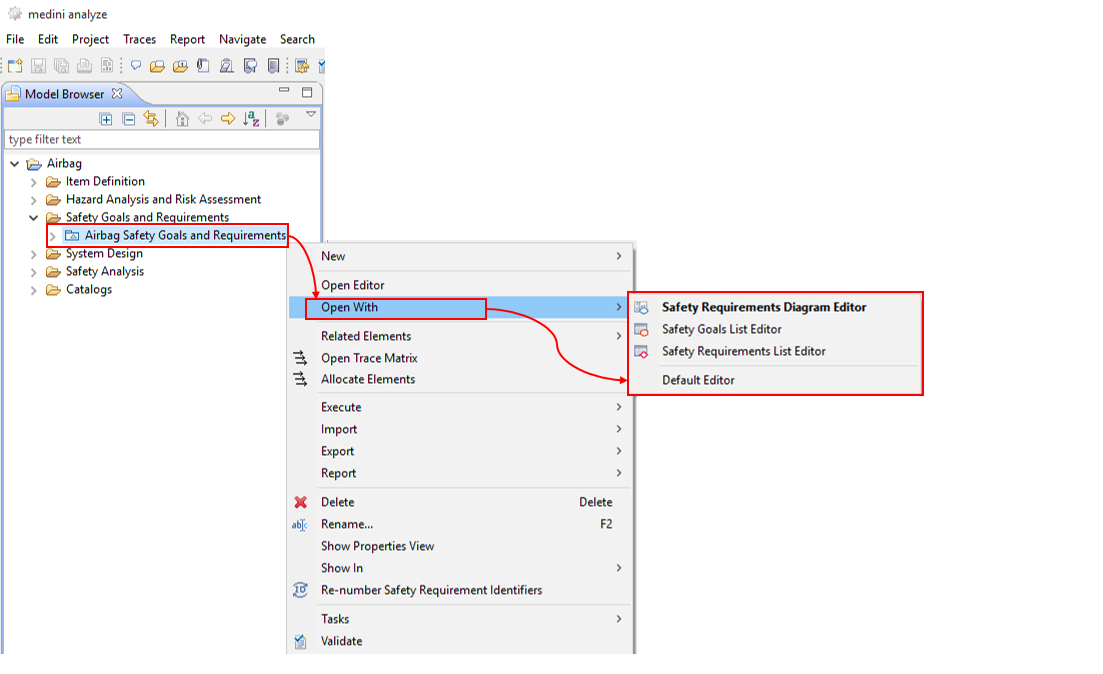
The table editors for safety goals and safety requirements can be invoked via the context menu of the safety requirement model or the respective element in the Model Browser using the entries "Open With > Safety Requirements List Editor" resp. "Open With > Safety Goals List Editor" (the latter only if safety domain supports safety goals).
Please note, the visibility of columns in the table editors can be modified according to your needs. Moreover, additional properties for goals and requirements and thus additional columns in the table editors can also be defined by users. For more details see Project Settings and General aspects for table editors.
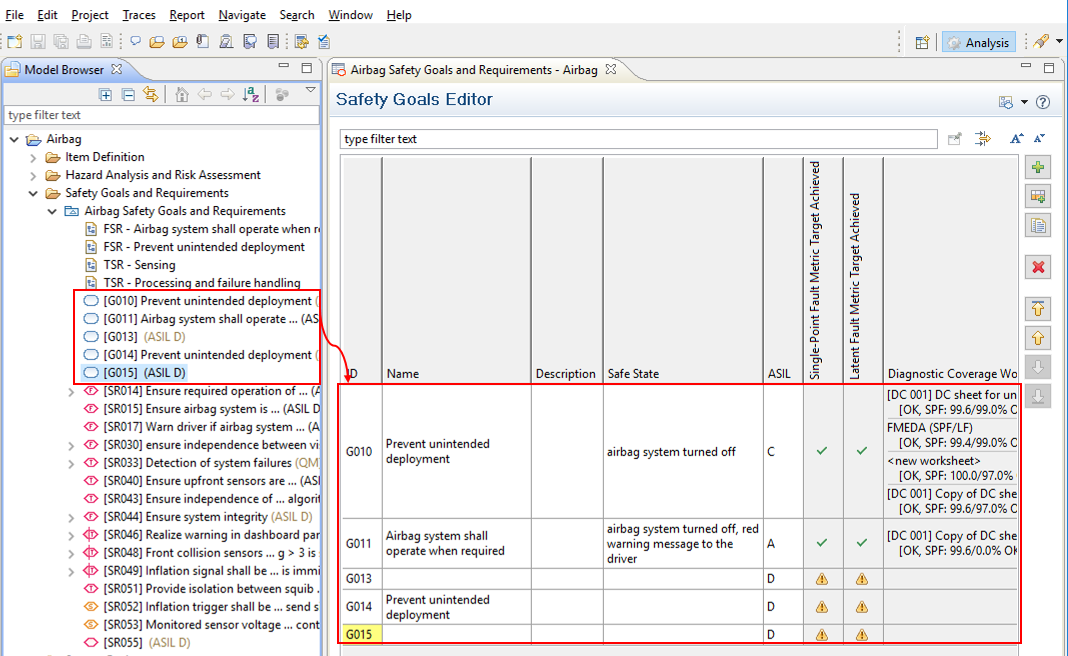
The safety goal table editor is shown in the figure below and only available in certain safety domains (e.g. ISO 26262). Each safety goal is shown as a separate row in the editor. By default the following information can be modified for a safety goal:
ID: Unique identifier for the safety goal
Name: User specified name of the safety goal
Description: free-text verbal specification of the safety goal
Safe state: an operating mode of a system without an unreasonable level of risk
ASIL level (ISO 26262 only)
The ASIL property has to be selected from a drop down list; all other properties are provided as strings.
Please note, if you change the ASIL of a safety goal which has been created as a result of the hazard and risk analysis, you should revise also the related hazardous event. A mismatch between the ASILs will be detected by the validation (see Default constraints).
Using the arrow buttons on the right side of the table the order of the safety goals can be changed according to your need (this order will also be applied when exporting the safety goals or generating a safety goal report). In addition an automatic ordering can be obtained by clicking on the header of any column: the table will automatically be sorted according to the alphabetic order of the content of that column.
The table editor also allows creating new safety goals (using the "Add" button). These safety goals will not be placed automatically on a diagram but only shown in the Model Browser - please use drag & drop to a diagram to visualize them.
Using the "Remove" button the selected safety goal can be deleted - this corresponds to the "Delete from model" command on the diagram resp. to the "Delete" command in the context menu of the safety goal in the Model Browser.
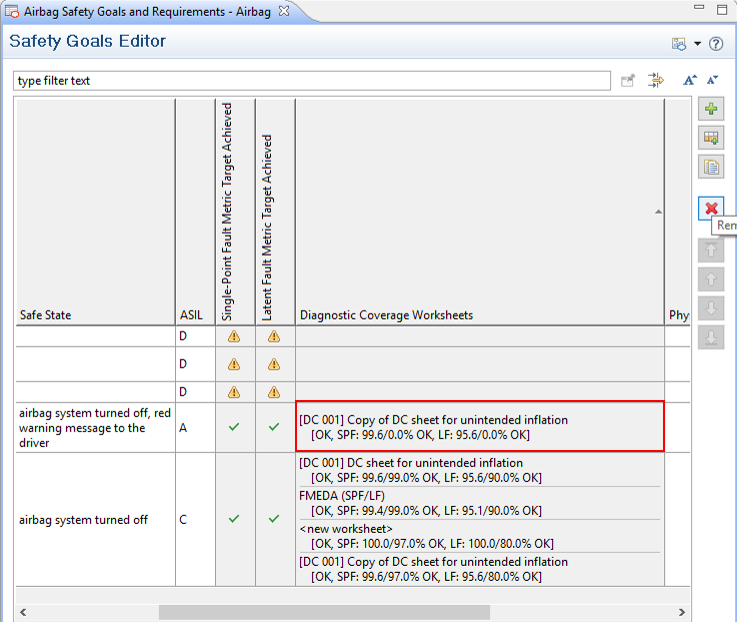
If there are diagnostic coverage metrics according to ISO 26262 part 5 applied for a safety goal, the result of the metric as well as the diagnostic coverage (DC-) sheets which contains the analysis will be shown in the following read only columns:
Single Point Fault Metric Target Achieved
This summarizes, whether the target values for the SPF metric as set by the different associated DC worksheets are met. The value is computed as follows: ok if all worksheets fulfill the metric according to the values set at the worksheet or if there is no worksheet at all and goal ASIL is not B,C or D. not ok if there is any worksheet not fulfilling the metric or if there is no worksheet and goal ASIL is B,C or D.
Latent Fault Metric Target Achieved
This summarizes, whether the target values for the LF metric as set by the different associated DC worksheets are met. The value is calculated the same way as for the SPF.
Diagnostic Coverage Worksheets
This shows the DC-sheet(s) associated to the safety goal from which the actual metric values have been taken. It is possible to navigate to the DC-sheet by right click into the cell and choose "Open DC Worksheet" and select the worksheet of interest. For each associated worksheet, the metric results are shown as a text string. This text string indicates whether both metrics (SPF and LF) are fulfilled and the individual actual and target values for SPF and LF. The diagnostic coverage sheet can be provided as described in FMEDA and Diagnostic Coverage Metrics.
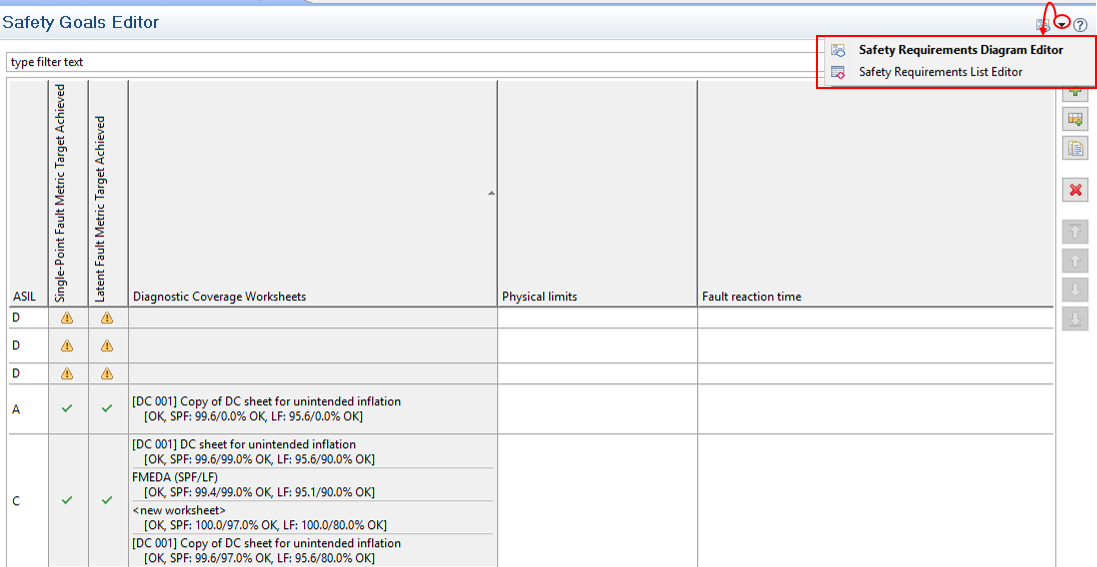
To open other editors (like the diagram editor or the requirements list editor) from the goal list editor, the icon in the top right corner of the safety goal list editor can be used.
The table editor can be customized similar to the other table editors of medini analyze by:
Column hiding or un-hiding
Column re-ordering
Introduction or deletion of custom columns.
All these functions are available in the context menu of the column header in the table. Please refer also to Profiling mechanism about customizing medini analyze by additional properties.
The look & feel of the safety requirements table editor is very similar to the safety goal table editor. Here the following default properties can be edited in the table:
ID
Kind
Name
Description
Status
ASIL (only for ISO 26262)
Furthermore if safety goal(s) are available to which a requirement contributes, those are visualized in the table in a separate column (e.g. for ISO 26262). If profile properties are defined for requirements, they may also be shown. See Profiling mechanism for details on using profiles.
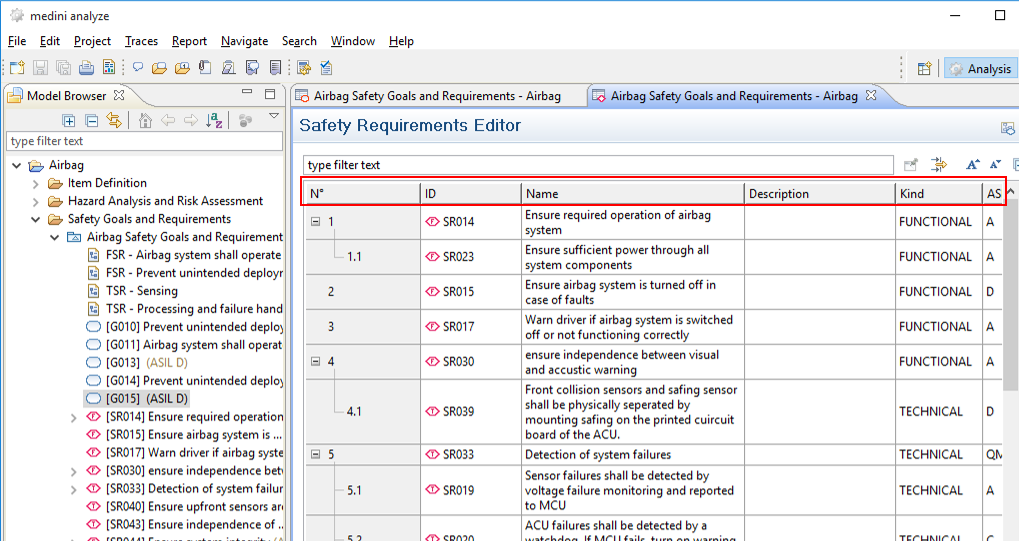
The hierarchy of nested requirements (sub-requirements) and decomposed requirements is indicated by a tree structure in the ID column. Click on the "+" resp "-" signs in the ID column to fold or unfold this hierarchy - the nested/decomposed requirements will be hidden or shown accordingly.
The fields "Kind" and "Status" are predefined and have to be selected from drop-down lists. The following values are available:
Requirements kind
Unspecified (default)
Technical
Hardware
Software
Functional
Non-Functional
Requirements Status
Proposed (default)
Assumed
Agreed
Reviewed
Rejected
Change the values according to the intended classification of a requirement and its status.
Sorting of the content of the table can be obtained in similar ways as for the safety goal table by the arrow-buttons on the right side of the table or by clicking in the header of a column that shall be used as base for the sorting.
Note, Sorting does not override sub-structuring and decomposition, i.e. sub-requirements or decomposed requirements (indicated by the tree structure in the ID column) will sorted only within the context of their parent requirement.
New top-level requirements can be added to the table by clicking on the "Add"-button. A new row will be added at the bottom of the table and you have to fill in the appropriate values for the single fields. In addition "Add after" also creates a new requirement.
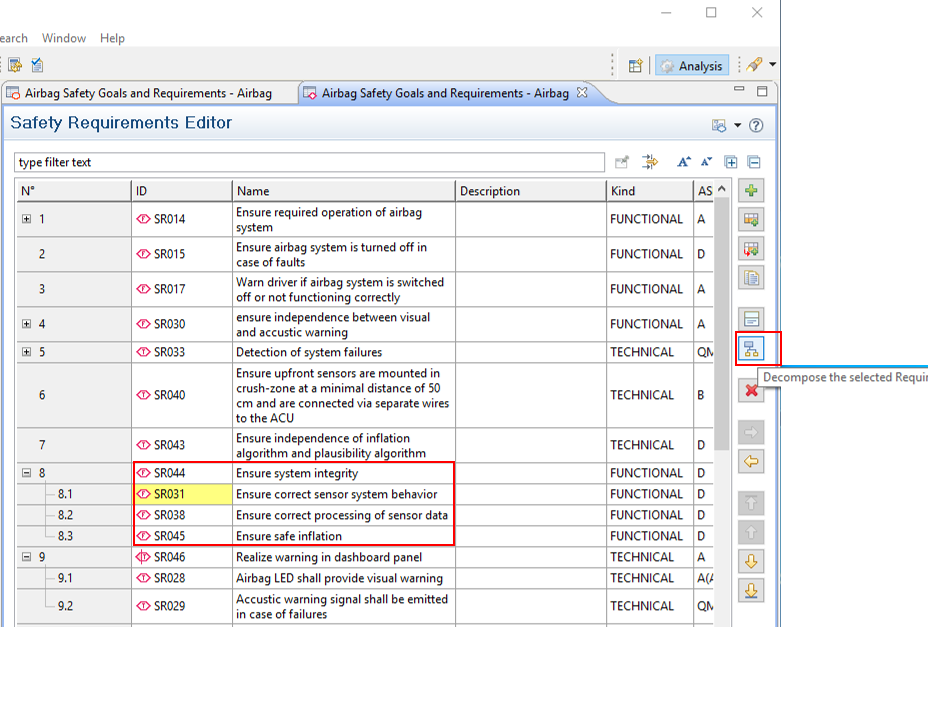
New sub-requirements for a requirement can also be created in the table editor. Just select a requirement and click on the "Insert" button on the right side of the table. A new sub-requirement will be inserted for the selected requirement - indicated by an indentation. Please provide the appropriate information for all fields of this newly created sub-requirement.
In addition you can also use the left/right-arrow buttons on the right side of the table to change the existing hierarchy of requirements: The right-arrow button will make the currently selected requirement to a sub-requirement of the requirement in the row above; the left-arrow button on the other side will move the selected sub-requirement one level up in the hierarchy.
Note, you can break-down sub-requirements again and thus specify hierarchies of sub-requirements to the depth you need.
In ISO 26262 projects, in addition to the distribution into sub-requirements it is also possible to decompose a requirement (ASIL decomposition). In order to do so, the "Decompose" button has to be pressed. This will create two new requirements below the selected requirement.
Note, in case that there is already a contained requirement, it is not possible to decompose it. First remove the contained sub-requirement(s).
The table editor can be customized similar to the other table editors of medini analyze by:
Column hiding or un-hiding
Column re-ordering
Introduction or deletion of custom columns.
All these functions are available in the context menu of the column header in the table. Please refer also to Profiling mechanism about customizing medini analyze by additional properties.
Please note, in order to specify the relation between safety requirements and safety goals you must use the graphical safety goal editor. Drag and drop the required elements from the Model Browser (if they are not yet shown there) onto a diagram and add the appropriate relations (see Graphical Editor for Safety Requirements).
To open other editors (like the diagram editor or the goal list editor) from the requirements list editor, the icon in the top right corner of the requirements list editor can be used.
Selecting a requirement and clicking on the "Edit" button on the right side of the table will open a form editor for the selected requirement. In the form you can edit all parameters of the selected requirement as well as more conveniently provide a detailed description. Moreover, in the lower part of the form also all direct sub-requirements of the selected requirement are managed.
If there are additional properties for requirements specified, they will be shown in the editor below the standard properties. To remove them or add new one, the link "Customize" can be used. It will open the profile definition page of the project settings. For general information on profiles please see Profiling mechanism.

Note, you can also open this form-editor for a single requirement by selecting a requirement in the Model Browser and choosing "Open With > Safety Requirement Editor" from the context menu.
Note that you can switch between the different views (Safety Requirements List Editor, Safety Goal Diagram Editor) from the icon on the top right corner of the form editor.
Note that for ISO 26262 projects, even though the ASIL property values can be changed with the editors, the tool provides validation rules that check the correctness of the ASIL property according to the rules of the ISO 26262 standard.