


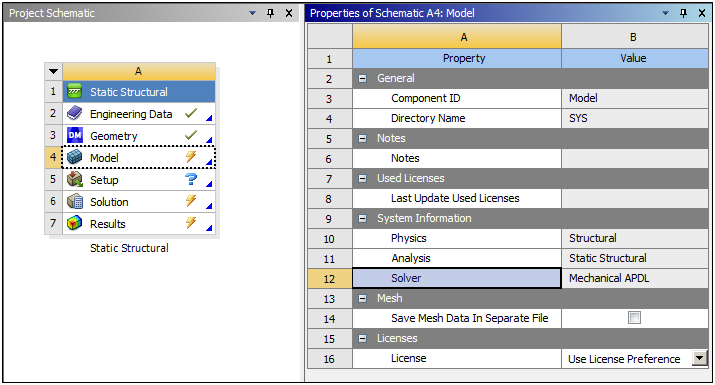
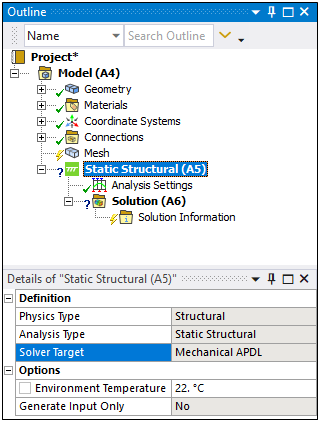
When you initiate a simulation in Workbench, the application automatically specifies the solver. You can view the specified solver in Workbench by displaying the properties (of the Model cell) of the analysis. The System Information category displays a Solver property. Once you open Mechanical, the Details for the Environment object displays a Solver Target property.
|
|
|
Solve Options
| Home Tab | Context Tab |
 |
 |
The Solve group provides options that enable you to specify some basic solution configurations and to solve your analysis.
The Solver Handler drop-down menu enables you to specify the desired target machine on which to perform your solution. It contains the options (default) and . When you create remote solution options, they are also displayed in the menu.
The button/option also provides a drop-down menu that contains the same options as the Solver Handler menu. These options initiate the solution when selected.
The Distributed option, active by default, indicates the use of distributed-memory parallel (DMP) processing. For more information, see the Using DMP Processing section of the Mechanical APDL Parallel Processing Guide.
The Cores field enables you to change the number of CPU cores to use during the solution. The default is
4. If your computer does not have four cores, the application automatically scales to the lower number.The Resource Prediction option opens a window that enables you to select an available analysis and produce a prediction the computing resources needed to perform a solution for the environment.
Important: In the lower right-hand corner of the Solve group is an option that launches the Solve Process Settings dialog. This dialog enables you to specify solution settings for remote computers as well as specific process settings to be used during the solution process.
Solution Progress Display
Once you start a solution, its progress is displayed in the Status Bar. The status bar also displays solution Interrupt and Stop options. If you would like the solver to halt immediately and forego writing any outstanding restart points, select the Stop option. Using the Interrupt option, you instruct the solver to complete its current iteration and record outstanding restart points (available for Static Structural, Transient Structural, and Structural Optimization analyses). Neither of these options affects previous restart points.
In addition, you can select the Progress pane to display the Solution Status window. Like the status bar display, this window displays the progress for synchronous solutions. The window also includes a Stop Solution button and an Interrupt Solution button. Using the UI Options preference setting Progress, you can choose to always display the progress window.
Note:
Clicking the Interrupt Solution button places a file named file.abt in the working directory. This may be useful for those who are familiar with Mechanical APDL functionality.
The Ansys HPC Platform Services (HPS) application does not support the Interrupt option.