
Creating a 3D Component from an Existing Model
To create a 3D component, select an existing object or model, right-click, and select Create 3D Component. You can also click Draw > 3D Component Library > Create 3D Component.
This opens the Create 3D Component dialog box. The Model tab lists all of objects selected before you invoked Create 3D Component.
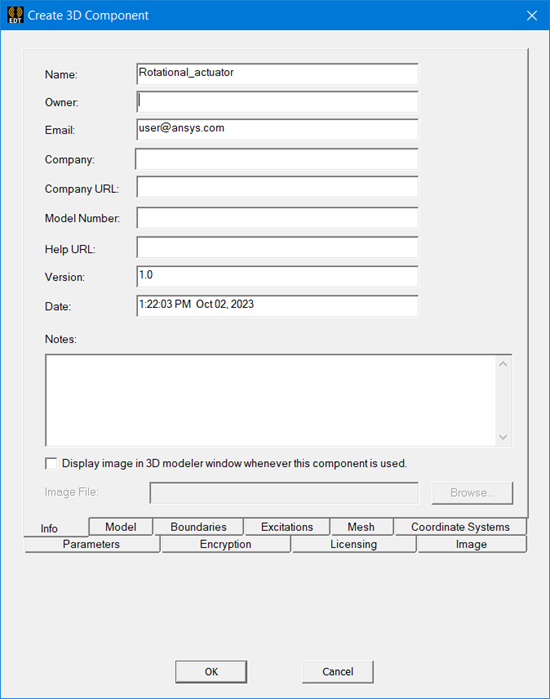
The tabs let you view the component features organized according to geometry, design data, and settings:
- Info tab
- Model tab
- Boundaries tab
- Excitations tab
- Mesh tab
- Coordinate Systems tab
- Parameters tab
- Encryption tab
- Licensing tab
- Image tab
Include or Exclude Feature from Component
You can view the various tabs and select which features to Include or Exclude in creating the component. You can use the check boxes in the Include column for this purpose. You can also use the text field. Type a feature Name which you can then use the command buttons to Include or Exclude.
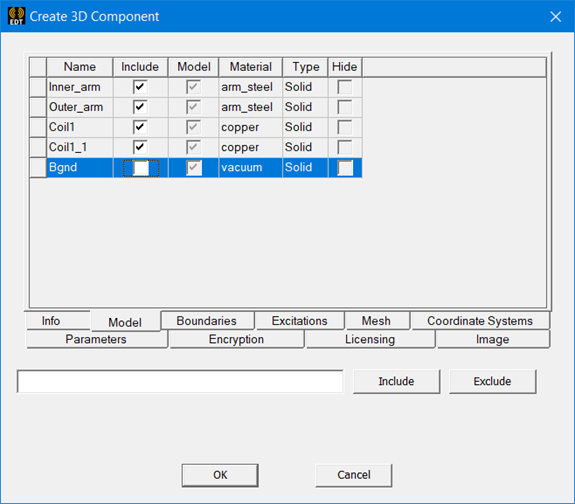
Object selection for Include or Exclude impacts selection in other tabs. For example, if you exclude an object from the component creation, the design data, parameters, and coordinate systems corresponding to that object are also excluded.
Sorting Columns Using the Headers
The features listed for each tab include columns for the Name, check boxes for whether to include, and properties. You can click on the column headers to sort by Name, Model, or other feature listed for each tab. Click the column header to select the column to sort. Click again to invert the column.
You can sort lists by using all columns except Include.
Notes on Design Data
- DC thickness on selected objects is always included in components. It is not listed in Boundaries tab.
- The Create 3D Component dialog does not list design data without an assignment (for example, a winding in Maxwell).
- The parent of any included boundary/excitation is included, as long as the parent does not require assignment (for example, a winding in Maxwell).
- Design settings like material overrides are not included.
Once you have made the Include and Exclude settings, and have specified the Image and Info you click OK to Save 3D Component File. When you click OK, the component is validated for everything that is included in the component. For example, you cannot include boundaries if the object on which the boundaries have been created is not included. After validation, a dialog for saving the component to a location appears.