
Setting up an HFSS Design
To set up an HFSS design, follow this general procedure. After you insert a design, you do not need to do the optional steps nor perform the intermediate steps sequentially, but you must complete them before you generate a solution.
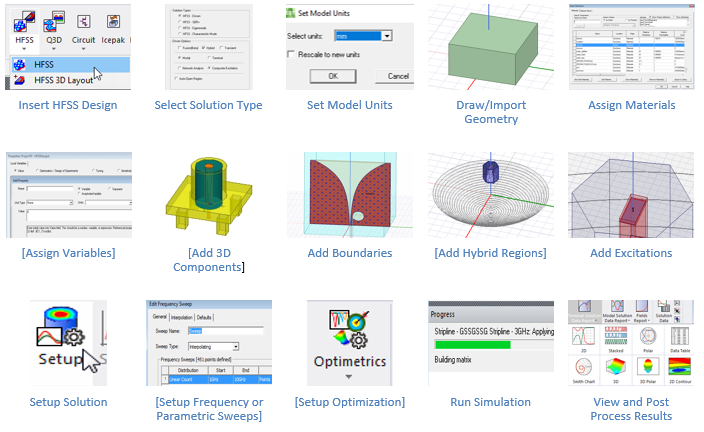
Insert an HFSS design into a project.
- Select the solution type.
- Set the model's units of measurement.
- Draw the model geometry and assign material characteristics to objects.
- Optionally, Working with Variables.
- Assign boundaries, which specify the field behavior at the edges of the problem region and object interfaces.
- Optionally, assign Hybrid Regions, which invoke other solvers for areas you assign as FEBI, HFSS-IE, Physical Optics, SBR+ or Dielectric Cavities.
- For Driven solution-type designs, assign excitations - sources of electromagnetic fields and charges, currents, or voltages on objects or surfaces.
For Composite Excitation Solutions, you provide a complete set of excitations via the Edit Sources dialog before solving.
- Optionally, add 3D Components.
- Specify how HFSS will compute the solution.
- Optionally, Set up any Optimetrics you want to run.
- Run the simulation.
- View solution results, post-process results, view reports, and create field overlays.
Note:
After a period of idleness of 10 minutes, HFSS gives up its license. A renewal of activity automatically requests a license. Such idle notifications do not occur during solves.