


You can also promote feature and sketch dimensions directly through the Details View.
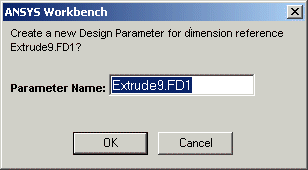
Feature and sketch dimensions contain check boxes next to their properties in the Details View. When the check box is clicked, a dialog box will appear which allows you to give the design parameter a name. Design Parameter names cannot contain spaces, nor special characters, nor can they begin with a numeric character. After clicking OK, the DesignModeler application creates the design parameter in the Design Parameters tab and then assigns the feature or sketch dimension to that design parameter in the Parameter/Dimension Assignments tab.
Note: Even though the dialog box provides you with a unique default parameter name, it is strongly recommended to rename the Design Parameter to something more fitting to your analysis.
Afterwards, the Details View shows the letter "D" next to feature and sketch dimensions that are "driven" by design parameters. A driven feature or sketch dimension becomes read-only in the Details View, since its value is now determined by the Parameter Manager. Parameter assignments can be cancelled by clicking the "D" check box again. This will suppress the assignment line in the Parameter/Dimension Assignments tab and clear the "D" that was in the check box. Clicking the check box will toggle the parameter assignment on and off. Design Parameters will remain as long as at least one assignment line uses them. If none, they are removed. See Deleting Parameters for more information.
Example 102: Toggling Parameter Assignment
 "D" Checked: The property cannot be changed because its value is now driven by the parameter manager. |  "D" Unchecked: The property can be changed. |
Note: If you choose to promote the parameters of an Attach feature to the DesignModeler application's Design Parameters, you will instead see a "P". A CAD parameter cannot contain spaces, otherwise it will not be parsed correctly in the Parameter Manager. With certain CAD systems (for example, SOLIDWORKS), the part name (with spaces) is included in the parameter name.
By clicking the check boxes in the Details View, Design Parameters can be easily enabled or disabled. However, if you choose to manually modify the contents of the Design Parameters or Parameter/Dimension Assignments tabs, you must ensure your changes are consistent among both windows. For example, if you wish to manually delete an entry in the Design Parameters tab, you must also delete all references to that entry in the Parameter/Dimension Assignments window. Use the Check button to inspect your changes and help pinpoint errors, if any.
Once you have created Design Parameters to define your model, varying them is easy. Just change the Design Parameter values in the first tab, then click the Check button to verify your changes. Note that any features that are affected by the Design Parameter change will be marked as updated. Click Generate to update the model.
Note: If you choose to promote a Sketch Dimension that is in an Overconstrained or Inconsistent status, you will not be able to change its value via the Parameter Manager. For example if you create two circles that have the Equal Radius constraint between them, and then create a Radius or Diameter dimension on each of them, they will be Overconstrained. You can still promote those dimensions as parameters, but will not be able to change their values. If you were to delete the Equal Radius constraint between them, then you could change their values.
Parameters as Simple Assignments
You can remove unchecked parameters that are simple assignments unless they are used by other assignments, or if the assignment is not a simple direct assignment. In this case they cannot be removed. For example, Extrude1.FD1 = @depth can be removed if "depth" is not used elsewhere, while Extrude1.FD1 = 2 * @depth cannot be removed as it is not a simple direct assignment.
Manually Creating Parameters and Assignments
In addition to creating Parameters and Assignments automatically by promoting dimensions and feature properties, and importing files that have parameters, you can manually create them.
To create a Parameter, enter the Name, Initial Value, and Type to interpret the value. You can also enter additional information in the comment column. Until both Name and Value fields are entered, the line will be shown as a comment. When you click the Check button, this new parameter is processed and added to the Parameter table on the Project Page.
Similarly for creating an Assignment, enter the name of the Target, the Expression, the Type, and any Comment.
You can use Target names that are not in the Parameter tab if you want, and can then use the Target in other Expressions.
If the Parameter Name does not appear in the Parameters Tab, then it will not be promoted to the Parameter table on the Project page.
Other Parameters topics: