


The following topics are included in this section:
The simple interface method of reading data into EnSight works for most formats and requires a file extension-toreader mapping file (ensight_reader_extension.map). This file can reside in the site_preferences directory and/or each user can have their own personal one in their personal EnSight defaults directory (located at %HOMEDRIVE%%HOMEPATH%\(username)\.ensight242 commonly located at C:\Users\username\.ensight242 on Windows 10, C:\Documents and Settings\yourusername\.ensight242 on older Windows, and ~/.ensight242 on Linux, and in ~/Library/Application Support/EnSight242 on the Mac). A sample of this file is shown below. The mapping file associates file extensions to readers. If this file is not provided or an association is not known, or the format doesn’t allow it due to required intermediate information (such as Plot3D currently), the simple interface method cannot be used and the button will not be active. One is then required to use the Advanced Interface method.
Select →
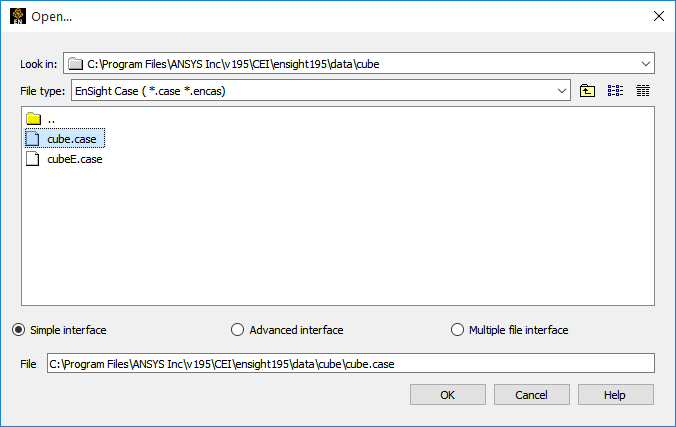
If not already selected, toggle Simple Interface on.
Navigate to the desired directory using typical navigation methods.
Filter the list using the File type, if desired.
Select the desired file. This file’s extension is what will be mapped to a reader in the ensight_reader_extension.map.
Click (Double-clicking the file in step 4 is also allowed.)

Note: Variables in the data are also listed at this point. They have not yet been activated. The process for doing so will be discussed in Activate Variables.
The following is a sample containing associations for EnSight Case, EnSight5, STL and MSC/Dytran:
EnSight file extension to format association file
Version 1.0
#
# Comment lines start with a #
#
#
# The format of this file is as follows:
#
# READER_NAME: reader name as it appears in the Format chooser in the EnSight Data Reader dialog
# NUM_FILE_1: the number of file_1_ext lines to follow
# FILE_1_EXT: the extension that follows a file name minus the “.”, that is, “geo”, “case”, etc.
#             There should be one definition after the :. Multiple FILE_1_EXT lines may exist
# NUM_FILE_2: the number of file_2_ext lines to follow
# FILE_2_EXT: the extension of a second file that will act as the result file. This is only used
# for formats that require two file names. As with FILE_1_EXT, there may be multiple
# FILE_2_EXT lines.
# ELEMENT_REP: A key word that describes how the parts will be loaded (all parts will be loaded the
#              same way). One of the following:
#              “3D border, 2D full”
#              “3D feature, 2D full”
#              “3D nonvisual, 2D full”
#              “Border”
#              “Feature angle”
#              “Bounding Box”
#              “Full”
#              “Non Visual”
#        If option is not set then 3D border, 2D full is used
# READ_BEFORE: (optional) The name of a command file to play before reading the file(s)
# READ_AFTER: (optional) The name of a command file to read after loading the parts

# Definition for Case files

READER_NAME: Case
NUM_FILE_1: 2
FILE_1_EXT: case
FILE_1_EXT: encas
ELEMENT_REP: 3D feature, 2D full

# Definition for EnSight5 files

READER_NAME: EnSight 5
NUM_FILE_1: 2
FILE_1_EXT: geo
FILE_1_EXT: GEOM
NUM_FILE_2: 2
FILE_2_EXT: res
FILE_2_EXT: RESULTS
ELEMENT_REP: 3D feature, 2D full

# Definition for STL files

READER_NAME: STL
NUM_FILE_1: 4
FILE_1_EXT: stl
FILE_1_EXT: STL
FILE_1_EXT: xct
FILE_1_EXT: XCT
ELEMENT_REP: 3D feature, 2D full

# Definition for Dytran files

READER_NAME: MSC/Dytran
NUM_FILE_1: 2
FILE_1_EXT: dat
FILE_1_EXT: ARC
ELEMENT_REP: 3D border, 2D full
READ_AFTER: read_after_dytran.enc
When using the advanced method, you similarly specify the files, but can also specify the format, and other format and time options. You then has control over whether all parts will be loaded into EnSight, or whether EnSight will be informed of their existence, but not actually be loaded yet.
Select →
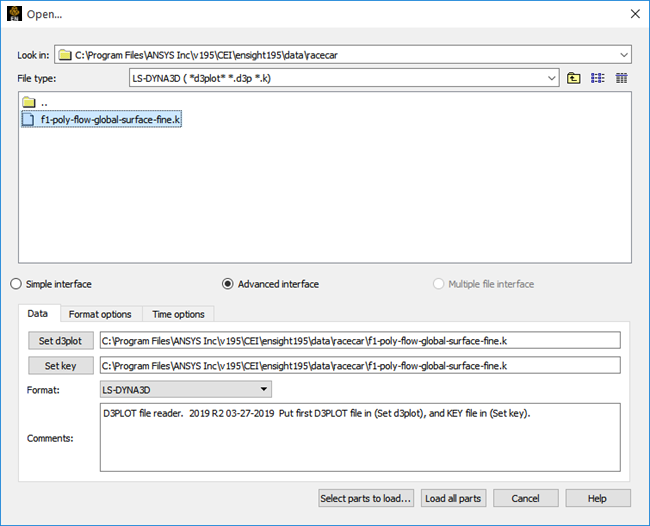
Toggle Advanced Interface, if not already set.
Navigate to the desired directory using typical navigation methods.
Filter the list using the File type, if desired.
Select the desired file.
This file’s extension is what will be mapped to a reader in the ensight_reader_extension.map.
Click the applicable Set Button(s) (in this case, the button).
If a mapping is known, the correct Format will be automatically chosen for you.
Select the correct Format - if not already correct.
The list shown is dependent on the presence of internal and user-defined readers at your site, and in your preference settings. For the list of available readers please see Native EnSight Format Readers or Other Readers.
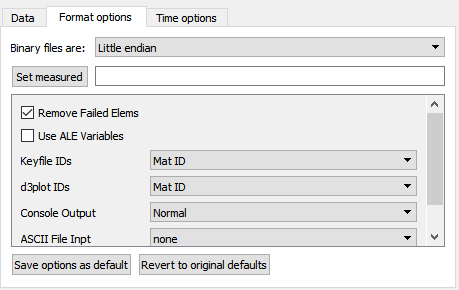
Optionally set any Format options.
Note: The options presented will vary according to the data format. Big-Endian is only necessary for legacy binary case gold files written on Unix platforms. All but the Casefile format will allow input of measured point data. See EnSight5 Measured/Particle File Format. Plot3d, Casefile, and Special HDF5 structured formats will provide a field for a boundary file. See EnSight Boundary File Format.
Optionally set any Time options.
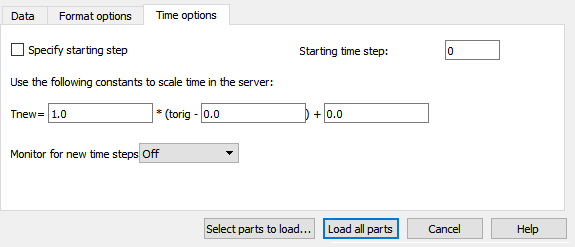
Click Select parts to load...
If you want to pick and choose which parts get loaded.
OR
Click Load all parts If you want to have all parts loaded.
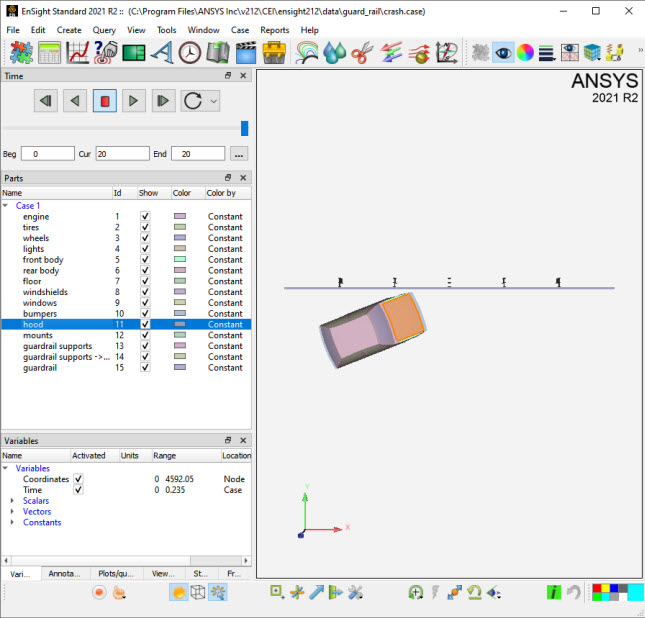
The parts in the model will now appear in the Parts list in EnSight. If you did a Load all parts, the parts will be loaded and active and will also be visible in the Graphics window.
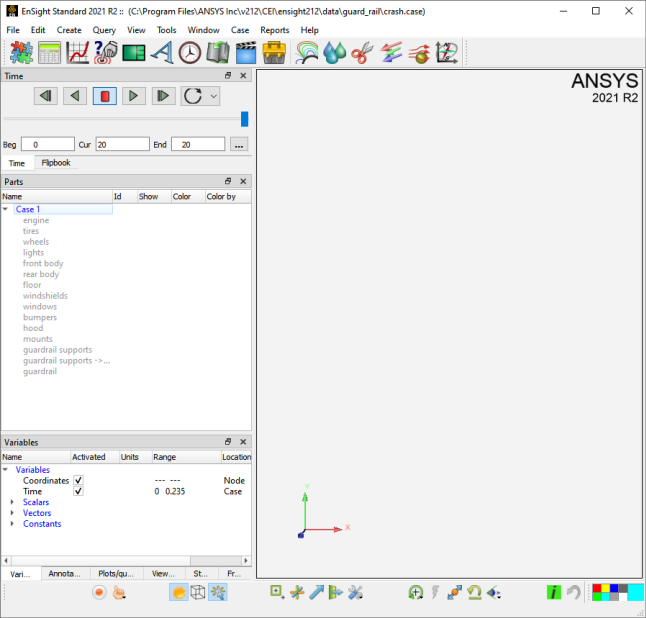
If you instead clicked Select parts to load, the parts will show up in the Parts list, but are in a not loaded state. So, they will appear like:
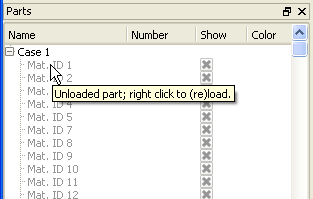
If you hover your mouse over one of the parts you will see:
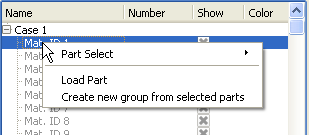
If you right click on one of the parts, you will see:
And if your data is unstructured, when you click on , you will see a dialog like that to the right, wherein you can set:
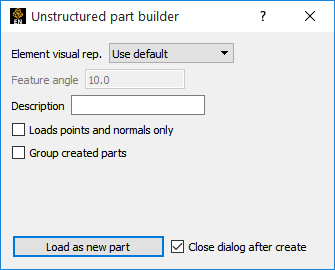
The initial Change the Visual Representation to use.
A description other than the default, if desired.
And click to get the part created.
If the data is structured, then you will see a dialog like the one below, wherein you can set:
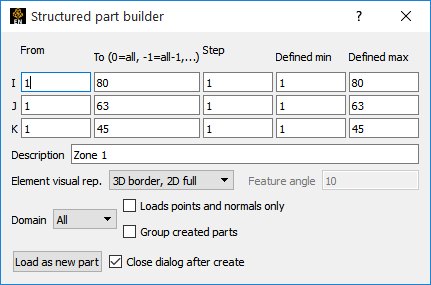
From, To, and Step IJK values for the selected part(s).
The From and To values are inclusive.
Valid values in the From and To fields are numbers advancing from 1(the min for each part), or numbers decreasing from 0(the max for each part):

If you specify values that will be outside of the range of an individual part, the proper min or max values for the given part will be used.
The Defined Min and Defined Max fields are for reference only.
If the selected part has Iblanking, you can build based on the value (Inside selects cells where Iblank=1, Outside selects Iblank=0, All selects all cells ignoring Iblanking).
The initial Visual Representation to use.
A description other than the default, if desired.
If you leave the Description field blank, it will default to what is shown in the Parts list.
And click Load as new part to get the part created.
See Change the Visual Representation.
Note: All parts in the case can be loaded by right-clicking on the parent Case 1, instead of individual parts.
If there are any exceptions to this general process, see the details for specific readers in Other Readers within the Ansys EnSight User Manual.
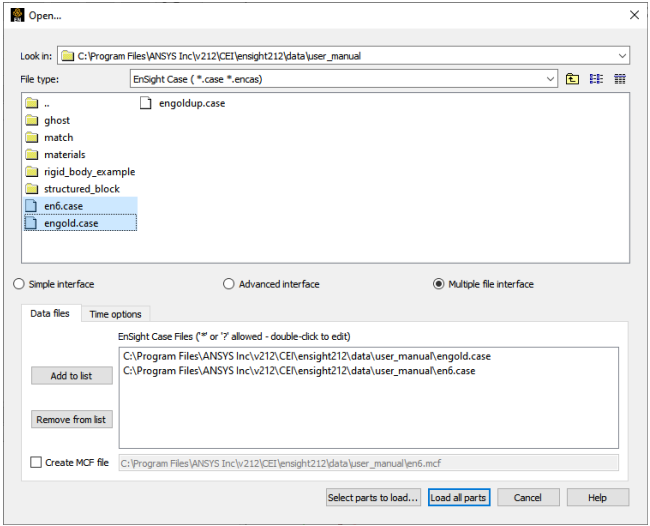
The Multiple File interface is currently implemented only for Case Gold. For Case Gold it is called the Multiple Case File (MCF) interface. The MCF on the data reader dialog allows you to interactively select and read multiple EnSight Case Gold files in one EnSight Case.
Select →
If not already selected, toggle on.
Navigate to the desired directory using typical navigation methods.
Select the desired file(s).
Use Ctrl or Shift-select to select multiple files.
Click
Adds the selected filenames to the Data files window.
Double-click on any filename in the Data files and add an asterisk (*) or question mark (?) wildcard.
Toggle .
Click on the field to edit the MCF filename. This will write out an MCF file containing the Data Window contents.
Load all parts
This will load all the case files in the Data files window into EnSight together in one Case.
Why write out an MCF file? The next time you load these same filenames, you only have to go
to the Advanced interface, select the single .mcf file
and load it using the EnSight_MCF reader.