


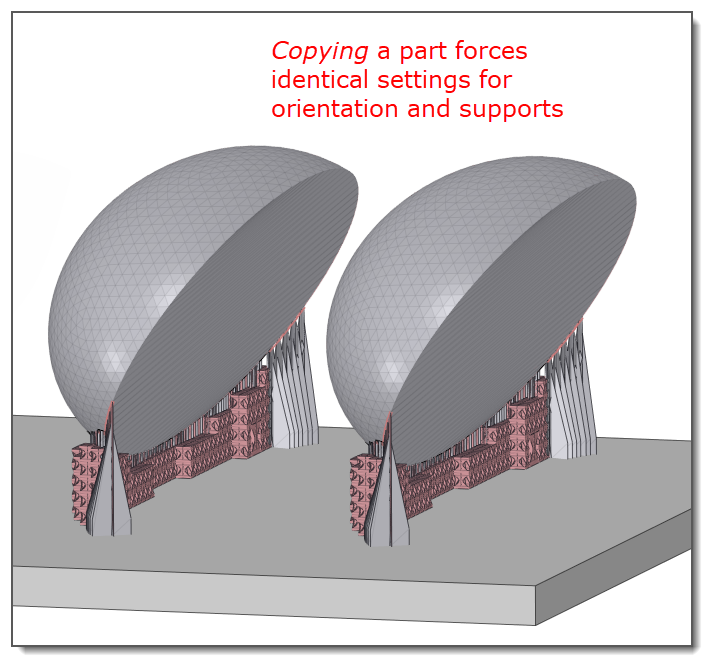
With Additive Prep, it's easy to nest multiple parts within the Build Volume so that you can consider the positioning of the parts when deciding how best to generate supports. You may add a new part (to the part already in the Build Volume) or copy a part but there is an important distinction between the two operations. Adding a part allows individual adjustments to the orientations and supports. Copying a part maintains identical settings for orientation and supports of the original and the copied parts. Regardless of which method you choose, be sure it is the entire workspace you are operating on rather than the part only.
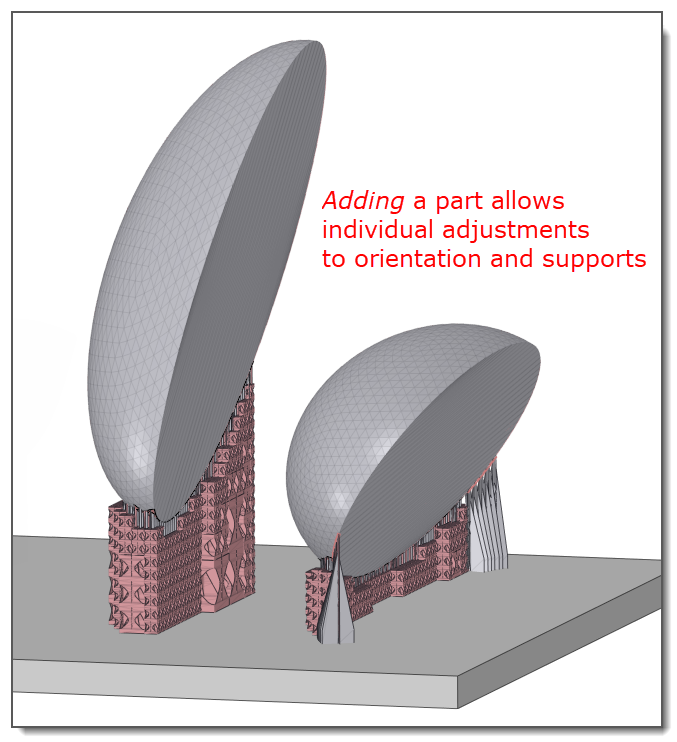
Adding an Additional Part (Workspace)
Click Add Part to add another part into the Build Volume. This will create a second workspace assembly in the Structure tree within the Build Volume. (Adding a part with the same name as an existing part places a (1) after the new object name in the tree, or a (2) if it is the third copy, and so on.)
Each new workspace is placed at the Zero Point, either at the center of the baseplate or at the corner, depending on what is selected in Settings under Zero Point. Most likely, the new part will be placed directly on top of the first so you will need to move the workspaces around a bit.
Select the workspace assembly you'd like to move, then click the Design tab (one of the SpaceClaim tabs) and in the Edit group, click Move to use the Move tool. Select an X or Y translational axis on the Move handle and drag the part to the appropriate location. Repeat as needed. To move the part up or down in the Z direction, or to rotate parts, use the orientation map, do not use the Move tool as this will invalidate Additive Prep's orientation and support generation tools.
Once the workspaces have been moved into position, proceed to orient the individual parts, create support regions, and generate supports as usual.
Copying a Part (Workspace)
Select the workspace assembly you'd like to copy, click Ctrl C, select the Build Volume assembly and click Ctrl V. This will create a copy of the workspace assembly in the Structure tree within the Build Volume. The copied workspace is placed directly on top of the first one so you will need to move the workspaces around a bit.
Select the workspace assembly you'd like to move, then click the Design tab (one of the SpaceClaim tabs) and in the Edit group, click Move to use the Move tool. Select an X or Y translational axis on the Move handle and drag the part to the appropriate location. Repeat as needed. To move the part up or down in the Z direction, or to rotate parts, use the orientation map, do not use the Move tool as this will invalidate Additive Prep's orientation and support generation tools.
Once the workspaces have been moved into position, proceed to orient the original part, create support regions, and generate supports as usual but know that any adjustments you make to the original part will automatically be made to the copied parts.