


Simplify and focus your workflow using the DED Process Wizard. Step through the wizard pages that are organized into workflow tasks. Actions take place when you click Next at the bottom of each page. As you progress through the steps, the wizard automatically adds objects into the project tree. Exit the wizard at any time and continue setting up your simulation manually in the project tree.
Open the Wizard
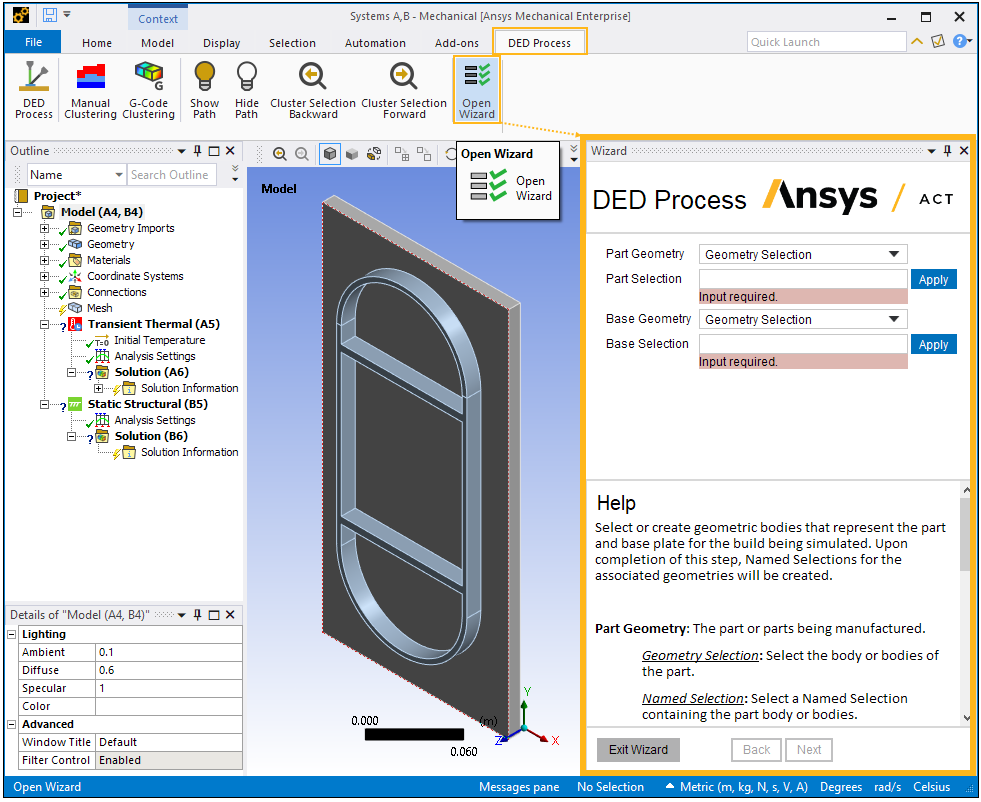
First make sure the DED Process Add-on is loaded.
To start the wizard, select the DED Process tab and then select the Open Wizard button.
The DED Process Wizard guides you in a step-by-step manner through the following steps:
Identify geometries
Generate mesh
Define weld path and create connections
Assign materials
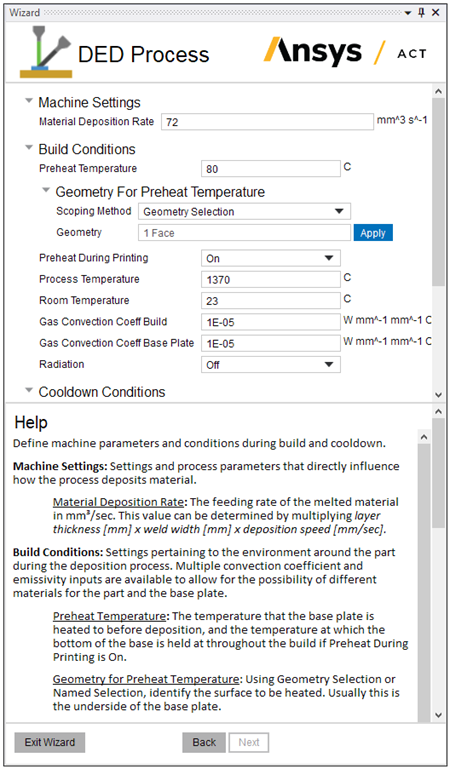
Define machine parameters and thermal boundary conditions
Define structural boundary conditions and base removal
Refer to the in-wizard help at the bottom of each page. An example page, for defining machine parameters and thermal boundary conditions, is shown here:
Assumption and Restrictions When Using the Wizard
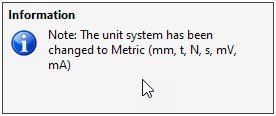
When you launch the wizard, the unit system is checked and, if necessary, automatically switched to the Metric system (mm, t, N, s, mV, mA) because the DED Process Add-on requires that units be in millimeters. The following message appears if the unit system is changed:
Upon completion of the material assignment step of the wizard, the Reference Temperature and Reference Temperature Value for the build body are automatically set to "By Body" and to the build material's melting temperature respectively, or 1000°C if the melting temperature is not defined for the assigned material. The Reference Temperature for the base is set to "By Environment."
The options to read Feed Rate, Preheat Temperature, and Dwell Time from a G-Code file are not available in the wizard. Specify them on the G-Code Clustering object in the project tree (outside of the wizard). See Element Clustering: G-Code Approach.
Close the Wizard
Upon completing the last page, click Finish to complete the wizard.
Click the X in the upper, right corner to close the wizard window.
Review Items in Project Tree
Continue the simulation in the Mechanical interface at this point. It is a good idea to review the objects in the project tree that were created by the DED Process Wizard. Select the objects in the tree from top to bottom and examine the details view for each object to see how the wizard options are implemented in the project tree. New objects have been added, such as the AM Process for DED object and its child objects (Build Settings, Manual Clustering or G-Code Clustering). Take note of the named selections for the build body, the base body, build and base body element faces and nodes for the removal step. A connection object, mesh objects, boundary condition objects, result objects, and others have been added or changed automatically by the wizard. You can make changes or add items as needed.
Perform Element Clustering
The element clustering step must be performed after you finish the wizard. Refer to one of the following sections, depending on which method you selected to define the build order in the wizard:
If you specified a manual approach to define the building order, refer to Element Clustering: Manual Approach.
If you specified a G-Code file to define the building order, you must now define the G-Code clustering options and perform element clustering, as described in Element Clustering: G-Code Approach.
After performing element clustering, the simulation is ready to solve.