


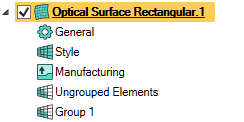
Managing Groups and Elements
This page shows how to create and manage groups. When designing an optical surface, you can create different groups of elements to apply specific parameters to these groups.
Note: When no group is created, all the elements (facets) are stored in Ungrouped Elements section.
To create and manage groups:
-
From the Design panel, reach the sub-feature level.
-
From the Groups panel, click Add
_Add.png) to add as many groups as needed.
to add as many groups as needed.
_OPD_Optical_Surface_Group_Table.png) Tip: For a quicker way, right-click the feature and select Add new group.The groups appear in the design panel.
Tip: For a quicker way, right-click the feature and select Add new group.The groups appear in the design panel. -
Select each group to define its parameters. From the Type drop-down list, select the type of lens you want to apply to the current group:
Note: Available beam types depend on the optical surface selected.
For more information on lens types, see Beams .
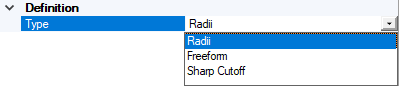
- Select Radii to create spherical facets that ideally diffuse light.
- Select Freeform to create facets that are shaped by specifying the area where the light should be sent in.
- Select Sharp Cutoff if you want to create an optical surface beam that directs light underneath a defined cut-off line.
- Select Flutesif you want to create facets by adjusting the flutes curvature.
-
In the 3D view, click
_Faces_Selection.png) and select the faces to include in the group:
and select the faces to include in the group:
- In case of a Rectangular or Freestyle Rectangular part, you can directly select a row
_OPD_Select_Row.png) or select a column
or select a column
_OPD_Select_Column.png) .
. - In case of a Circular or a Freestyle Circular part, you can directly select a radius
_OPD_Select_Radius.png) or select a circle
or select a circle
_OPD_Select_Circle.png) .
. - For a free selection of faces, you can choose a SpaceClaim selection mode in the bottom right corner of the session and use Box, Lasso or Paint.
_SpaceClaim_Selection_Modes.png)
- You can add Named Selections composed of faces to Optical Part Design groups.
Note: You can only add a same type of element in a group. Example: a group composed of faces only, or a group composed of Named Selections only. - In case of a Rectangular or Freestyle Rectangular part, you can directly select a row
-
Once, the group is defined, click
_Validation.png) to validate the selection.
to validate the selection.