
Setting Field Plot Attributes
After creating a vector or scalar field overlay on a surface or volume, you can modify its appearance by changing the settings in the Plot Attributes dialog box. When you modify the settings for a plot folder, all plots in that folder are modified with the same attributes.
- Click Maxwell 3D or Maxwell 2D and select Fields > Modify
Plot Attributes
 ,
or in the Project Manager window, select the Field Overlays icon,
and select Modify Attributes.
,
or in the Project Manager window, select the Field Overlays icon,
and select Modify Attributes.
- Select the field plot folder you want to modify, and then click OK. You can also select the specific plot in the Project tree, and select Modify Attributes from the right-click menu. (For mesh plots, refer to Setting Mesh Plot Attributes.)
The Select Plot Folder window appears.
A dialog box with attribute settings for the selected plot appears.
- Change the desired plot attributes. Under
the following tabs in the dialog box, you can control the following attributes:
Color map
Scale
The scale of field quantities.
Marker/Arrow
- The appearance of points (for scalar point plots).
- The appearance of arrows (for vector plots).
Deformation Scale
- Select whether to show or hide the deformation and also scale the plot. (Applicable only when stress feedback coupling with ANSYS Structural is enabled.)
Plots
(if not streamline)- The plot selected.
- To display or hide the mesh on the plot’s surface or volume.
- The type of isovalue display (for scalar plots.)
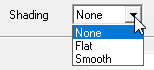
- Whether to use Shading (for scalar plots), if lighting is turned on. By default, the Shading is set to None which is equivalent to "Do not use lighting."
- The transparency based on solution value.
- Whether to add a grid (that is, a mesh overlay), and to set the grid color.
- Specify the plot resolution as Coarse, Normal, Fine, or Very Fine.
This affects the use of memory for animating plots. For large plots with more frames to animate, use Coarse or Normal to reduce memory requirements and improve performance. For smaller plots with few frames, if higher resolution is required, use Fine or Very Fine.
- The spacing of arrows (for vector plots).
Plots
(if streamline is checked)- The plot selected
- The linestyle as solid or cylinder from drop-down menu.
- Line width, specified using a slider.
- Whether to show marker on streamline.
- Seeds density spacing. This affects the number of stream lines used to represent the quantity in the plot. Moving the slider to the left decreases the spacing and increases the number of stream lines. Moving the slider to the right increases the spacing and decreases the number of lines used to represent the quantity.
- Min. and Max. values represented.
- Optionally, click Save as default if you want the tab's settings to apply to field overlay plots created after this point.
- Select Real time mode if you want the changes to take effect immediately in the view window. If this option is cleared, click Apply when you want to see the changes.
- Click Close to dismiss the dialog box.