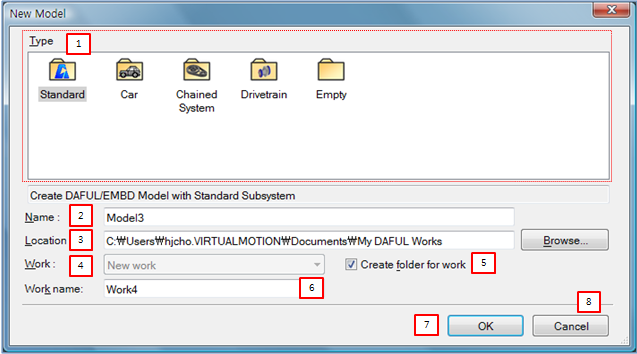
Creating a is the first step in building a model. If the model is a simple, it is better to start by creating a New File instead. can be accessed from the File Menu and Quick Access Toolbar. Several properties can be defined when a is created, as shown in the figure below.
The dialog properties are described in the following table.
Figure 1.39: Description of properties of New Model
| Property | Description | ||||||||||||
| 1. Type |
Set the type of model. A model is classified to help manage modeling files for each project as follows.
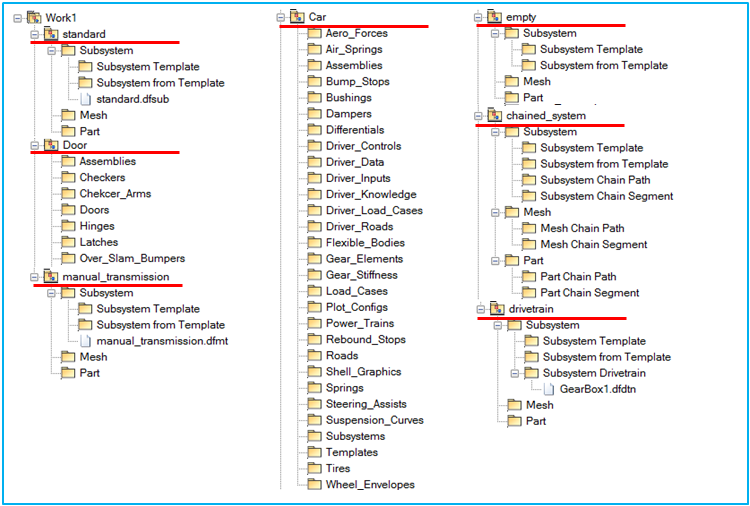
The folder structure for each model type is shown in Figure 1.40: Work folder structure for each Model type. | ||||||||||||
| 2. Name | Set the name of the Model. | ||||||||||||
| 3. Location | Set the location of the folder that contains the files for the Work and Model. | ||||||||||||
| 4. Work | Determine whether the new Model is added to a newly created Work or an existing Work. | ||||||||||||
| 5. Create folder for work | Determine whether a model folder is created below the work folder or not. When this option is cleared, the Model file is generated in the Work folder. | ||||||||||||
| 6. Work Name | Show or set the name of the Work. | ||||||||||||
| 7. OK | Close the property dialog, create the new Model and go to the next step (New File in the case of a standard Model). | ||||||||||||
| 8. Cancel | Close the property dialog and stop the creation of a new Model. |
The Work folder structure for each model type is as follows: