This tutorial focuses on the flow outside of the internal pipe. Thus, in generating the first Ogrid, you will essentially partition the volume around the small internal pipe so that part of the blocking may be removed.
Create the first Ogrid.
> Split Block
 > Ogrid Block
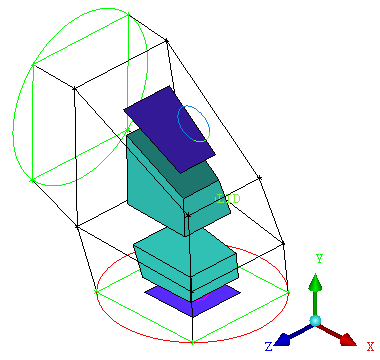
Click Select block(s) and select the 2 blocks shown in Figure 114: Blocks and Faces Selected for the First Ogrid. Click the middle mouse button to finish the selection.
Click Select face(s) and select the faces shown in Figure 114: Blocks and Faces Selected for the First Ogrid. Click the middle mouse button to finish the selection.
The cylinder will now pass through the top and bottom of the geometry.
Click to create the first Ogrid.
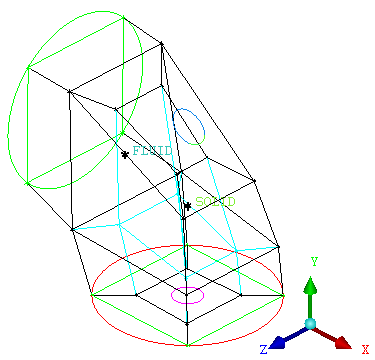
After creating the first Ogrid, the blocking will appear as shown in Figure 115: First Ogrid.
Assign the material inside the cylinder to the SOLID part.
This will remove this region from the mesh if it is computed with the SOLID part disabled.
 >
> The index control window will appear in the lower right corner.
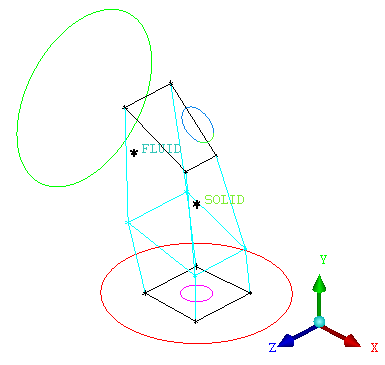
Change the Min for O3 from
0to1.You can click the up arrow or type the number and click the enter key on the keyboard. You should then see only the blocking shown in Figure 116: Visible Blocks After Using Index Control
Select the blocking material.
> > Click
 (Blocking Material, Add Blocks to Part ).
Click
 (Select block(s)), box select the entire model, and click the middle mouse button to accept. Alternatively, press
 von the keyboard to select all visible.Click .
The selected blocks will then be assigned to the SOLID part.
Note: When you delete a block material or move it to another part, Ansys ICEM CFD Hexa assumes that there is a surface boundary between the blocks and automatically applies an association to the nearest active surface for the faces at the block material boundaries. You will see that the previously blue edges turn white/black to indicate this.
Associate the Ogrid edges to the cylinder curves (Figure 118: Edges Projected to the Cylinder Curves).
> Associate
 > Associate Edge to Curve
Ensure that Project vertices is enabled.
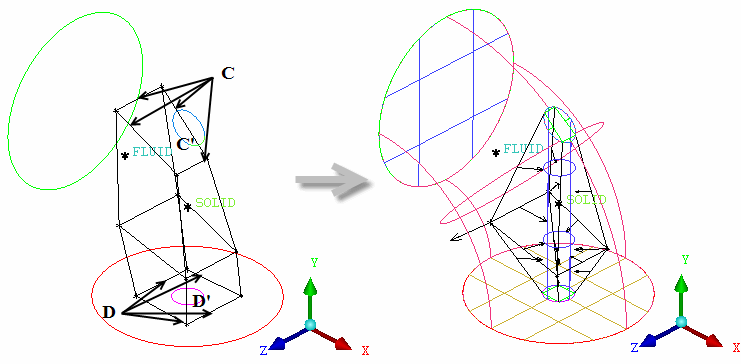
Associate the edges denoted C to CURVE C' using Figure 118: Edges Projected to the Cylinder Curves as a guide.
Associate the edges denoted D to CURVE D' using Figure 118: Edges Projected to the Cylinder Curves as a guide.
View the association between edges and curves.
> > Enable the display of Surfaces in the display tree.