Disable the elbow part surface ELBOW_1_1 in the display tree.
 >
> The association arrows point to the outside surfaces of the elbow part (Figure 118: Edges Projected to the Cylinder Curves). If you try to snap project vertices now, these vertices will move outward to the elbow part surfaces. Hence, you must disable the ELBOW_1_1 part in the display tree, so that the vertices will not move to that part.
Snap project the vertices to the cylinder
> Associate
 > Snap Project Vertices
Ensure that All Visible is enabled.
Click .
The blocking should look like Figure 119: Vertices Projected to the Cylinder.
Improve the placement of the vertices on the cylinder.
> Move Vertex
 > Set Location
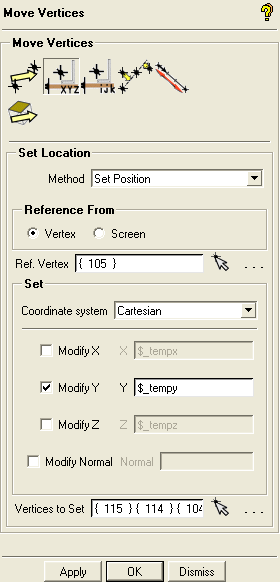
Ensure that Set Position is selected in the Method drop-down list.
Ensure that Vertex is selected in the Reference From group box.
Click
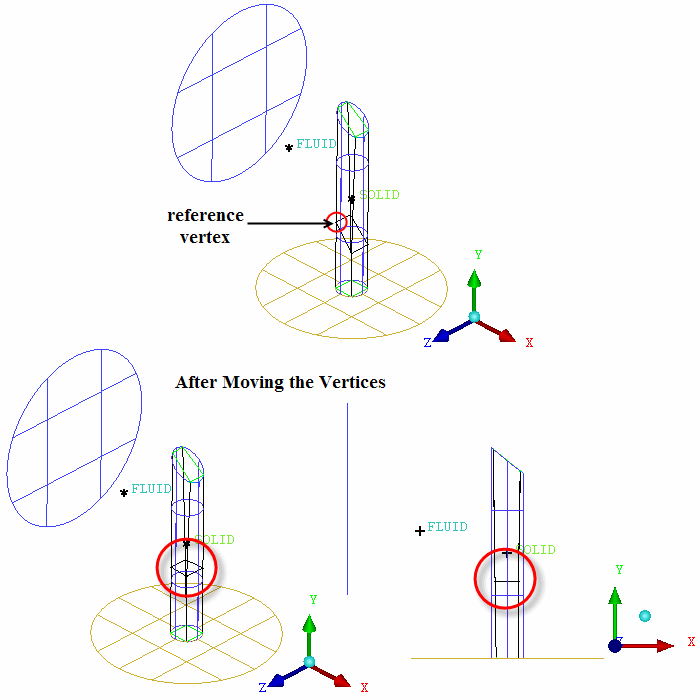
 (Select vert(s)) next to Ref. Vertex and select one of the higher vertices as shown in Figure 120: Moving the Vertices on the Cylinder as a reference to which the
other vertices will be moved.
(Select vert(s)) next to Ref. Vertex and select one of the higher vertices as shown in Figure 120: Moving the Vertices on the Cylinder as a reference to which the
other vertices will be moved.Ensure that the Coordinate system is set to Cartesian.
Enable Modify Y.
Selecting Modify Y will allow you to move the vertices in the Y direction.
Click
(Select vert(s)) next to Vertices
to Set and select the other 3 vertices.You can select the vertices by block selecting all of them.
Click .
All the vertices will be aligned such that they have the same Y value (Figure 120: Moving the Vertices on the Cylinder).
Align the vertices to the base plane.
> Move Vertex
> Align Vertices 
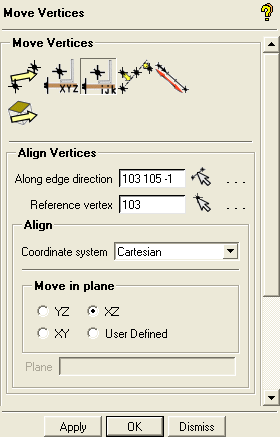
Click
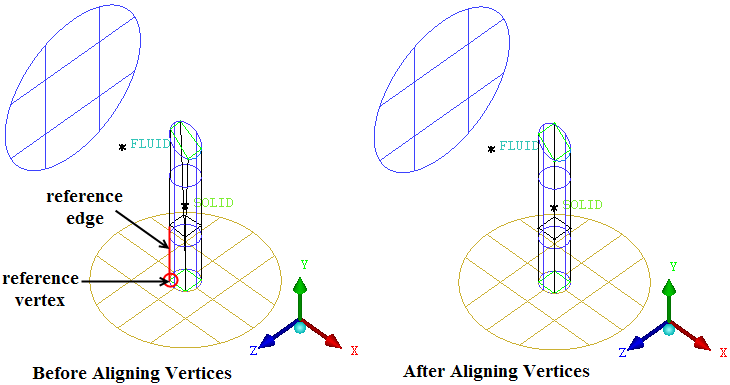
 (Select edge(s)) and select an edge along the
Y direction for Along edge direction (see Figure 121: Aligning Vertices).
(Select edge(s)) and select an edge along the
Y direction for Along edge direction (see Figure 121: Aligning Vertices).Click
(Select vert(s)) and select the vertex at the
base of the edge on the base plane for Reference vertex (see Figure 121: Aligning Vertices)Ensure that XZ is selected in the Move in plane group box.
Click .
Realign the vertices on the geometry.
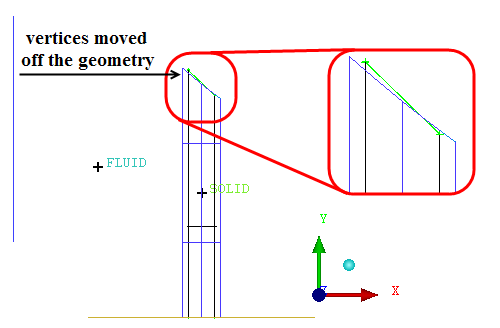
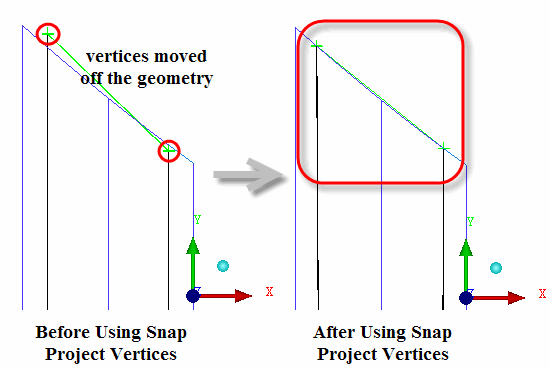
After aligning the edges you may notice that some vertices have moved off the geometry a little bit (Figure 122: Vertices Moved Off the Geometry). You will now use Snap Project Vertices to realign them.
> Associate
> Snap Project Vertices Repeat the steps for aligning to the base plane and snap vertices until you get the geometry right (Figure 123: Vertex Positions After the Final Alignment).
Enable ELBOW_1_1 in the display tree.
Click in the Index Control window.