


The Scoping Wizard option is available on the Selection tab of the ribbon. This feature automatically detects any geometry-based scoping that becomes lost following a geometry update. Once identified, you use the options of the feature to visualize and reestablish the original scoping. You turn the feature on (default) and off using the Use Geometry Based Associativity preference (Options > Geometry) dialog. In addition to the activation preference, there is an associated preference (Automatic Scoping Update) to have the application automatically correct geometry-based scoping that becomes lost following a geometry update.

Go to a section topic:
Overview
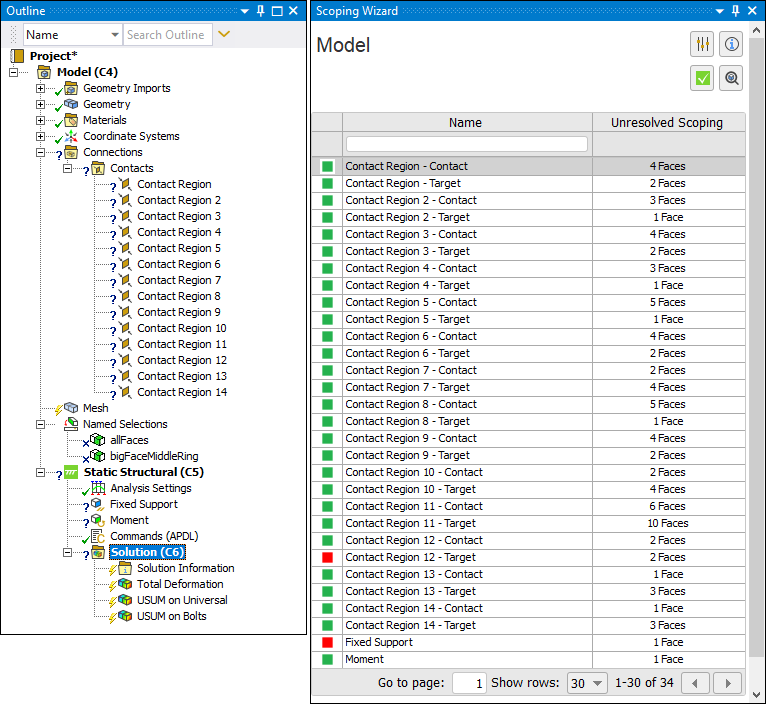
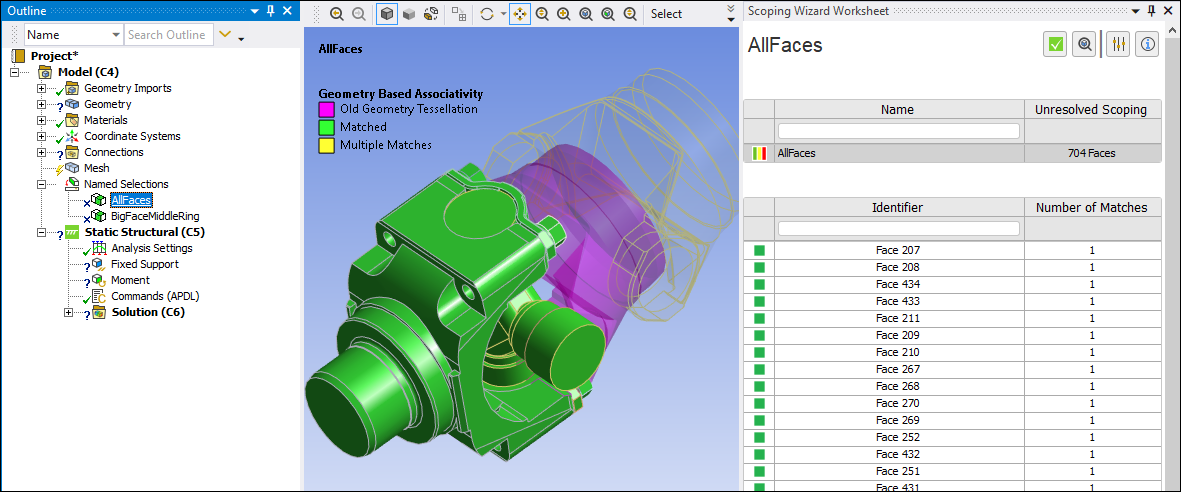
Selecting the ribbon option displays the Scoping Wizard worksheet pane, illustrated below, that lists all objects with unresolved scoping. Corresponding objects in the tree also display with an invalid state.
Important: This feature does not recover mesh-based (node, element face, element) scoping.
Feature Options
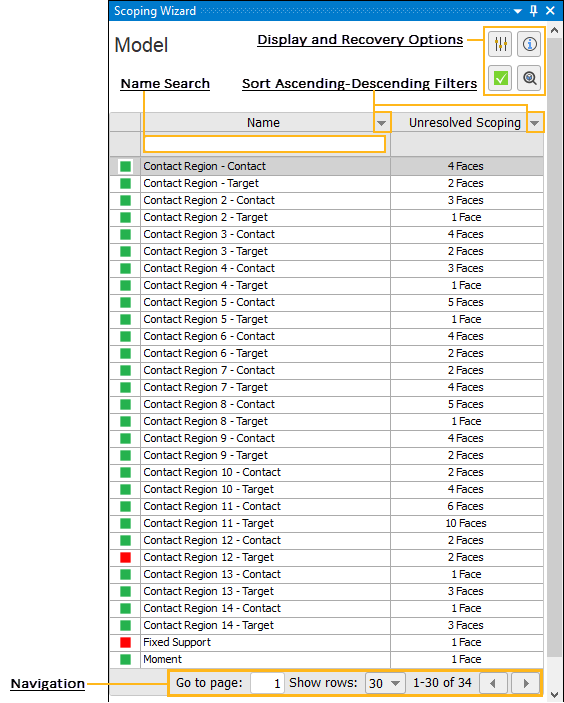
The Scoping Wizard pane enables you to:
Change display settings, fix scoping, show an information pane, and zoom on a scoping.
View a list of unresolved objects.
Filter the list based on object name or number of unresolved scopings (ascending/descending).
Navigate through long lists of unresolved objects.
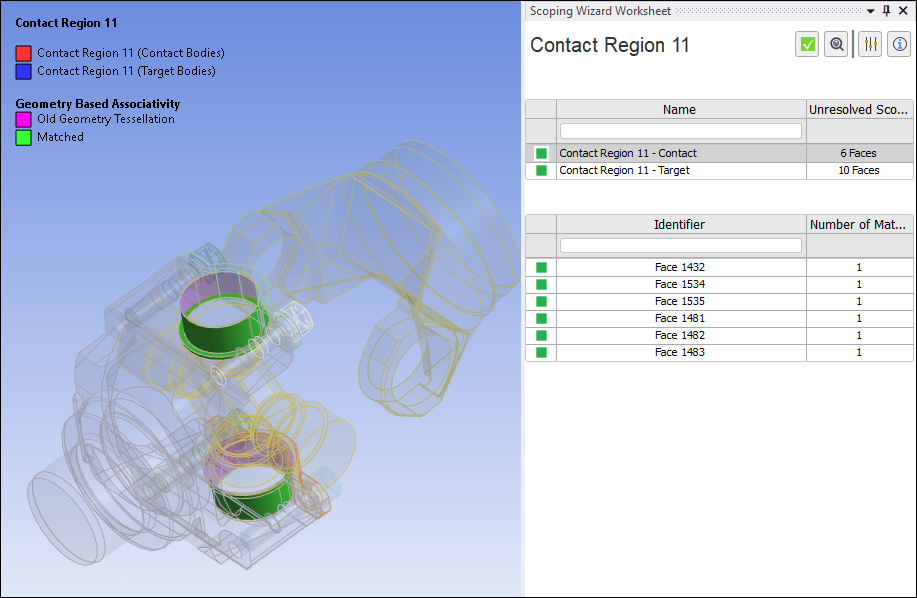
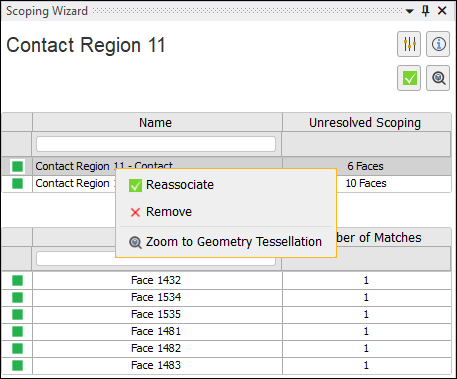
If you double-click a table row, or select an unresolved object in the tree, the pane shows information specific to the object and its (unresolved) scoping. The following example shows a Contact Region that has lost scoping. The pane displays the object type/name (Contact Region), the number of unresolved geometric entities, whether the application identified a scoping match, and the original application-assigned ID for the entities. The first item in the worksheet is selected by default, and the parts are highlighted in the Geometry window.
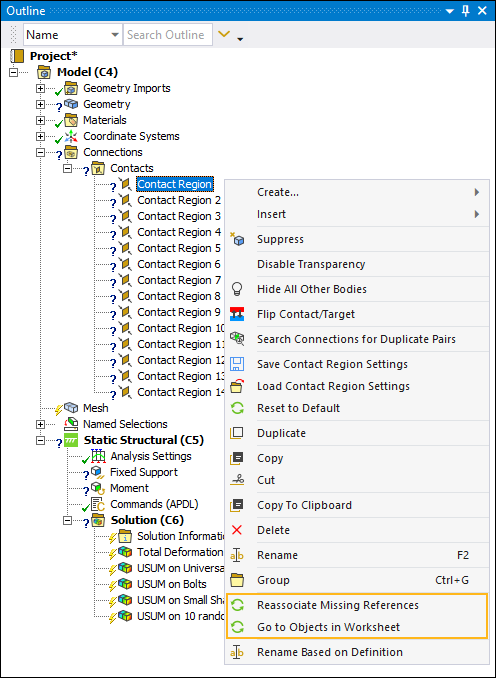
The feature also offers several context (right-click) menu options.
| Outline Options | Worksheet Options |
|---|---|
|
From the Outline, you can:
|
Right-clicking on a row in the worksheet offers the following options:
|
Note: If you use the / options for an unresolved object, the associated data is copied and pasted between sessions and the application will automatically attempt to resolve any scoping.
The application displays reference annotations in the legend as well as highlights on the part(s) in the Geometry window, based on the state of the recovered reference. The application displays matched references display as green, multiple matches yellow, old geometry tessellation in purple, and if no match is available, the reference is drawn in red. Furthermore, the worksheet uses the color scheme to indicate if one or more of the conditions exists, such as the Named Selection, AllFaces, example shown in the table below that displays all three colors. See the Display and Recovery Options topic below for more information about annotations.
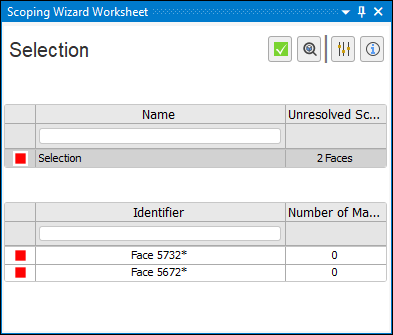
In addition, if a table entry appears with an asterisk, this indicates that the application could not find data associated with the reference. This can be the result of importing an older project, the use of virtual cells, or if you have turned the Use Geometry Based Associativity preference off.
Display and Recovery Options
At the top of the pane, there are options to take corrective action, zoom in on a geometry, or modify display settings, including:
| Option | Description |
|---|---|
|
Settings |
Illustrated below, the Settings drop-down menu enables you to turn annotation display options on and off. This image shows the default display settings.
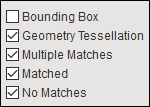
Options include:
|
|
Information |
This option displays a dialog that includes a description of the feature and its capabilities. |
|
Fix All Scoping |
This option automatically corrects all recovered scoping |
|
|
For the currently selected row in the wizard, or an object in the tree, this option zooms in on the body or part that the application has determined was associated with the original scoping. |