


There are various ways to open Ansys Mechanical and specify a desired analysis system.
Opening Mechanical from the Start Menu
To open Mechanical independently of Workbench and create an analysis system from within the application:
Open the Ansys 2024 R2 menu of the Start Menu and select .
Open an existing project, import a geometry, or open a new Mechanical project without a geometry. Supported project file types include *.mechdb, *.dsdb, *.mechdat, and *.mechpz. When opening Mechanical independently, *.mechdb is the default file type and *.mechpz is the archived file for this type.
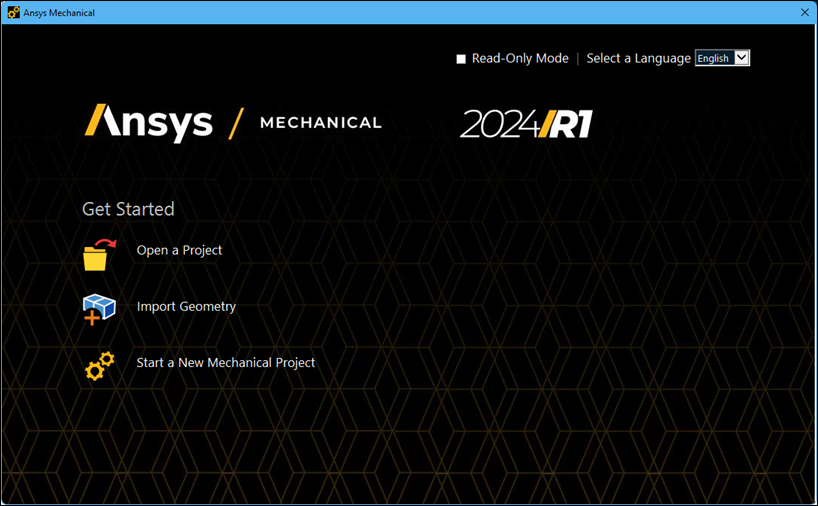
Note: The above dialog is the first instance of the pane for a newly installed version of the application. The color scheme of this dialog can be changed using the Options dialog preferences of the Style category of the UI Options group, you can change the color theme, from Dark to Light, or Classic.
If you do not open an existing project, select a desired analysis type from the Analysis drop-down menu of the Home Context tab (Insert group) for your new project.
Important: After a new installation of the product, open Mechanical independently. Note that preferences from your previous installation are not automatically migrated. But, when you subsequently open the Workbench application, preferences from your previous installation are automatically migrated. As a result, the application overwrites any previously applied options or preferences from opening Mechanical independently.
Opening Mechanical from Ansys Workbench
See the Working Through a System section of the Workbench User's Guide for the steps and background to create an analysis system in Workbench and open Mechanical. That section outlines the necessary workflow and supported analysis types.
Geometry Not Required
When configuring your analysis in Workbench, it is not necessary that you include geometry. You can simply skip the step of specifying a geometry and open Mechanical by double-clicking a supported cell, such as the Model cell, or right-clicking on a supported cell and selecting the option. This can be done to create a template for use with multiple geometries.
Opening Mechanical from the Command Line
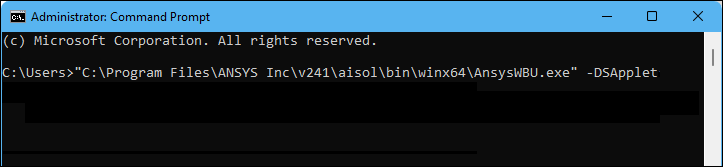
Based on the platform, either Windows or Linux, enter (copy and paste) one of the following in the Command Prompt pane and press Enter to run the command. The example commands shown below illustrate a file path of a typical installation location. Change the details of the file path to the specifics of your installation directory and add arguments as desired.
- Windows
"C:\Program Files\ANSYS Inc\v241\aisol\bin\winx64\AnsysWBU.exe" -DSApplet
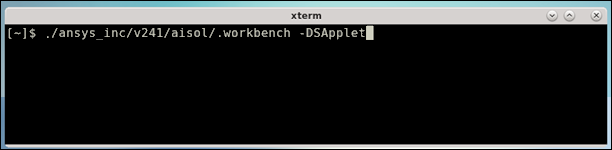
- Linux
./ansys_inc/v241/aisol/.workbench -DSApplet
Open an existing project, import a geometry, or open a new Mechanical project without a geometry. Supported project file types include *.mechdb, *.dsdb, *.mechdat, and *.mechpz. When opening Mechanical independently, *.mechdb is the default file type and *.mechpz is the archived file for this type.
Note: Once you select an option, this window disappears.
If you do not open an existing project, select a desired analysis type from the Analysis drop-down menu of the Home Context tab (Insert group) for your new project.
Command Line Arguments
The following are supported Command Line arguments. These arguments are case Insensitive.
| Argument | Description |
|---|---|
-AppModeMech | Skip Start page. |
-script "script_filename" | Run a script from a file. |
-file "filename" | Open a Mechanical database or import a geometry file (see examples below). When
added, -file must be the
last argument in the command line. |
-b | Run a script in batch mode. |
-x | Run a script with auto exit. |
-ScriptArgs | Pass arguments from the Command Prompt to the script as
a comma separated list, for example, -ScriptArgs "arg1, arg2,
arg3". See the example below. |
-readonly | Open an existing Mechanical database in read-only mode. |
-language fr | Specify the displaying language as French. Similarly, set it to en-us for English, de for German, ja for Japanese (Windows platform only), and zh for Chinese (Windows platform only). |
Script Examples
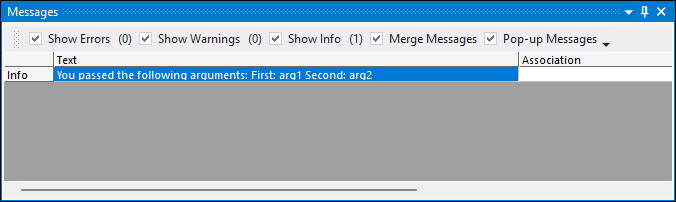
"%AWP_ROOT241%\aisol\bin\winx64\AnsysWBU.exe" -DSApplet -AppModeMech -script "D:\script_example1.py"
"%AWP_ROOT241%\aisol\bin\winx64\AnsysWBU.exe" -DSApplet -AppModeMech -b -script "D:\script_example1.py"
"%AWP_ROOT241%\aisol\bin\winx64\AnsysWBU.exe" -DSApplet -AppModeMech -x -script "D:\script_example1.py"
"%AWP_ROOT241%\aisol\bin\winx64\AnsysWBU.exe" -DSApplet -AppModeMech -file "D:\script_example1.mechdb"
"%AWP_ROOT241%\aisol\bin\winx64\AnsysWBU.exe" -DSApplet -AppModeMech -script "D:\script_example1.py" -file "D:\Example1.agdb"
"%AWP_ROOT241%\aisol\bin\winx64\AnsysWBU.exe" -DSApplet -AppModeMech -script "D:\script_example1.py" -ScriptArgs "arg1, arg2"
  for this example, the script file script_example1.py can use the ScriptArgs by referencing args.
For example, using the ScriptArgs example above with the script
file shown below...

You receive this message in the application.
See the Scripting in Mechanical Guide for additional information about how to write and/or record Python scripts in Mechanical.
Note
- Backwards Compatibility
Ansys 2024 R2 was tested to read and resume databases from the previous four release versions. However, the application can generally read and resume even older databases. If you encounter a database that you cannot directly read into the current version, first resume it in a supported version, save it, and then resume that database in the current version.
Mechanical does not enable you to resume a database (.dsdb and .wbdb) file created in Release 11.0 or earlier that contain items that convert into Mesh or Mechanical systems. To import these files, first import them into a version between Release 12.0 and 2019 R2, save the file, and then resume the project in your most current version.
- Unit System Behavior
Whenever you open a project from a previous session, the unit system previously specified automatically becomes the active system in the new Mechanical session. A good habit is to verify the active unit system whenever you open a project.