


This multi-part basic tutorial can be completed independently. You can use the oSP3D database that you created by following the previous basic tutorials or load the oSP3D database sos_demo.sdb in the Examples folder. This tutorial consists of procedures for:
To export scalar data to optiSLang:
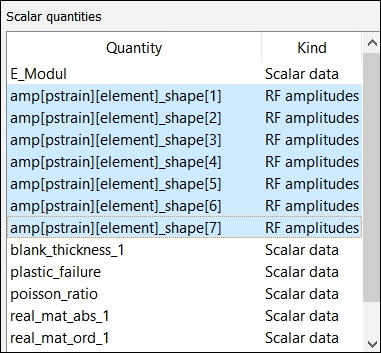
Select the scalar quantities to export.
Select > > .
For Input file, open the file optislang_bin_file.bin in
oSP3D_examples\lsdyna\metal_forming__eroded_elements\samplingNote: oSP3D modifies an existing optiSLang BIN file because it is not aware of all features of this file and cannot create one from start to finish.
For Output file, specify the file path and name to which to save the file and click .
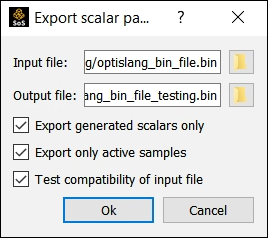
Descriptions follow for the three check boxes:
- Export generated scalars only
Selecting this check box excludes exporting once again scalar data produced by a DOE in optiSLang previously imported from a BIN file. For more information, see Importing Field and Scalar Data.
- Export only active samples
Selecting this check box excludes exporting deactivated scalar data objects, such as having deactivated designs with too many eroded elements. You use the central data table to activate and deactivate individual data objects.
- Test compatibility of input file
Selecting this check box checks whether previously imported scalar data objects are compatible with the selected input BIN file.
Once settings are finalized, click .
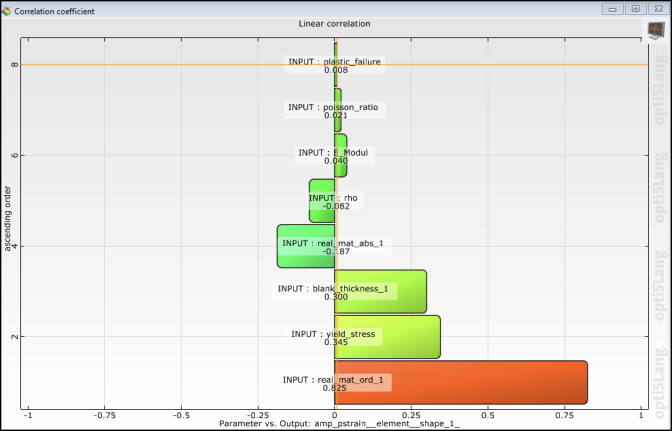
Use a Postprocessing node in optiSLang to open the output BIN file and analyze the exported scalar data.
To export scalar data in CSV format:
Select the scalar quantities to export.
Select > .
For Output file, supply the file path and name to which to save the file and click .
For this example, you can accept the defaults for all other options.
Click .
The image shows CSV output of scalar data opened in Excel. There is one column for each scalar data quantity. The first column denotes the design identifier.

To export field data objects in CSV format:
Select the field data objects to export.
Select > > .
For Output file, supply the file path and name to which to save the file and click .
Click .
The image shows CSV output of field data objects opened in Excel. There is one column for each field data object. The first header row denotes the quantity identifier, and the second header row denotes the design identifier.
