The 2D to 3D option allows you to convert 2D or surface blocking to 3D. The following options are available:
- MultiZone Fill
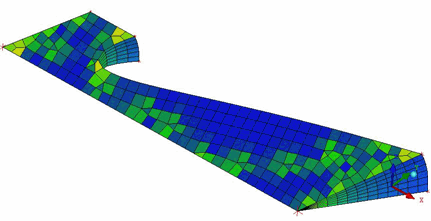
The MultiZone Fill option converts surface blocking into 3D blocking. This requires a closed volume(s) of structured and/or unstructured surface blocks. It can produce a structured blocking if all the surface blocks are structured 4 sided blocks, otherwise unstructured or swept blocks may result.
The following options are available for the MultiZone Fill Method.
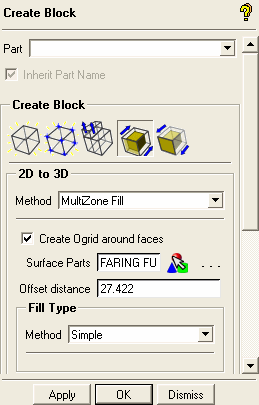
- Create Ogrid around faces
allows you to add Ogrid layers on the selected parts.
Note: When using this method for blocking a model with a floating internal volume, this method has difficulty connecting the internal and external volumes and the internal volume may merely be superimposed within the outer volume. Splitting the model with a connecting plane will allow a topological connection and solve this problem.
- Surface Parts
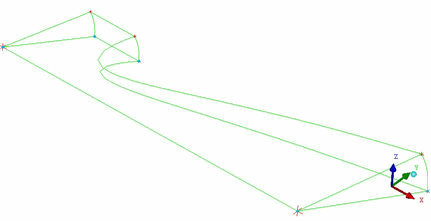
allows the selected parts to be marked for Ogrid layer creation. These parts can be default selected by setting prism parameters in the Part Mesh Setup parameters menu. The other prism settings such as initial height, ratio and number of layers can also be set. You can then either accept the default selection here or add/remove parts as desired. The number of layers will be constant throughout a boundary layer, but varying the initial height will affect the total height above those surfaces.
- Offset distance
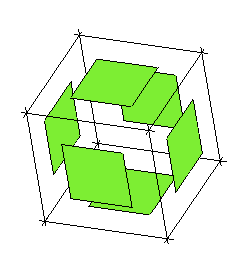
specifies the height of the Ogrid boundary layer calculated from the Part Mesh Setup parameters for height, ratio, and number of layers set for individual parts. If the Part Mesh Setup parameters are not set, the offset distance will be calculated from the Global Prism Parameters. The value displayed is the average height calculated, however, the Ogrid boundary layer will be created based on the offset calculated for each individual part. For example, in Figure 334: Variable Ogrid Height, the initial height on the highlighted surface was set to half the height of the other surfaces.
If you override this calculated height, it will apply to the entire Ogrid. It will prioritize the initial height and ratio and adjust the number of layers to fit the user-specified total height.
Note: The number of layers must be constant for the entire Ogrid layer, if you set varying numbers of layers, the greatest will be used.
Note: The variable Ogrid height affects the initial Ogrid generation to make the process more automatic but Multi-zone builds an editable blocking with flexible vertices. So, any edge length, including Ogrid heights, can easily be changed interactively.
- Fill Type
- Simple
creates a simple free block or volume region. This saves time on complex models by not attempting to decompose the volume into mapped or swept blocks. This is recommended for external aerodynamics applications.
- Swept
uses algorithms which resolve swept configurations better.
- Advanced
uses algorithms which can decompose the volume into a combination of mapped, swept and unstructured blocks. It automatically imprints free faces to aid with sweeping, etc. This will give a result similar to the Multi-zone Method found in Ansys Meshing. Some work decomposing the geometry or surface blocking beforehand can improve the results.
Note: Behind the scenes several possible algorithms are run to create the 3D blocking. One such algorithm is similar to converting each surface block into one element, with Mapped blocks converted into quads; then in an operation similar to the Hex dominant mesher, the volume is filled with hexa elements. If this is successful, then these are converted back into 3D blocking to replace the original 2D surface blocking. Other algorithms use the mapped side mesh to guide the sweeping of unstructured faces into swept blocks (similar to the Cooper tool). Any remaining volumes are simply declared as unstructured blocks and can be filled with one of the bottom up options, including Tetra, Hexa Core or Hexa Dominant mesh.
- Translate
allows you to specify the X, Y and Z distance to extrude the 2D Block. When Inherit Part Name is enabled, the 3D block inherits the blocking material (part) of the original 2D block.
Unstructured 2D blocks will be converted to Swept blocks on translation.

- Rotate
allows you to extrude a 2D Block by rotation. When Inherit Part Name is enabled, the 3D block inherits the blocking material (part) of the original 2D block.
Unstructured 2D blocks will be converted to Swept blocks on rotation. Degenerate (axis-collapsed) swept blocks can also be handled. The degenerate 7–node hexa elements on the axis can be converted to regular elements using the Write 7–node-hexas as pyramids option in the Hexa/Mixed Meshing Options DEZ (see Hexa Meshing).
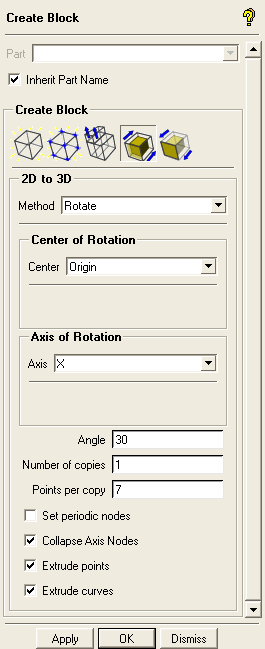
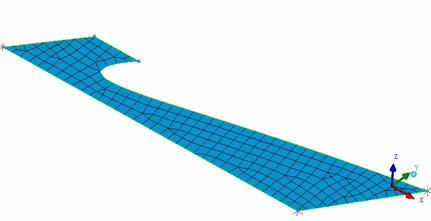
Figure 335: 2D to 3D Rotate for a 2D Unstructured Block shows an example of a 2D unstructured block extruded using the 2D to 3D rotate option using an Angle of 30 degrees, Number of copies set to 1, and Points per copy set to 7 as shown in the DEZ above.
- Center of Rotation
specifies the center of rotation. The Origin option allows you to rotate the block in the specified axis direction about the origin (0,0,0). The User option allows you to rotate the block about a specified point.
- Axis of Rotation
specifies the axis or vector about which to rotate the block.
- Angle
specifies the angle of rotation for each block copy.
- Number of copies
specifies the number of copies of blocks.
- Points per copy
specifies the number of nodes on the extruded edges.
- Set Periodic Nodes
defines periodicity at both the geometry and blocking level, and will override any existing periodicity information set under Global Mesh Setup > Set Up Periodicity.
Note: For periodic nodes, the Angle value must divide 360 degrees an integer number of times, with zero remainder.
- Collapse Axis Nodes
allows you to collapse all the nodes lying on the axis of rotation.
- Extrude points, Extrude curves
when enabled, the original 2D geometry gets converted to 3D as well. Points are extruded to 3D curves and curves are extruded to 3D surfaces.
Note: The node to point association must be defined before extrusion in order for points to be extruded to produce 3D curves. Similarly, the edge to curve association must be defined for the curves to be extruded to 3D surfaces.