


After you have created a volume mesh, you can add the Extrude Volume Mesh task to your workflow. This task allows you to extend the volume mesh out beyond the original domain using one or more co-planar boundaries.

Provide a Name, or use the default name.
Select a boundary face from the list. The extrusion will be performed perpendicularly to the selected boundary, so if you select multiple boundaries, they all must be co-planar. A preview box appears in the graphics window, the size of which is based on the values you provide in the task.
Note: The preview box is available only for selected faces whose normal is aligned with the Cartesian coordinate.
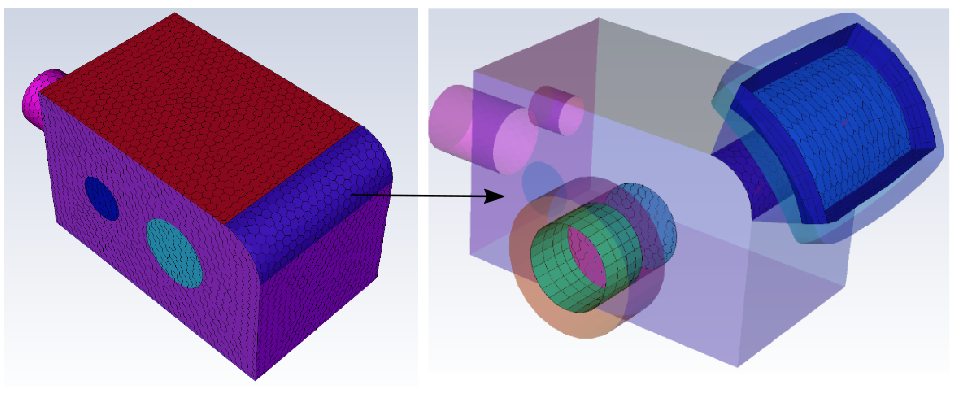
Extrusions can be applied to both planar and non-planar surfaces. For non-planar, curved, surfaces, the extrusion process is performed normal to the selected surfaces.
Note: Periodic or shadow face zones cannot be extruded. If you select such zones for extrusion, Fluent provides a warning and automatically assigns such zones to type '
wall' so that you can complete the extrusion task.Use the Filter Text option in the drop-down to provide text and/or regular expressions in filtering the list (for example, using *, ?, and []). You can also choose the Use Wildcard option in the drop-down to provide wildcard expressions in filtering the list. When you use either
?or*in your expression, the matching list item(s) are automatically selected in the list. Use^,|, and&in your expression to indicate boolean operations for NOT, OR, and AND, respectively. See Filtering Lists and Using Wildcards for more information.Choose an extrusion Method based on the specified Total Height value (the overall height of the extrusion) or based on the specified First Height value (the height of the first layer of the extrusion).
Specify whether the volume extrusion is derived from normal-based faceting, or direction-based faceting. When Normal Based is enabled (the default), the volume extrusion is based on normal-based faceting, such that for each layer, the normal is calculated and smoothing occurs, and is suitable for non-planar surfaces. For planar surfaces, disable this option to use a direction-based approach where the direction is chosen based on the average normal of the entire surface, and is used to extrude all layers.
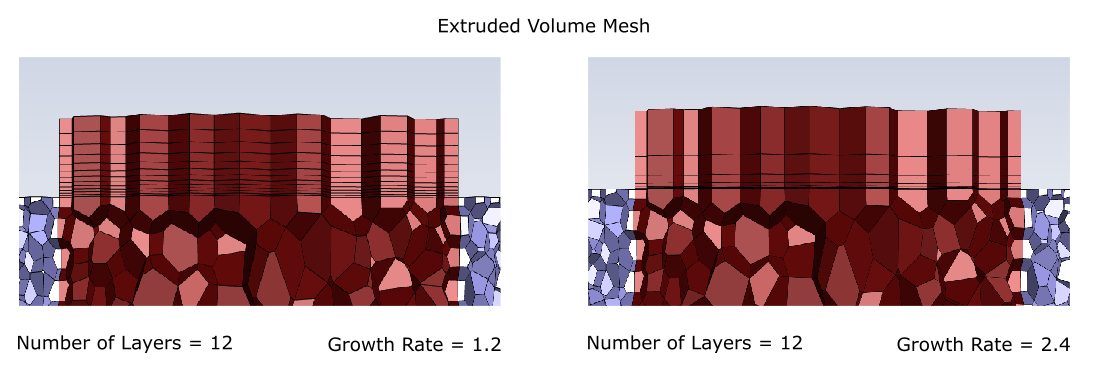
Specify the Number of Layers for the extrusion.
Specify the Growth Rate for the extrusion. For example, a growth rate of 1.2 will expand each layer of the extrusion by 20 percent of the previous length.
The extrusion process uses these parameter values and geometrically grows the volume mesh according to the following relation:
where
 is the Total Height for N
layers,
is the Total Height for N
layers,  is the First Height, R is the
Growth Rate, and N is the Number of
Layers.
is the First Height, R is the
Growth Rate, and N is the Number of
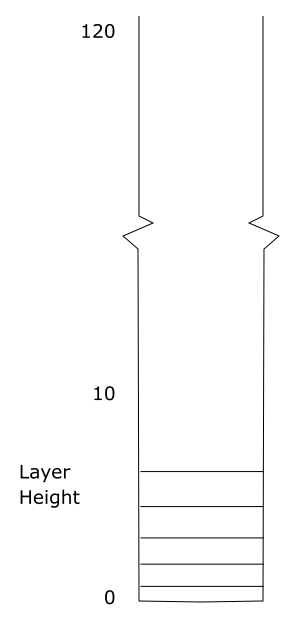
Layers.The layer heights for the extrusion are calculated in a geometric fashion, as in:
Click Advanced Options to access additional controls prior to performing this task. Options include:
Select a Growth Pattern, where the choices provide a visual indication of the pattern of growth for the volume mesh extrusion.
Keep the default selection for the Merge With Adjacent Region prompt: as needed.

Note:
Volume mesh extrusions performed on shapes other than rectangles and squares (such as triangles, pentagons, hexagons, etc.) will automatically merge all side faces irrespective of the original faces, and irrespective of this property setting.
Fluent splits the side adjacent surfaces only by 90 degrees and merges with the adjacent zones accordingly. For other shapes, however, side faces are not split. As a workaround, you can create a custom task to split the side surfaces for specific cases.
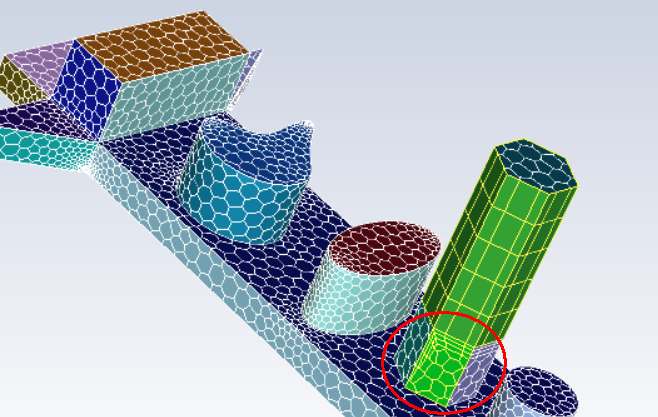
Using the task based display (
 ) for this task displays the boundary zones of the mesh along with the
adjacent cell zones of the extruded face.
) for this task displays the boundary zones of the mesh along with the
adjacent cell zones of the extruded face.Extruding cylindrical surfaces too far may create invalid meshes. If your cylindrical surface extrusion exhibits undesirable skewness or otherwise is invalid, reduce the total height of the extrusion and perform the operation again to see if results improve.
You cannot extrude the volume mesh on zones that are already connected to cells, or when the adjacent face zone is not a structured quadrilateral face zone.
When Merge With Adjacent Region is turned off, and the volume mesh is extruded, Fluent creates the additional cell zones with names based on your extrusion task Name. For example, if you create an extrusion task named "my_extrusion_task" on two selected boundaries, then the newly created cell zones will be named "my_extrusion_task-1" and "my_extrusion_task-2" and so forth. A summary of the cell zones is provided upon volume extrusion.
Click Extrude Mesh. The extruded mesh will appear in the graphics window.
If you need to make adjustments to any of your settings in this task, click Revert and Edit, make your changes and click Update, or click Cancel to cancel your changes.
