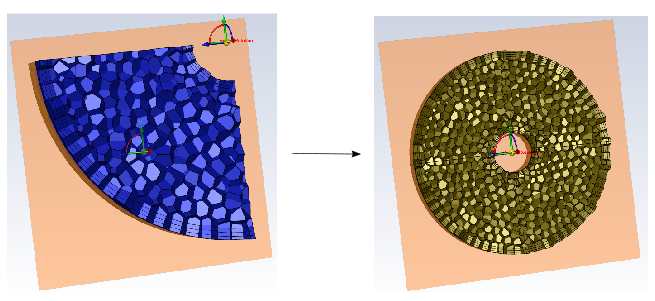
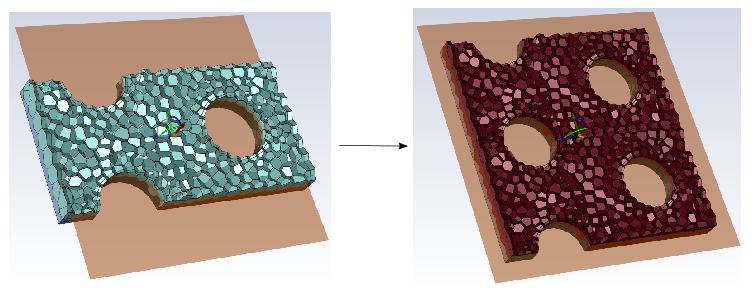
After you have created a volume mesh, you can add the Transform Volume Mesh task to your workflow. This task allows you to create and apply translational or rotational transformations to your volumetric mesh.
Provide a Name, or use the default name.
Select the Type of transformation: either Translational or Rotational. The default name changes upon the selected type (
translate_copy_1for translational transformations, orrotate_copy_1for rotational transformations).When periodicity is detected in the model, the Method option is available to help you provide additional settings based on periodicity. By default, the Method is set to Automatic - using existing periodicity. In the case of rotational periodicity, the angle, origin, and vector components are automatically extracted from the stored periodicity. Additionally, the number of copies is automatically set to produce a full 360 degree model. In the case of translational periodicity, the translational shift vector and distance are automatically assigned.
Note: The Automatic - using existing periodicity option is not available if there are multiple periodic zones.
Otherwise, use the Manual option to provide your own values to these settings for your rotational or translational transformations.
Select a mesh object from the list.
Use the Filter Text option in the drop-down to provide text and/or regular expressions in filtering the list (for example, using *, ?, and []). You can also choose the Use Wildcard option in the drop-down to provide wildcard expressions in filtering the list. When you use either
?or*in your expression, the matching list item(s) are automatically selected in the list. Use^,|, and&in your expression to indicate boolean operations for NOT, OR, and AND, respectively. See Filtering Lists and Using Wildcards for more information.For Translational transformations, specify values for the Translational Shift in the X, Y, and Z directions.
For Rotational transformations, specify values for the Angle as well as the Rotation Axis Origin and Rotation Axis Direction in the X, Y, and Z directions.
For the Create a Copy and Translate? prompt:
Choose yes if you want to make a copy of the volume mesh and apply the translation to the copy. If this option is selected, you can make the appropriate selection for the Number of Copies? prompt.
Choose no, only translate to apply the volume mesh translation directly to the original volume mesh.
For the Create a Copy and Rotate? prompt:
Choose yes if you want to make a copy of the volume mesh and apply the rotation to the copy. If this option is selected, you can make the appropriate selection for the Number of Copies? prompt.
Choose no, only rotate to apply the volume mesh rotation directly to the original volume mesh.
When periodicity is detected, and your are automatically using the model's periodic settings, use the Merge the cell and face zones? prompt to choose whether or not to merge cell and face zones during the volume mesh transformation to avoid any zone duplication.
Note: The Merge the cell and face zones? option is not available when the Manual option is selected for the Method.
Use the Rename cell and face zones? prompt to choose whether or not to rename the cell and face zones during the volume mesh transformation.
When set to yes, the new cell zone name is created with an underscore ("_") and its copy number appended to the original zone name (e.g.,
my_zone_1,my_zone_2, etc.).When set to no, any copied cell or face zones (e.g.,
my_zone,my_zone_1,my_zone_2, etc.) will be created with names that use colons (":") and the copy's ID (e.g.,solid,solid:<id-1>,solid:<id-1>:<id-2>, etc.).Click Preview Transformation to see a preview of what the volume mesh transformation will look like in the graphics window.
Click Transform Mesh. The transformed mesh will appear in the graphics window.
If you need to make adjustments to any of your settings in this task, click Revert and Edit, make your changes and click Update, or click Cancel to cancel your changes.


