


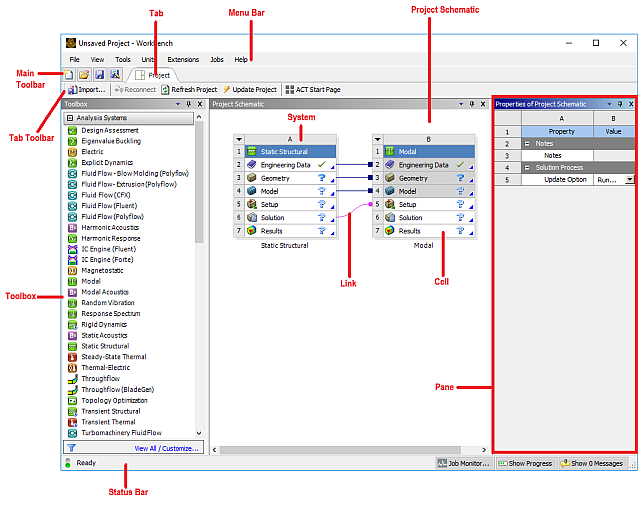
The Workbench graphical user interface (Figure 1.1: The Workbench Graphical User Interface) consists of the Toolbox, the Project Schematic, the Toolbar, and the Menu bar. The most common way to begin work in Workbench is to drag an item, such as a component system (application) or an analysis system, from the Toolbox to the Project Schematic, Alternatively, you can double-click an item to initiate the default action.
You will view your Component Systems and/or Analysis Systems – the pieces that make up your analysis – in the Project Schematic. The Project Schematic will also show all connections between systems. The individual applications in which you work may display separately from the Workbench graphical interface, but the actions you take in the applications will be reflected in the Project Schematic.
Note: By default, Workbench does not come pre-loaded with the FENSAP-ICE Analysis Systems. The installation of the FENSAP-ICE Workbench plugin is required. In Ansys Workbench, select Install Extensions under the Extensions menu bar. Select the FENSAPICE-WB.wbex file located in the installation package ../fensapice/workbench subdirectory. A dialog box appears to confirm the installation of the plugin. Once confirmed, select Manage Extensions under the Extensions menu. Inside the Extensions Manager, check-mark the FENSAP-ICE plugin and right-click to select Load as default. Close the Extensions Manager. The FENSAP-ICE Analysis Systems should now appear in the Workbench Toolbox.