


Creating a Speos system in Ansys Workbench
This page shows the main steps to create a Speos system in Ansys Workbench. The Speos system in Ansys Workbench allows you to create a link between the two software. This link/bridge allows the software to exchange input and output data.
Note: If you need more information on Ansys Workbench functioning and behavior, refer to Ansys Workbench User's Guide.
Note:
As a project cannot mix *.scdoc data and *.scdocx data, a Workbench project created with *.scdoc data
should be recreated after the *.scdoc file conversion to *.scdocx file
For more information, refer to SCDOC File Import.
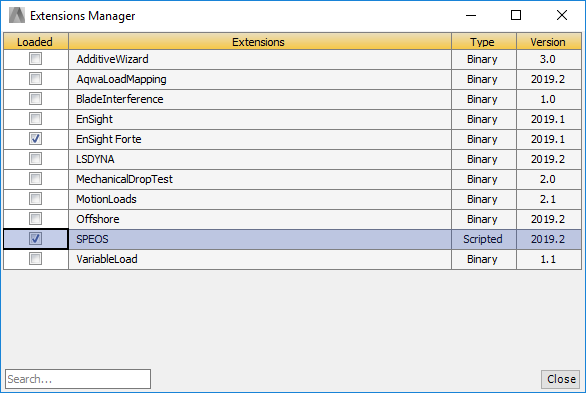
To create a Speos system in Ansys Workbench:
-
From the list, select Speos and click Close to
import the extension in Workbench.
-
If you want to modify the solver to compute the simulation:
_Workbench_Solver.png)
- In the Speos system, select the Simulation Task cell.
- In the Properties panel of the Simulation Task, select the Solver to use between Local (CPU) and GPU
-
To import the Speos project, right-click .
You can select a previously used design (*.scdoc file) or browse to a specific location to retrieve a project.
_Workbench_System_Speos.png) Your geometry and project is imported in Ansys Workbench.
Your geometry and project is imported in Ansys Workbench. -
If you want to import a geometry parameter (like a dimension parameter), double-click the
Geometry cell to open SpaceClaim.
-
Modify a parameter on a geometry.
SpaceClaim proposes you to add the parameter in Ansys Workbench.
_Workbench_Geometry_Add_as_Parameter.png)
-
Click Add as parameter
_Workbench_Add_as_Parameter.png) .
The geometry parameters is linked and imported in Ansys Workbench.
.
The geometry parameters is linked and imported in Ansys Workbench.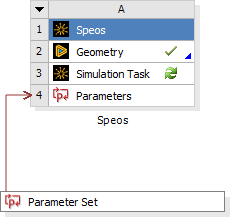
-
Modify a parameter on a geometry.
-
In Speos, define the Speos input parameters to import in Ansys
Workbench:
-
Click the Workbench tab and click Publish
Parameters
_Workbench_Publish_Parameters.png) .
.
-
Click the Workbench tab and click Publish
Parameters
-
In Ansys Workbench, right-click Simulation Task and click
Generate Parameters
_Workbench_Generate_Parameters.png) to import Speos input parameters.
to import Speos input parameters.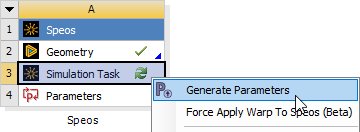
The input parameters are imported into Ansys Workbench. The loop is created between the two software.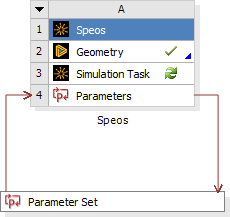
The project is created, you can now interact and adjust parameters directly from Workbench to observe result variation.
Tip: If you need to refresh or modify input data, repeat the procedure from step 6. Modify
input publish parameters and regenerate the import.