


Although some task definition templates are provided by default with the Ansys HPC Platform Services installation, you can create additional templates to suit your simulation needs. A template serves as a framework when defining a project.
To create a template:
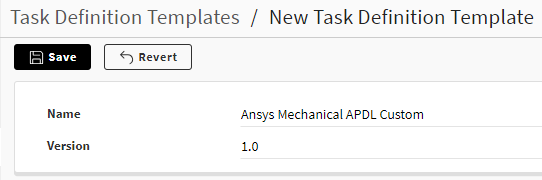
On the Templates page, click . A New Task Definition Template form appears.
At the top of the form, specify a unique Name for the template which identifies its associated application or purpose. Optionally specify a template Version if you wish to implement a process of tracking and managing different versions of the same template.
In the Requirements area, in the Applications section, specify the application to associate with the template by specifying the application's Name and Version. You can add more applications if desired.
In the Resources section, optionally specify default values for the system and hardware settings. Whether you specify default values or not, users will be able to modify these values each time the template is used for a project.
- CPU
Minimum number of CPU cores that an evaluator must have
- Memory
Minimum amount of random access memory (RAM) in megabytes that the evaluator must have (optional requirement)
- Disk Space
Minimum amount of free disk space in megabytes that the evaluator must have (optional requirement)
- Platform
The platform on which the task can run (Linux, Windows, or Any)
- Distributed
Enables distributed parallel processing
HPC Resource Requirements
These settings apply when submitting a job to an HPC cluster:
- CPU per Node
Total number of CPU cores per compute node.
- GPU per Node
Number of GPU accelerator devices per compute node. While the CPU handles most operations for a simulation, it can offload certain time-intensive parallel operations to a GPU for faster performance.
- Exclusive
If set to true, compute resources will be used exclusively by this job and will not be shared with other running jobs.
- Queue
Name of the job scheduler queue.
Custom Requirements
To add a custom requirement to the job requirements, click . Specify a Name for the property as you would like it to appear in the interface, then select the desired format:
- String
A string is a data type that represents text. It is composed of a sequence of characters that can include letters, spaces, and numbers.
- Integer
An integer is a data type used to represent real numbers that do not have fractional values. It is a numerical value that can be positive, negative, or zero.
- Float
A float is a data type that represents a fraction in decimal format.
- Boolean
A Boolean is a data type that has one of two possible values (usually True/False or On/Off).
Optionally specify a default value, list of possible values (for string, float, or integer types), and description for the property.

In the Execution area, specify whether the evaluator will execute the task using a Command or Script.
If Command is selected, enter either the Windows command or Linux shell command to be executed. There are special placeholders or variables, which are defined using a
%syntax, that pass information to the command. Some important placeholders are:%executable%Replaced with the path to the application's executable, like
AnsysFW.exeorrunwb2in the case of Workbench on Windows or Linux, respectively.%file:name_of_the_file%Replaced with paths to input or output files that are defined in the Files area.
If needed, you can also access these placeholders in the command:
%memory%%num_cores%%disk_space%%platform%
Here is a typical command for executing Mechanical APDL (MAPDL):

If Script is selected, click and upload the script to use. To view or edit the uploaded script, click . The script is displayed in an onscreen text editor. To save changes the script, click . To discard your changes, click .
In the Input Files section, use to define the types of input files for which users will be prompted when creating projects with this template.
Name. A name to identify the type of input file (for example, 'MAPDL input file' or 'Mesh or case file').
Path. The file name pattern or file extension if a specific one is required. If you were to specify
*.cas, for example, only files with the .cas extension would be accepted as input. Leaving this field blank gives users the flexibility to choose different types of files.Type. The type of data contained in the file: Binary, Image, or Text. Binary file types store data as a sequence of bytes, some of which may be intended to be interpreted as something other than text characters (for example, a graph), while text file types store data as a sequence of characters in human-readable format.
Required. Specifies that this input file type is required for job submission. A user must select a file when creating a project.
Description. Tooltip text to display for the input file type when a user hovers over the information icon
 in the project creation wizard.
In the Output Files area, use Add Output File to add default output files for projects created from the template.
Name. A name to identify the type of output file. This could be the file extension such as 'rst' or a common name such as 'transcript'.
Path. The filename to which the output file is written.
In paths for both input and output files, wildcard characters are supported. This allows Ansys HPC Job Manager to read and store files with file paths varying in different runs, such as random directory names, file names, and file extensions. You can use the common asterisk (*) and question mark (?) wildcard characters to collect solver log files, images, error logs, and other files that do not have fixed names.
In the path file*.err, for example, an asterisk is used to recursively search subdirectories to collect all error files that start with file.
Type. The type of data contained in the file: Binary, Image, or Text. Binary file types store data as a sequence of bytes, some of which may be intended to be interpreted as something other than text characters (for example, a graph), while text file types store data as a sequence of characters in human-readable format.
Collect. Retrieves the current state of the file at regular intervals and uploads it to the server so that the latest information is available for clients to fetch.
Monitor. Specifies whether a file can be opened while the evaluation is running. For a solver job, rather than being blind to what is going on during the evaluation, selecting this check box for the solver log file (solve.out, for example) provides you with live monitoring capabilities. While the evaluation is running, you can open the solver log file to see solution progress and how far it is from reaching convergence. Once the evaluation is completed, the solver log file is deleted.
Description. Optional description of the output file.
When all template settings have been specified, click . The template is added to the list of templates on the Templates page.
By default, only you can access, edit, and use the template. To make it available to other users, see Managing Access to a Template.