


To begin configuration, run the ARC Configuration application on the machine that will serve as the cluster head node, or master node. You can configure other nodes from the master node while using the application.
The instructions that follow focus on the deployment of a Windows cluster, but could be applied to the deployment of a Linux cluster as well.
In this section:
Launching the ARC Configuration Application
Sign in to the master node as an Administrator.
On the master node, launch the ARC Configuration application as follows:
On Windows, select .
You can also launch the application manually by double-clicking the following executable:
[RSMInstall]\ARC\bin\arcConfigConsole.exe
On Linux, run the following script:
<RSMInstall>/ARC/Config/tools/linux/arcconfigui
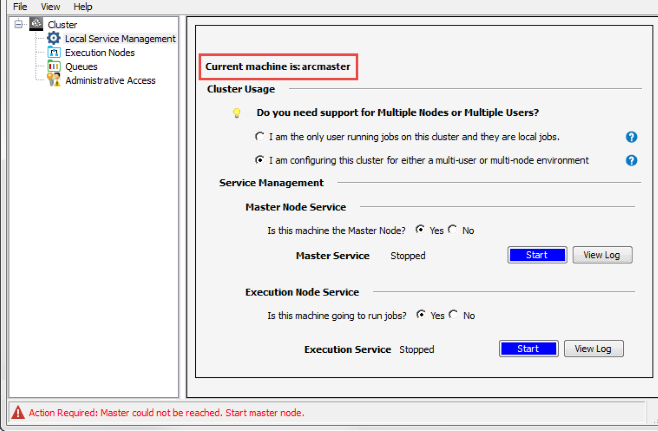
When launched, the ARC Configuration application will display the hostname of the current machine:
Defining Cluster Usage and Node Usage
In the Cluster Usage section, specify how the cluster will be used, and by whom:
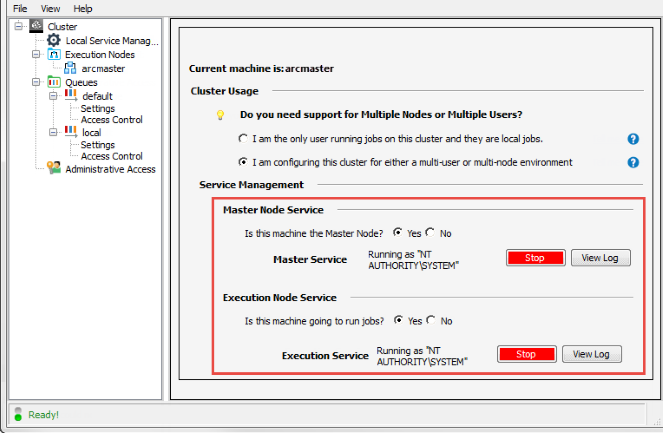
I am the only user running jobs on this cluster and they are local jobs. Jobs will be submitted, scheduled and run on the same machine (the local machine), and only you will be submitting jobs to this machine (using the Localqueue). The existing localhost configuration is an example of a single-node, single-user cluster.I am configuring this cluster for either a multi-user or multi-node environment. Jobs will be submitted by one or more users to a specific machine on the network. The machine specified as the master node (cluster submit host) may also serve as an execution node, or have additional execution nodes associated with it. Jobs may run on the master node or on any of the execution nodes depending on the queue chosen. In the Master Node Service section, select to specify that the current machine is the master node, then click to install the Master Node Service on this node. When you do so, any execution nodes and/or queues previously associated with this node are displayed in the tree view.
In the Execution Node Service section, specify whether or not the current machine will be used to run jobs. If you selected , click to install the Execution Node Service on this node. When you do so, the node is added to the Execution Nodes list.
Note that you can also use the ARC Configuration application to stop running ARC services when desired:
Defining Execution Nodes
Note: You cannot define execution nodes unless the Master Node Service has been started on the master node. This is done on the Cluster Management page.
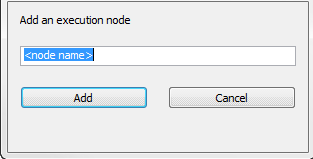
If you specified that the Master node is going to run jobs, go to step 4 to specify execution properties for this node. Otherwise, to add nodes to the cluster, right-click Execution Nodes in the tree and select .
In the ARC Configuration Manager dialog box, enter the hostname of the machine that you want to add as an execution node, then click .
Under Execution Nodes, select the node that you want to define:
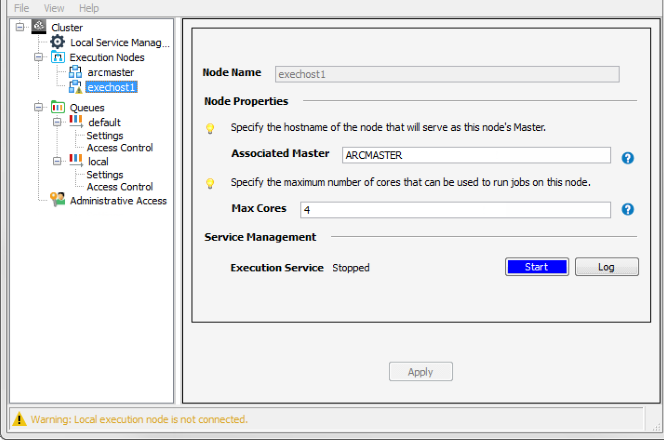
Click to install the Execution Node Service on the selected node (if not already started).
Define the node's properties:
Associated Master For successful job submission in a multi-node cluster, you must configure each execution node to report to the master node. This is achieved by specifying the hostname or IP address of the Master node (cluster submit host) in this field.
The master node is where the ARC Master service is installed. This service dispatches jobs to the execution nodes.
Max Cores Use the Max Cores setting to reduce the number of cores that can be used by ARC jobs on this node. By default, all available cores can be used. Click to update the node with the properties that you have set.
Repeat these steps to add more nodes to the cluster if desired.
Defining Queues
When users want to submit a job to a cluster, they must select a queue for the job. Each queue has specific nodes associated with it, enabling you to control where and how jobs are run.
The ARC has a built-in local cluster queue for submitting jobs
to the local machine, and a default cluster queue that can submit
jobs to any of the execution nodes. You can create additional queues that submit jobs to
specific execution nodes, or have custom properties.
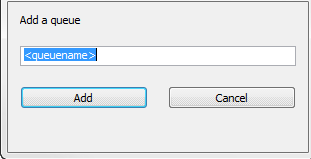
To create a cluster queue, right-click Queues in the tree view and select .
In the ARC Configuration Manager dialog box, enter a name for the queue in the edit box, then click .
Select the newly added queue in the Queues list:

Define the queue properties:
State Set the current state of the queue
Active: The queue state is Enabled, and the current time falls within the Active Time Range.
Suspended: The queue can accept jobs, but jobs will remain queued.
Disabled: The queue will not accept jobs.
Priority The priority that this queue's jobs will be given in relation to other queues. It is common to create a higher priority queue for smaller jobs so that they are processed before running large jobs that tie up computing resources for a long period of time. A value of -254 is the highest priority, while 254 is the lowest priority. Set Active Time Range?
Start Time/End Time
If Set Active Time Range is disabled, jobs can be submitted to this queue 24 hours a day.
If Set Active Time Range is enabled, you can specify a time range in which jobs can be submitted to the queue. To define the range, specify a Start Time and End Time.
Note:Jobs cannot be submitted to the queue at all if its State is set to Disabled.
If a time range has been set, and the current time does not fall within that range, the Current queue status displayed will be Closed.
Limit Concurrent Jobs?
Max Concurrent Jobs
If Limit Concurrent Jobs is enabled, you can specify the maximum number of jobs than can be run at one time from this queue. Click Apply.
Go to the tree and select the queue’s Access Control option:
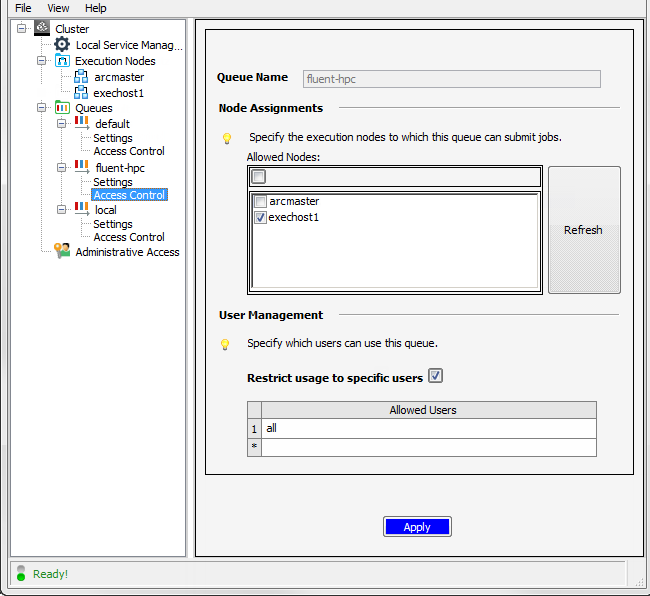
To specify the execution nodes to which this queue can submit jobs, enable the check boxes of the desired nodes in the Allowed Nodes table. If you have recently added a new execution node to the cluster, and do not see it in the list, click Refresh to update the list.
By default, all users who have access permission on the cluster nodes will be able to use this queue. To restrict queue usage to specific users, enable the Restrict usage to specific users option, then select all in the table and replace it with the username of the first user to whom you would like to grant access. Continue adding usernames to the list, one username per row.
Click Apply.
Repeat the above steps to define more cluster queues if desired.
Defining Administrative Access
To specify the users and groups who are allowed to make cluster configuration changes (via the master node), select Administrative Access in the tree.
By default, any user with
adminaccess on the master node, as well as members of the RSM Admins group, have permission to make cluster configuration changes: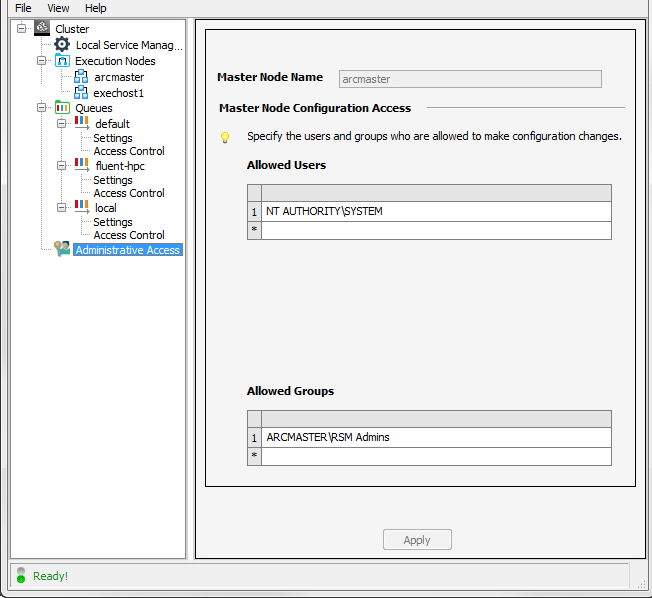
To restrict configuration access to specific users or groups, use the Allowed Users and Allowed Groups tables to specify the desired user accounts and group names.
Click Apply.
Caching Credentials for Cluster Job Submission
In a multi-node Ansys RSM Cluster (ARC), you can use the Cache Password action to cache the password for the currently logged-in user account. This will allow RSM to easily access machines in the cluster when this account is used to log in to the cluster.
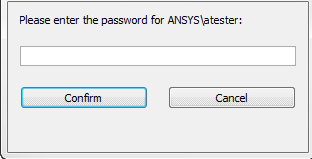
To cache the password for the current user account:
Right-click Administrative Access in the tree, then select .
Enter the password that you want RSM to use when the cluster is accessed with the current user account, then click :
Note: If you want RSM to use a different account to log in to the cluster, you will need to cache the password for that account using the arccredentials command instead. For more information, see Caching Credentials for Cluster Job Submission (arccredentials)
Refreshing the View During ARC Configuration
When using the ARC Configuration application, you can refresh the view at any time by selecting > . This pulls in information from any nodes or queues that have been added or edited via other means. For example, if you added a cluster queue using the command line, refreshing the view in the ARC Configuration application will display that queue in the Queues list.
To set up an automatic refresh that occurs at a regular interval, select > .