


Diagnosing Failed Contact Matches
If a contact match fails, the Contact Match object may be in
the "Ignored" state in the Tree Outline
( ), or a
warning or error message might be displayed.
), or a
warning or error message might be displayed.
For a description of the various contact match states, see Understanding Mesh Connection and Contact Match States.
To diagnose a failed contact match:
If necessary, use the Filter to identify any contact matches that are in the "Ignored" state.
In the Outline, click the drop-down menu and select .
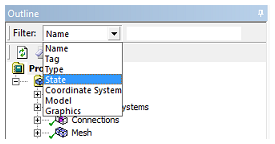
In the adjacent drop-down menu, select .
If the contact match is in the "Ignored" state, then display the associated error message:
In the Tree Outline, select the Contact Match object.
In the Details view, click Click to Display to display the associated error message.
You can use the Filter to identify contact matches that are in the "Ignored" state. However, if a contact match is in an error state, it cannot be filtered in the tree.
For each error message, take corrective action:
If the error message... Do this... Provides "Problematic Geometry" information Right-click the error message and select .
The geometry that is responsible for the message is highlighted in the Geometry window.
Any error message that is related to a specific contact match will be associated with the secondary geometry.
Right-click the problematic bodies and select > .
All contact matches that are attached to the problematic geometry are highlighted.
Review the tolerances and mesh sizes associated with the highlighted contact matches.
For more information, see Correcting Contact Match Errors.
Provides "Go to Body "information Right-click the error message and select .
The object that is responsible for the message is highlighted in the Details view.
Review the tolerances and mesh sizes associated with the highlighted body or bodies.
For more information, see Correcting Contact Match Errors.
This action highlights all contact matches attached to the problematic geometry.
Provides "Go to Object" information Right-click the message and select .
The corresponding Contact Match object that is at issue becomes active in the tree.
Verify that all of the associated properties are properly defined.
Correcting Contact Match Errors
Contact match errors may occur due to tolerance issues or mesh size differences. Automatic contact match detection can result in undesirable contact matches. Therefore, if you used this method to apply the contact matches, you should verify that the failed contact match is necessary before correcting the error.
If there is a tolerance error, verify that the Tolerance Value is correct.
If the distance between the "Primary" and "Secondary" bodies is greater than the Tolerance Value, then increase the tolerance.
Create a named selection for the failed contact matches that should have the same mesh size:
Select all of the failed contact matches, right-click, and select .
A named selection is created for each failed contact match.
Select the named selections that should have similar mesh size, right-click, and select .
When choosing named selections, you should consider the location of the contact matches in the assembly, and the mesh size in the regions surrounding those contact matches.
Define the mesh size for the faces in the named selection:
Right-click the Mesh object and select > .
In the Details view, set the Scoping Method to , and then select the named selection that you created.
Define the mesh sizing by modifying the settings in the Definition group as needed.
For more information about the face sizing settings, see Descriptions of Local Sizing Control Options.
Right-click the Mesh object and select .
The base mesh is regenerated with the face sizing control.
Right-click the Mesh Edit object and select .
The contact matches are regenerated.