


Conditions can be used to control whether and how an integration node executes.
For a detailed tutorial, see Conditional Execution in the optiSLang Tutorials.
Basic Conditions
The execution of the node can be controlled in case a predecessor failed (or was itself skipped). You can set whether the node is skipped or executed.
To access these settings, double-click the node and switch to the Conditional Execution tab.
Select one of the following options:
: The node will not be executed. The workflow continues after the node.
: The node will be executed.
: The node execution depends on the project settings.
Click .
Expression Conditions
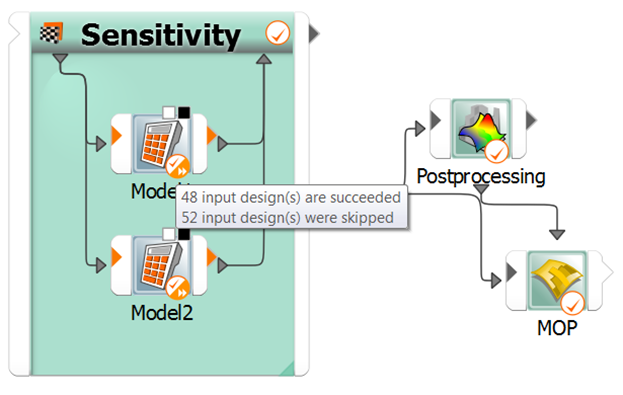
You can control the execution of individual designs by creating one or more conditions (by using conditional operators) in the Conditional Execution tab Expression table. These conditions can depend on various actor inputs (slots and design values including parameters, responses from previous actors, criteria) and are dynamically evaluated during project runs. They must produce a boolean result indicating whether the actor execution should proceed (true result) or should be skipped (false result).
Setting the Tab Visibility
If the Conditional Execution tab is not visible:
Click ![]() and select the
check box.
and select the
check box.
Or:
From the menu bar, select > .
Switch to the Advanced tab.
From the Conditional execution tab visibility list, select .
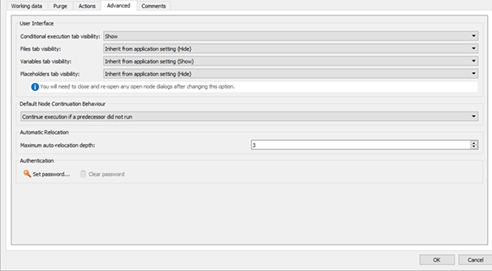
Click .
User Interface Icons
If conditions are enabled on the node, the  icon is displayed.
The conditional execution state of node/system is shown by a progress state icon.
Using the Enabled State Slot
An additional way to conditionally execute nodes is by using the enabled_state input slot.
The Design Entry ( ) type output
slots can be connected to enabled_state input slots. These slots are Bool
(
) type output
slots can be connected to enabled_state input slots. These slots are Bool
( ) type. The receiving node is only
triggered if the value of enabled_state is True. The calculator and
integration nodes can be used as conditional variable source.
) type. The receiving node is only
triggered if the value of enabled_state is True. The calculator and
integration nodes can be used as conditional variable source.