


 The Split
Face option allows you to split a mapped face at a desired
location.
The Split
Face option allows you to split a mapped face at a desired
location.
You can use the drop-down list to choose a Selection Method:
- Specify Edge
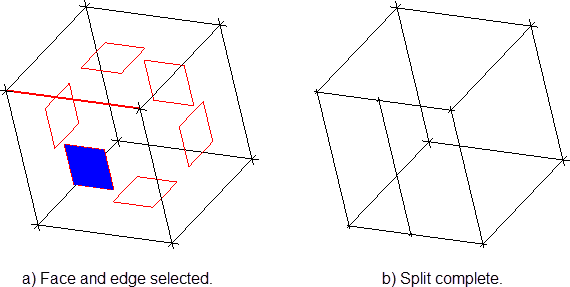
After selecting a face, select the edge where the split will take place. Hold down the left mouse button to slide the cursor to the desired split location. Release the left mouse button and press the middle mouse button to accept the location and to complete the face split operation. This method works for both 2D and 3D blocking.
In the Figure 347: Specify Edge Example, one face of a 3D blocking is split. The split is manually positioned in the middle of the face.
- Automatic
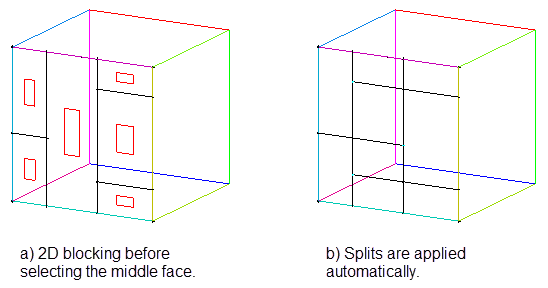
After selecting a face, any available splits are applied immediately. Splits are located where non-corner nodes exist on edges. This method works for 2D blocking only.
See the Figure 348: Automatic Example. Splits are located where adjacent edges intersect edges of your selected face.
Tip:The Automatic method supports the selection of multiple faces by utilizing the corner vertices tool from the selection toolbar.
If you do not explicitly select any face(s), all existing mapped faces will be selected.
Note: The selected face(s) must be mapped. Other types will generate a warning message.