


When starting to work with the UTL from a geometry file, you will use the watertight geometry workflow (Using the Watertight Geometry Meshing Guided Workflows in the Fluent User's Guide). The inputs and steps that you follow are consistent with non-ULT Fluent. The only difference is that you can have the option to select geometrical bodies by topology or label for tasks like creating local sizing or updating boundaries.
There are a few methods for defining physics volumes and boundaries as outlined in the following sections.
You can start from a mesh file in either the Meshing or Solution workspace. If you start from Meshing, then you have the option to transition to the Solution workspace without automatically creating physics conditions for all geometry boundaries (this is controlled by the Create Physics on Meshing to Solver Switch preference).
There are two ways to create new physics volumes:
The preferred approach is to split new volumes off the existing default physics volume:
Right-click a default volume (fluid or solid) and pick Split in the context menu.
 Physics
→ Volumes → fluid
Physics
→ Volumes → fluid
 Split
Split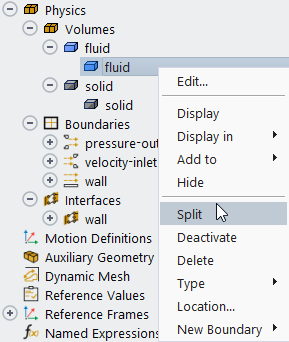
Name the new physics region and select the locations on the model topology that are included in this region. Fluent removes any bodies from the default physics region, named fluid in this example, and adds them to the region you create, avoiding any over-specification for the selected topological bodies.
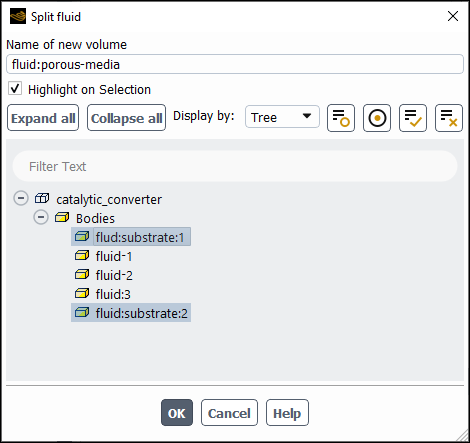
Click to create the new physics region with the selected topology.
The alternative method is to create a new volume:
Right-click either the Volumes branch or the fluid or solid branches to define a new volume.
Physics
→ Volumes New
Volume → <volume type>
Name the new physics volume.
Select the locations in the model topology where the physics will be applied in the New Physics Volume Location: dialog box and click .
Define the settings for the newly created volume.
If you defined boundaries while in meshing, those boundaries are respected and classified correctly in the solver.
You can create new boundaries via the context menu accessed by right-clicking any of the Boundaries branches in the Outline View tree.
Right-click the containing boundary and select New Boundary> and pick the desired type.
Select the location(s) in the model topology where the physics boundary definition will be applied.
Fluent automatically converts legacy case files into UTL format. It is important that you check all of the physics settings to confirm they are properly defined. You can read any case file that is supported at the Pro licensing level (for example, transient cases are not supported).
Important: Once you begin operating in the UTL environment, you cannot revert to the legacy setup format.
During the setup, it is possible that you may complete an action that results in the
case having one or more issues. In addition to the standard error and warning messages
that are printed to the console and presented in dialog boxes, the UTL performs
additional checking to ensure that the problem is properly defined. If Fluent finds an
issue with the setup of the UTL, it indicates this with exclamation points (![]() ) at the affected branches.
) at the affected branches.
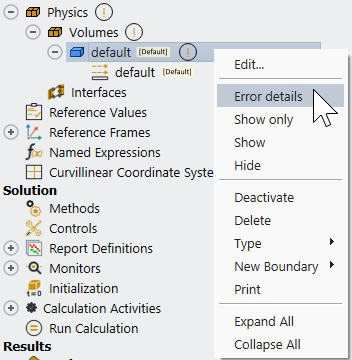
Right-click the most-nested branch first, that is, the branch representing the smallest child element in the tree and select Error details from the context menu, which prints the error message to the Console. Typically, addressing the smallest elements first will resolve the issues identified higher in the tree.