


The following topics are included in this section:
One common use of textures is to place a logo or "decal" onto a part. This operation involves using a projected texture. This is a simple three step process.
For this example we will use the AMI dataset which comes with EnSight.
Load the AMI dataset and set the display type to shaded surface.
Orient the hypersonic body as shown and select it in the part list.
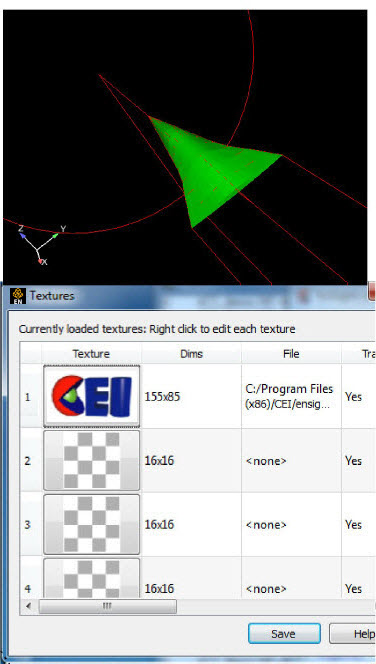
Next we need to set up the texture map to use. Select the color icon to bring up the Part Color/Surface Property Editor dialog and turndown Textures, then click on the Edit Textures… button to bring up the texture dialog.
Right-click on the first texture button and select Load texture file…
Browse to the image file containing your logo image.
A good example is the CEI logo found in CEI/ ensight102/doc/wiki.ensight.com/ cei_logo_png72.png. This image includes an alpha channel that is zero outside of the logo pixels (the Display Alpha menu option will display only this channel).
Associate this texture with the part by selecting the part and set Use Texture to
1.The hypersonic body will get a tiling of CEI logos over it, since we only want a single logo, change the Repeat mode to Clamp (the logos will likely disappear).
Finally, we need to set up the transform necessary to place the logo.
Bring up the plane tool and size/ position it as illustrated:
The key here is to think of the plane tool as a flashlight that shines down the plane tool's Z axis and the light is bounded by the plane rectangle.
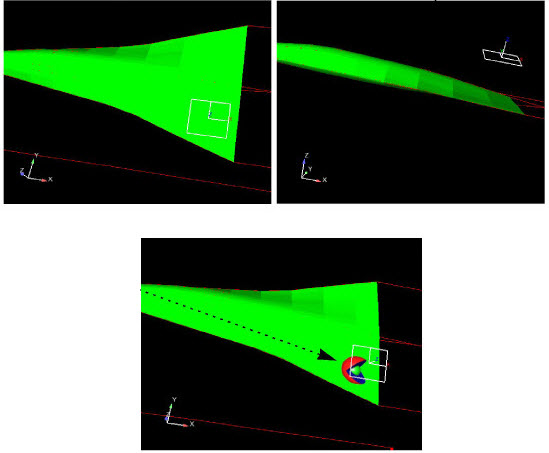
Once you have the plane positioned, click Get proj from plane tool.
The logo texture will now be displayed on the body at the location specified by the plane tool.