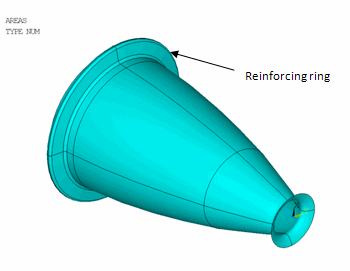
The nozzle extension consists of a main curved wall and a reinforcing ring close to the jet exhaust, as shown in this figure:
Both the wall and the reinforcing ring are made of layered composite materials. To maintain a degree of simplicity for this example, the model uses a single orthotropic material for all layers; however, the material orientation varies from layer to layer.
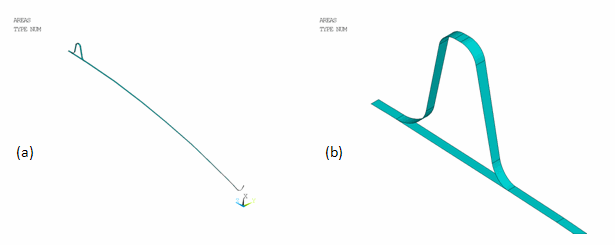
Because the model exhibits symmetry, optimal computational efficiency is achieved by modeling only a single 1° sector (the base sector) of the entire nozzle extension. The geometry model of the 1° sector is shown in this figure, where (a) is the global geometry and (b) is a detail view of the reinforcing ring:
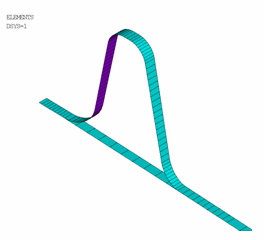
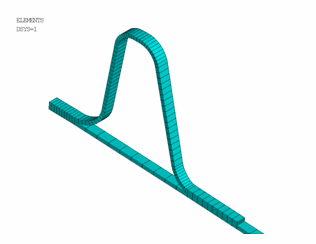
The reduced 1° geometry model is meshed with SHELL281 elements. The following figures show respectively the mesh and the expanded solid representation of the shell mesh (/ESHAPE).
Using the SHELL281 element's option for improved shell formulation (KEYOPT(2) = 1), the element incorporates initial curvature effects more accurately. With this option, both shell-membrane and thickness strains are accounted for in the calculation of effective shell curvature change. This option is essential for capturing the orthotropic thermal expansion effects in curved shell structures. To properly postprocess a layered solution, layered data storage is set to store results for the tops and bottoms of all layers (KEYOPT(8) = 1).
Shell sections define the layers of the composite material. (The SECTYPE command specifies the section type, and the SECDATA command specifies the material, thickness, material orientation, and the number of integration points of each layer.) Two sections are created, respectively, for the main wall and the reinforcing ring. The following table summarizes the shell section properties:
| Section Number | Layer Thickness | Material Number | Material Orientation | Integration Points | Offset |
|---|---|---|---|---|---|
| Section 1 (main wall) | 1/4 total thickness | 1 | 0 | 3 | Top of the section |
| 90 | |||||
| 0 | |||||
| 90 | |||||
| Section 2 (reinforcing ring) | 1/4 total thickness | 1 | 0 | 3 | Bottom of the section |
| 90 | |||||
| 0 | |||||
| 90 |
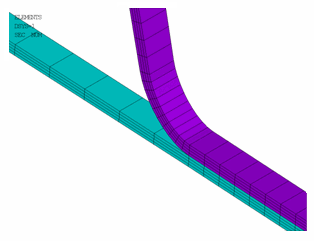
Assume that the reinforcing ring is securely bonded to the outer surface of the main extension wall. The secure bonding is easily simulated via the use of common nodes at the connection areas between the wall and the reinforcing ring. (See Figure 11.3: Ring Element Plot.) It is necessary to apply shell offsets, however, so that the wall and the ring can be properly connected. This example offsets the shell section for the main wall to its top, and the shell section for the ring to the bottom (SECOFFSET), as shown in this figure:
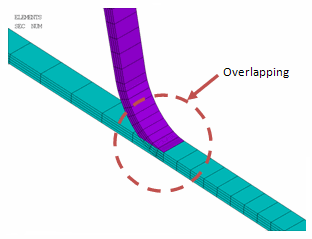
Without the offsets, the shell sections are offset to the midplane by default, leading to an incorrectly overlapped model, as shown in this figure:
To obtain an accurate reference solution, results are compared to a refined 3D model with multiple quadratic layered solid elements (SOLID186) through the wall thickness.


