


You must have an EOSPRINT 2 license, in the form of a dongle or from a license server, from EOS in order to build an EOS build file. Additive Prep uses version 2.8 of the EOS API.
To generate an EOS build file:
Select the Build Processor option in the ribbon. The Build Processor panel appears in the right side of the UI, as shown in the following figure.
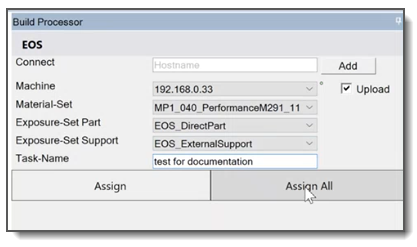
In the Connect field, enter the host name or network address of your 3D printer and click Add. Be sure the machine you want to connect to is up and running. It may take a minute or two to make the connection. You will get a message such as "Configuration up to date. Connection established." when the connection is made. If a connection cannot be established or gets interrupted, you'll see: "No connection possible and no machine configuration found..." or a similar message.
Check the Upload box to enable uploading of the build file to the specified machine.
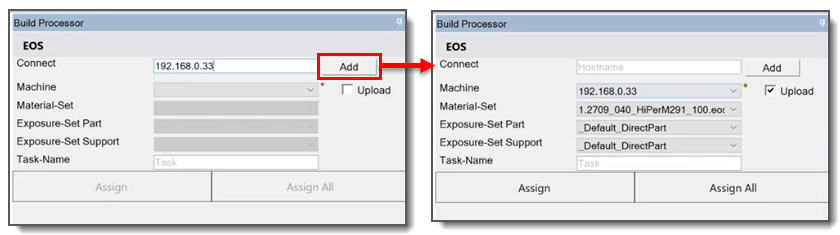
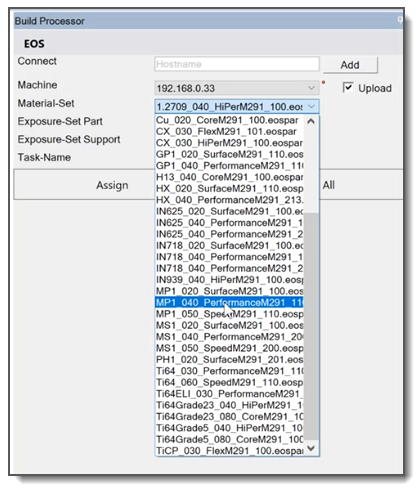
Select a material from the list. It must be a material that your EOS license supports.
Select a scan strategy for the part and then the support from the available options.

Enter a task name for the build file. When you have finished making changes, click the Assign button to assign the changes to the selected workspace assembly, or click the Assign All button to apply the changes to all the workspaces in the Build Volume.
Click the green check box
 to
generate the build file. Your build file will be uploaded to the EOS machine upon completion.
(You will need to Export to obtain the
build file and other files on your local computer. An exported build file format for EOS is
.openjz with possibly additional .task and/or .data files.) If your part is particularly large
and complex, it may take a minute or two for the build file to be generated. You will see the
message "Open Slice Viewer tool to view build file" when the operation is complete.
to
generate the build file. Your build file will be uploaded to the EOS machine upon completion.
(You will need to Export to obtain the
build file and other files on your local computer. An exported build file format for EOS is
.openjz with possibly additional .task and/or .data files.) If your part is particularly large
and complex, it may take a minute or two for the build file to be generated. You will see the
message "Open Slice Viewer tool to view build file" when the operation is complete.To make changes, simply adjust the parameters, click Assign or Assign All, and click the green check box again
and a new
build file is generated.Next you will probably want to review the build file in the Slice Viewer tool.