


Creating Optical Properties
Creating Volume Optical Properties (VOP) and Surface Optical Properties (SOP) on solids allows you to determine the light rays' behavior when they hit or are propagated in the geometry.
To create Optical Properties:
-
From the Light Simulation tab, click Material
_Material.png) .
A new material is created in the Simulation panel.
.
A new material is created in the Simulation panel.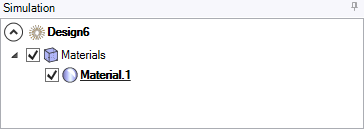
-
In the 3D view, click
_Simulation_Selection_Geometry.png) , select the geometries on which to apply optical properties and click
, select the geometries on which to apply optical properties and click _Validation.png) to validate.
Tip: Right-click a Material and click Select associated geometry to highlight in the 3D view the geometries on which the material is applied.The selection appears in Geometries as linked objects.
to validate.
Tip: Right-click a Material and click Select associated geometry to highlight in the 3D view the geometries on which the material is applied.The selection appears in Geometries as linked objects. -
If you want to modify the current Volume properties:
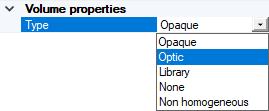
- Select Opaque for a non transparent material.
-
Select Optic for a transparent colorless material without bulk scattering.
- Edit the Index and Absorption coefficient values.
- Define Constringence as true or false and edit its values if needed.
-
Select Library and click Browse to select and load a *.material file.
If you want to modify the *.material file, click Open file to open the User Material Editor.
Select None to define the material without volume optical properties.
This allows you to address cases like filters.
Note: Defining the Volume properties to None means that the body is considered as a surface and not a volume. Otherwise, if you do not set the Volume properties to None for a surface body, this may generate incorrect results.Select Non-homogeneous to create a material with non-homogeneous refractive index.
- In File, browse and select the *.gradedmaterial file that describes the spectral variations of refractive index and absorption with the respect to position in space.
Define the coordinate system to align the (x, y, z) variation of the refractive index with the solid body.
To make sure the graded material and the geometry match, a bounding box is displayed in the 3D view during the edition of the material.
Note: For more information, refer to Non-Homogeneous Material.
-
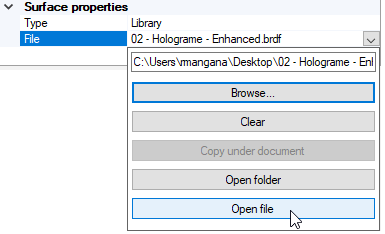
If you want to modify the current Surface properties:
_Optical_Properties_Surface_Properties_Definition.png)
- Select Mirror for a perfect specular surface and adjust the Reflectance if needed.
- Select Optical polished for a transparent or perfectly polished material (glass, plastic).
Select Library and click Browse to select and load a SOP file.
If you want to modify the SOP file, click Open file to open the Surface Optical Property Editor.
 Tip: To define a surface which is polarized, select a .polarizer file instead of a .coated file as coated surfaces are isotropic.
Select Plug-in, and click Browse to select a custom made *.sop plug-in as File and the Parameters file for the plug-in.
Note: Make sure each plug-in created has a different GUID._Optical_Properties_Surface_Properties_Plugin.png)
For more information, refer to Surface State Plugin.