


Applying an Image Texture
This page shows how to apply an image texture. Image textures are often used to simulate materials with color variations like wood.
To apply an Image Texture:
-
From the Light Simulation tab, click Material
_Material.png) .
.
-
In the 3D view, click
_Simulation_Selection_Geometry.png) , select the geometries on which to apply the texture and click
, select the geometries on which to apply the texture and click _Validation.png) to validate.
to validate.
-
In General, set Use Texture to True.
A surface layer is created under the material in the simulation panel and allows you to define the surface properties of the geometry.
_Mappinp_Texture_General.png)
-
In the surface layer, from the Texture imageType drop-down list, select From file to activate the image texture.
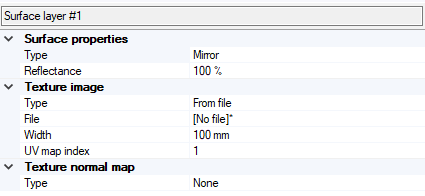
- In File, double-click in the field to browse and load a .jpeg or .png file.
-
Define the Image width of the image in mm.
The Image size is calculated proportionally on U and V.
-
Define the UV map indexyou want to use to apply this texture.
The UV map index determines which UV mapping should be used to apply the texture. This index refers to the UV map or "layer" that should be selected within a UV mapping feature.