Create 3D Component Encryption Tab
The Encryption tab contains options for 3D component encryption.
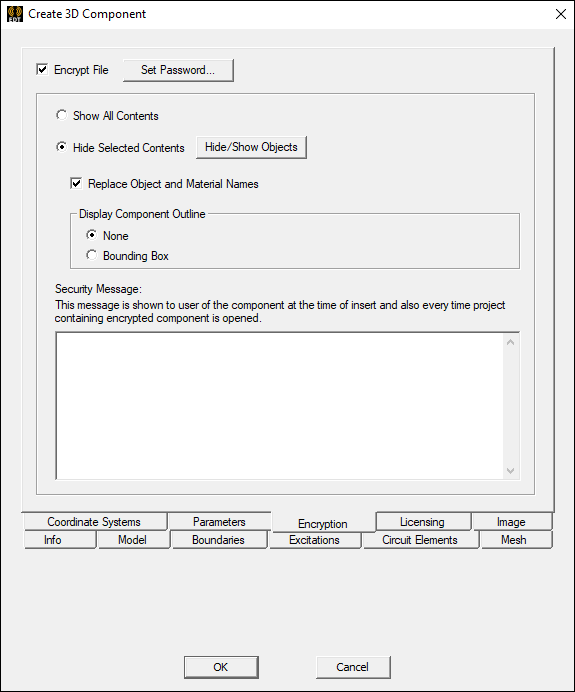
Selecting the Encrypt File check box enables all options and automatically launches the Set Passwords window.
Encryption is a common technique for encoding information in a manner that is very difficult for unauthorized users to decode. When this option is enabled for 3D components, the contents of the component file are encrypted to protect them from external viewing or editing.
- 3D components use the Advanced Encryption Standard (AES) with a 256-bit key and password-based key derivation.
- If the encrypted component is created with an Internal Key, it can be used without additional authorization.
- If the encrypted component is created with a User Password, that password must be entered when the component is used in a design.
- It is not possible to edit the definition of an encrypted component within Electronics Desktop unless Allow Component Edit with User Password was selected when defining the component.
- If the Show All Contents option is selected, the geometry and other contents will be shown when the component is used. Geometry export and links will operate as for general geometry.
- The Hide Selected Contents option can be used to further protect access to an encrypted component’s details. When this option is selected, hidden contents will not appear in the user interface.
- All geometry will be hidden, except for objects that the user specifies as visible during component creation.
- Hidden geometry will not be visible in the model window or included in the history tree.
- Geometry export and links will not be allowed.
- Materials, boundaries, and other setup data will also be hidden, with limited exceptions such as excitation settings that must be accessed in order to control the simulation and post-processing of the design.
- For components with hidden
contents, all geometry will be excluded from field calculations and from
plots of fields and meshes. Plots in surrounding volumes will extend
to, and can include, the outer surfaces of the component, but not the containing
volume. Important:
Such plots may indirectly reveal component content by providing a view of the surfaces where the plots terminate. To prevent such exposure, include additional modeled objects that surround the hidden contents of the component and have material of the surrounding material environment (e.g., air, vacuum).
See: Hiding Component Content.
- When using Hide Selected Contents, the names of objects, materials, boundaries, and other setup data may appear in progress updates, messages, and other informational text. The Replace Object and Material Names option can be used to automatically convert object and material names to generic names in the exported component. Other sensitive names should be changed before exporting.
- The Security Message field specifies text that is displayed at component insertion and when the project containing the component is opened.
- When a project contains one or more encrypted 3D components, the project file is encrypted in order to protect its contents. This encryption uses an internal key, so that the file can be opened without entering a password.
There are some additional considerations with respect to projects using encrypted components:
- The component itself will always be stored in encrypted form.
- When an HFSS design contains an encrypted component with hidden contents, it will also protect solver inputs and other project files containing data that could be used to extract component information. However, note that solver inputs associated with SBR+ regions are not protected, even when encrypted components are in use.
- For a hybrid design that contains a combination of SBR+, FEM, and IE regions: the FEM and IE regions will be fully protected, while the SBR+ regions will not.
- Other design types, such as Maxwell, Q3D, or Icepak, do not include extended protection of solver inputs and other project files.
Set Passwords
Clicking Set Password launches a window containing fields for setting component passwords. This is the same window that automatically launches upon enabling Encrypt File.
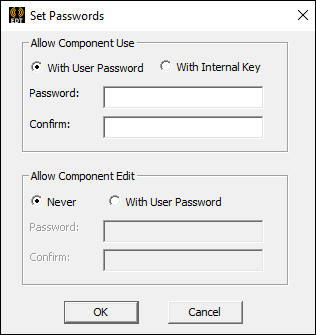
- Allow Component Use – allows you to select between encrypting with a user password or an internal key (which requires no additional authorization). If setting a password, enter it in both the Password and Confirm fields and click OK.
- Allow Component Edit – allows you to choose between never allowing edits to components or allowing edit with a user password. If selecting the latter, enter a password in both the Password and Confirm fields and click OK.
- When enabling a password for both component use and component edit, the password does not have to be the same.
Hiding Component Content
The Hide Selected Contents option allows selected parts of the component to be displayed either as a Bounding Box or without an outline (None).

Once encryption is set, visibility can be set on a per-object basis using the Model tab of the Create 3D Component window. Preview the component using theImage tab.
Inserting Encrypted Components
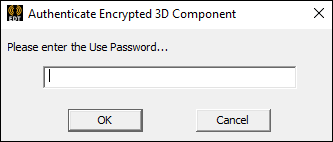
When an encrypted 3D component is added to a design, a prompt will appear asking for the password.
Editing Encrypted Components
3D component definitions can be edited from the Project Manager:
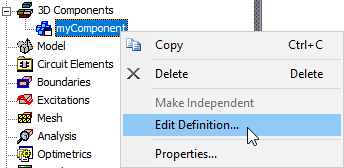
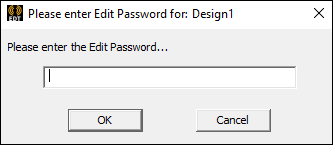
A prompt appears asking for the password:
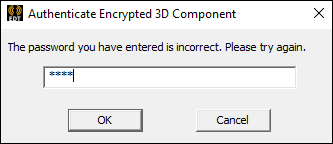
If the password is incorrect, a warning appears:
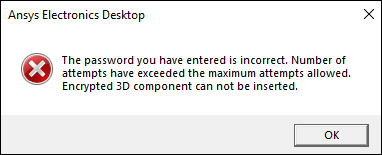
There is a three attempt maximum, after which a warning will appear and no further attempts may be made:
Opening a 3D Component File
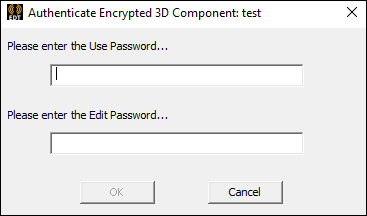
When opening an encrypted 3D component file using File > Open, both the use password and edit password must be entered:
Copying and Pasting Encrypted Components
Encrypted components may be Copied and Pasted. They will be remain encrypted.
