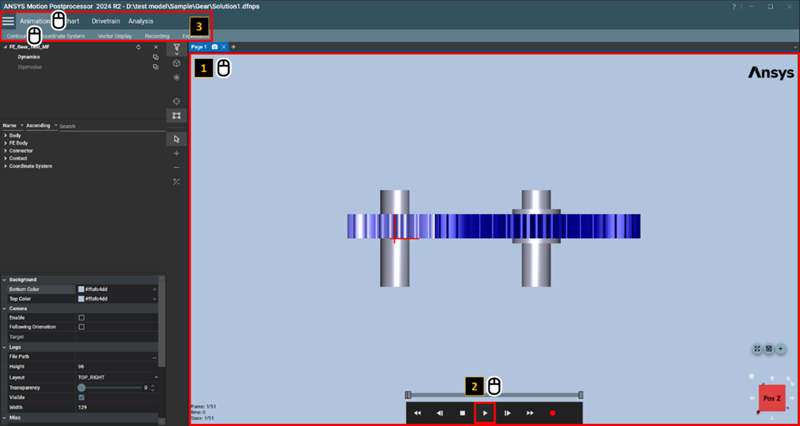
When an animation view is selected and an animation is loaded, a contour can be created using the following steps.
Figure 3.73: Steps for Creating a Contour
| Step | Description |
| 1 | Select an animation view to activate the animation. If the animation view is already selected, you can skip this step. |
| 2 | Click the play button  to load the animation. If the animation is
already loaded, you can skip this step. to load the animation. If the animation is
already loaded, you can skip this step. |
| 3 | Select > to access the contour creation menu. |
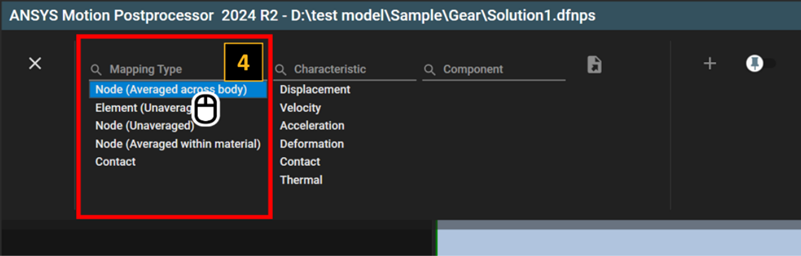
| 4 |
Select a Mapping Type option to choose objects for contour display. The contents are automatically shown depending on the objects in the DFR file and the solution type. See Simulation Results using Contour for more information about the Mapping Type. |
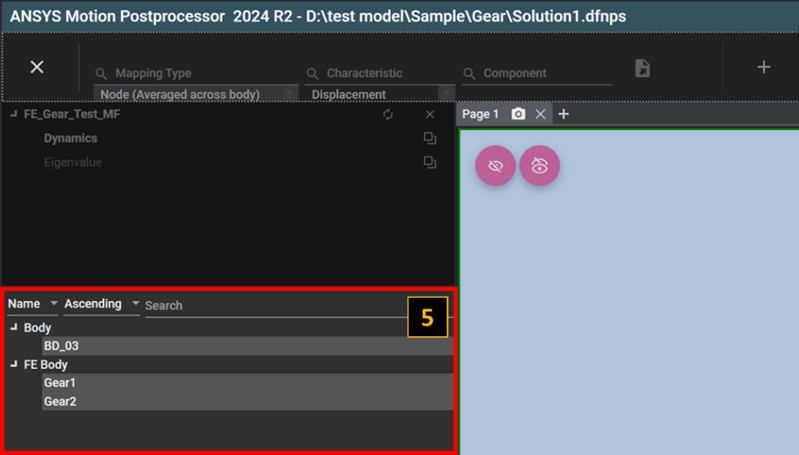
| 5 |
Select objects for contour display in the Object Navigator. The object list depends on the mapping type. |
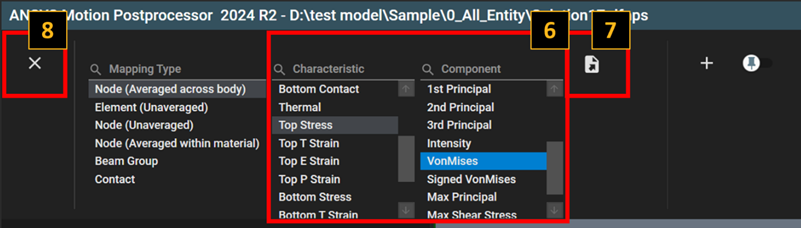
| 6 |
Select > . The content in the component is then displayed as a contour. The mapping type and characteristic are the main category and sub-category to determine the component. See Simulation Results using Contour for more information about characteristics and components. |
| 7 | Click the  button to create the contour button to create the contour |
| 8 | Click the  button to close the contour creation
dialog. button to close the contour creation
dialog. |