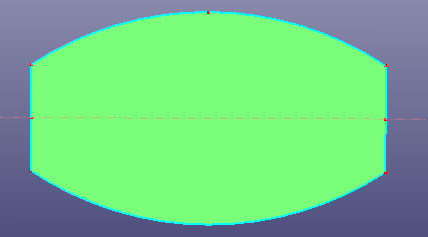
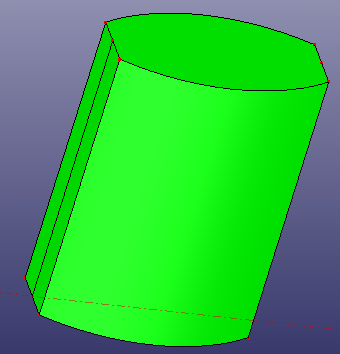
To compute the main body of the bottle, create a solid shape. The simplest way is to use the previously created profile and to extrude it along a direction. Our current profile are six indepdent edges. You need to compute a face out of these edges to generate a solid. Use Fill Plane to generate a plane surface by these edges.
Choose > > from the menus, or click > in the right toolbar.
In the dialog box:
Choose the By Edges method (default method).
Area select the six edges.
Click Apply.
Tip: You can also pick one edge first and click Search button to trace connected neighbor free edges.
Choose > > from the menus, or click > in the right toolbar.
In the dialog box:
Select the plane into the Face List.
Define the End Pos. as
70.0.Click Apply.
Click AutoCenter in the bottom toolbar to view the solid.
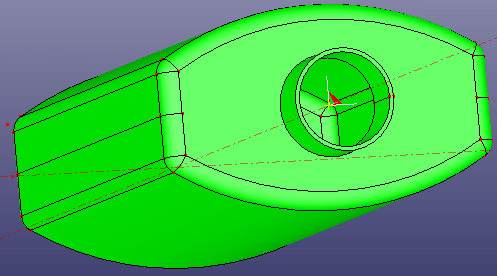
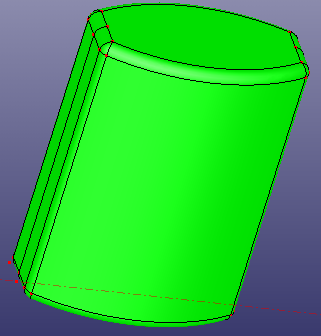
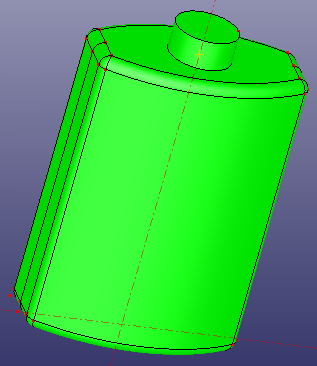
The edges of the bottle's body are very sharp. To replace them by rounded faces, use the Solid > Fillet functionality.
Depending on their location, fillets can be very complex. For example, they can follow linear or specific evolution laws between vertices of an edge. However, for this tutorial, simply specify that fillets must be applied on all edges of the shape and have a radius of thickness 2.5mm.
Choose > > from the menus, or click > in the right toolbar.
In the dialog box:
Select any face from the solid body into the Shape List.
Choose Equal Radius (default method).
Define the Radius as
2.5.Check Whole Shape.
Click Apply.
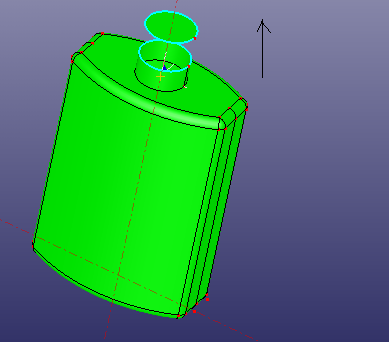
To add a neck to the bottle, create a solid cylinder and fuse it to the body. The cylinder is to be positioned on the top face of the body with a radius of Thickness/4 and a height of Height/10.
To create a cylinder, first create a local coordinate system on the top face of the body. To create a coodinate system, create a center point on the top face and an axis that is normal to the top face.
Choose > > from the menus, or click > in the right toolbar.
In the dialog box:
Choose the Mass Center method.
Select the top face.
Click Apply.
Choose > > from the menus, or click > in the right toolbar.
In the dialog box:
Choose the Point to Plane method.
Select the top face into the Plane List.
Select the last step created reference point into the Point List .
Click Apply.
Choose > > from the menus, or click > in the right toolbar.
In the dialog box:
Choose the Origin/Dir method.
Select the reference point as the Origin.
Select the reference axis as the Z Dir.
Click Apply.

After creating the local coordinate system, create the solid cylinder as follows:
Choose > > from the menus, or click > in the right toolbar.
In the dialog box:
Choose the Parameters method (default method).
Select Coordinate System.
Define the Radius as
7.5.Define the End Pos. as
7.0.Define the End Angle as
360.0.Click Apply.
Tip: In current version, it's not necessary to create coordinate system outside the Solid Cylinder dialog anymore for this sample. You can select the top plane face directly into the listbox of Coordinate System. It will automatically search the coordinate system from the selected plane surface, and show text similar as (CoordSys@ Plane Face).
Now, you have two separate parts: a main body and a neck. Fuse them together using the Boolean operation.
Choose > > from the menus, or click > in the right toolbar.
In the dialog box:
Choose the Union method.
Select the two solid bodies into the Solid Shapes list.
Click Apply.
Since a real bottle is used to contain liquid material, you should now create a hollowed solid from the bottle's top face. In LS-PrePost geometry part, making a hollowed solid is called Thicken and is internally computed as follows:
Remove one or more faces from an initial solid to obtain the first wall W1 of the hollowed solid.
Create a parallel wall W2 from W1 at a distance D. If D is positive, W2 will be outside the initial solid, otherwise it will be inside.
Choose > > from the menus, or click > in the right toolbar.
In the dialog box:
Select the fused solid into the Solid Shape list.
Select the top face on the neck into the Remove Faces List.
Define the thickness as
0.6.Click Apply.