


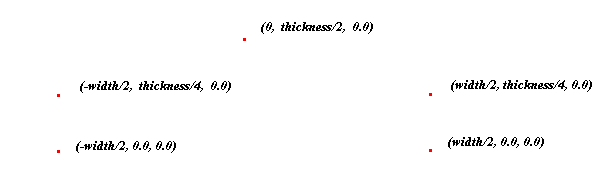
To create the bottle's profile, you first create characteristic points with their coordinates as shown below in the (XOY) plane. These points will be the supports that define the geometry of the profile.
Choose > > from the menus, or click > in the right toolbar.
In the dialog, select the Parameters method (default method) to create five points.
The coordinates list is as follows:
X Y Z 2500257.500150-257.50-2500To create a point:
Input the x, y, and z coordinates into the X, Y, Z fields. Alternatively, copy a set of coordinates, paste it into the X field, and press Enter.
Click Apply.
Repeat those steps to create all five points.
Click in the bottom toolbar to view the five points.
The result is shown below.

Tip: In the Point dialog, you can also use the Batch Input method:
Select the Batch Input method. Copy the coordinates for all five points
( 25, 0, 0) (25, 7.5, 0) (0, 15, 0) (-25, 7.5, 0) (-25, 0, 0).Paste the coordinates list into the field.
Press Enter to preview results, then click to accept the result.
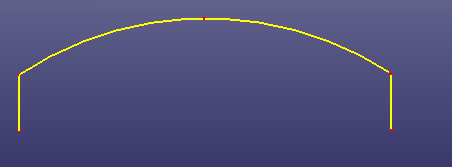
With the help of the previously defined points, you can compute a part of the bottle's profile geometry. As shown in the figure below, it will consist of two segments and one arc.
Choose > > from the menus, or click > in the right toolbar.
In the dialog box:
Choose method Point/Point.
Select point 1 and 2.
Click Apply.
Select point 4 and 5.
Click Apply.
Choose > > from the menus, or click > in the right toolbar.
In the dialog box:
Choose the 3 Points method.
Select point 2, 3, 4 in that order.
Click Apply.
The final result is shown above.
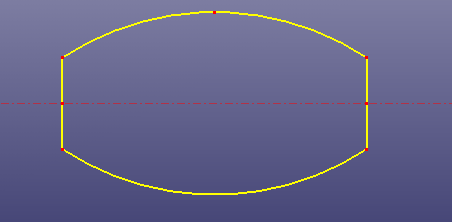
Once the first part of the profile is created, compute the complete profile. A simple way to do this is to reflect (mirror) the existing three curves.
To apply a mirror transformation on shapes, you first need to create a point, an axis, or a plane. Currently, you need create a reference axis.
Choose > > from the menus, or click > in the right toolbar.
In the dialog box:
Choose the Two Points method.
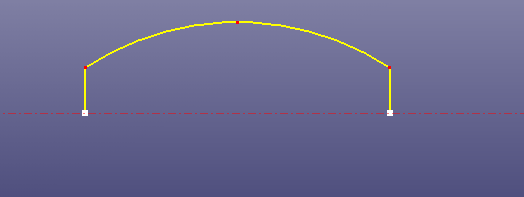
Select two points shown as below.
Click Apply.
Using this refer-axis, you can mirror the three curves.
Choose > > from the menus, or click > in the right toolbar.
In the dialog box:
Choose Reflect as the Transform Type.
Select the three curves into the Source Entity listbox.
Choose reflect type by By Axis.
Select the reference axis into it.
Check Copy.
Click Apply.
Tip: In the Transform dialog, it's not necessary to create the ref-axis outside for this sample before the relecting operation. It will automatically check the selected edges. If the selected edges can construct an open loop, the default reflecting axis will pass the two end points to the function.