


Follow the recommended body merge workflow when you add a Body Merge to your model. For considerations when using Body Merge, see Body Merge Requirements and Limitations and How Body Merge Affects Body Attributes, Scoping, and Meshing.
To merge multiple bodies in your model into a single merged body:
Add a Body Merge object. Do one of the following:
On the Model Context tab, click the Body Merge icon
 .
.
Right-click the Model object in the Outline pane, then select from the menu.
Right-click the Geometry window, then select from the menu.
Tip: You can optionally select the geometric bodies to be merged before adding a Body Merge object.
When you select bodies or parts from the Geometry list in the Outline pane, the Body Merge icon appears on the Geometry context tab. Click this icon to create a Body Merge for the selected items.
Click the Body Merge object in the Outline pane. The Details of Body Merge pane is displayed.
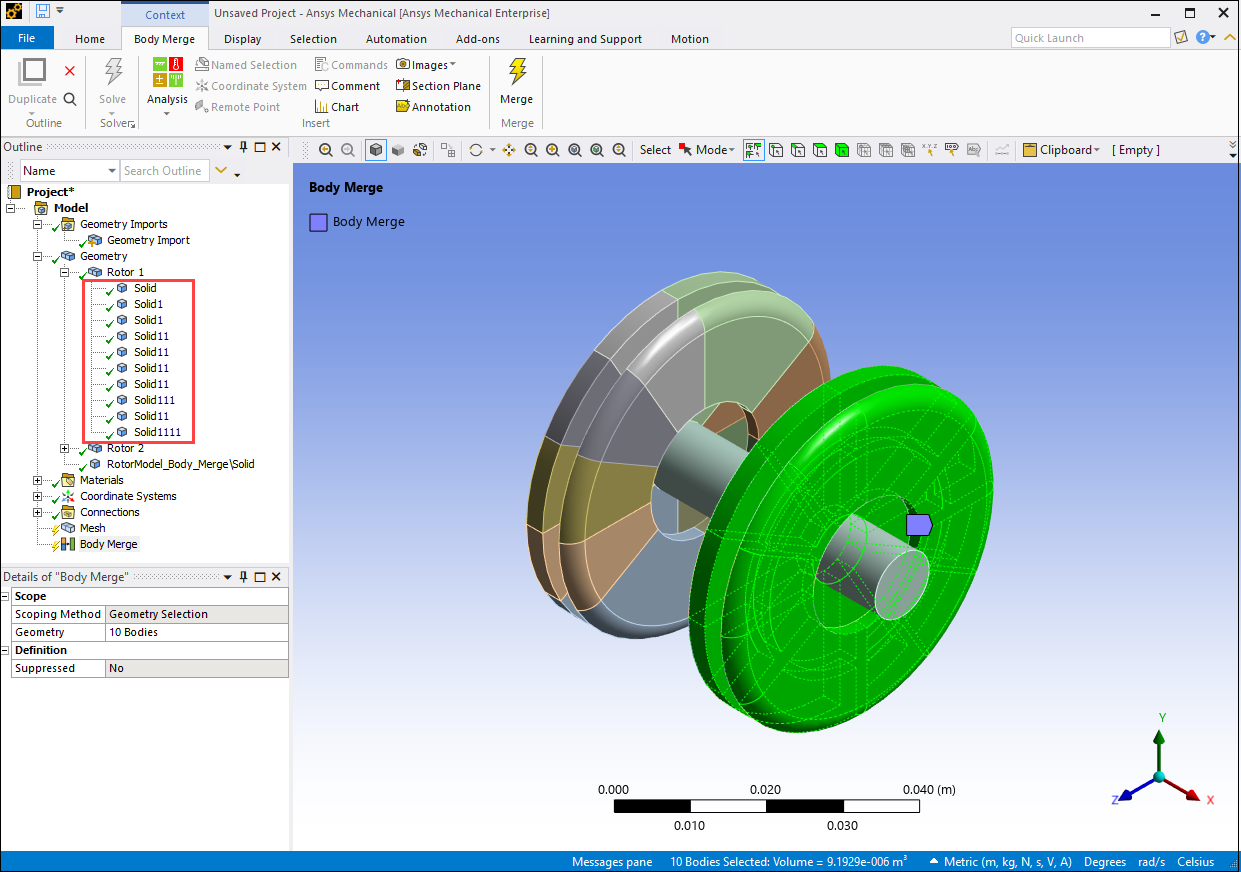
Geometry Selection is the only Scoping Method supported for Body Merge. The number of selected bodies is displayed in the Geometry field. These bodies are also highlighted in the geometry view.
In the following figure, the individual bodies that make up the part Rotor 1 were selected for the Body Merge. These bodies are outlined in red under the Geometry object in the Outline pane. The Details of Body Merge pane shows 10 selected bodies.
If you have not yet selected the bodies to be merged, the Geometry field displays No Selection and is highlighted in yellow. Do the following:
Select the desired geometric bodies for the body merge.
Click the Geometry field. and buttons are displayed.
Click to scope the body merge to the selected bodies.
Execute the body merge with the command.
Mechanical then merges the selected bodies as shown in the following image. The new merged body is highlighted in red. Its name (Rotor 1) is listed under the Geometry object in the Outline pane, replacing the names of the bodies that were selected for the merge. You can now assign a material to Rotor 1, scope boundary conditions to it, and perform other operations on the merged body.
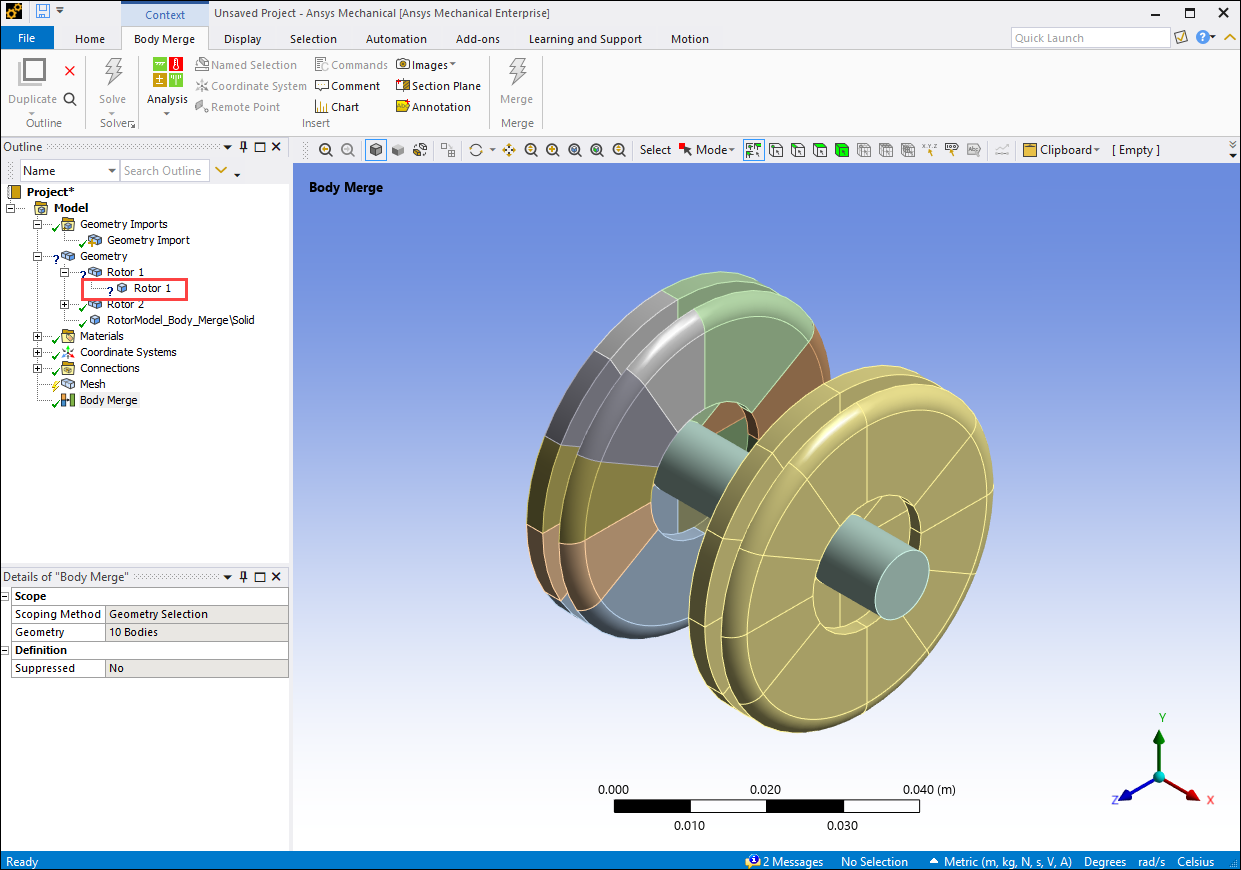
A question mark displays next to the new merged body, indicating that you need to finish specifying the body's required attributes. A check mark displays next to the Body Merge object, indicating that the merge is successful.