


In addition to the real time solution response graphs you can view from the Solution Information object, you can also view graphs of specific displacement and contact results as a function of time using Result Tracker objects. These objects are inserted as branch objects under a Solution Information object.
Other than contact trackers that read data from the CND file (file.cnd), you cannot add new Result Trackers to completed solutions. In order to add and solve a new result, you must clear the Solution, add a new Result Tracker, and then resolve the simulation.
Note:
Application
To insert a Result Tracker object, select a Solution Information object and either choose an option under the Result Tracker drop-down menu in the Solution Information Context tab, or right-click on a Result Tracker object and then select Insert > and the desired result tracker type.
Note: You can add Contact Result Trackerswhile the solution is in progress. The application automatically sets the Enhanced Tracking property to and the property is read-only. Normal scoping requirements apply.
Result Tracker Types
The Result Tracker feature is available for the following:
Result Tracker Features
The following options are offered by the Result Tracker object:
Plotting a Result Tracker
Any of the graphs created by either the Result Tracker or nonlinear convergence items have the following features:
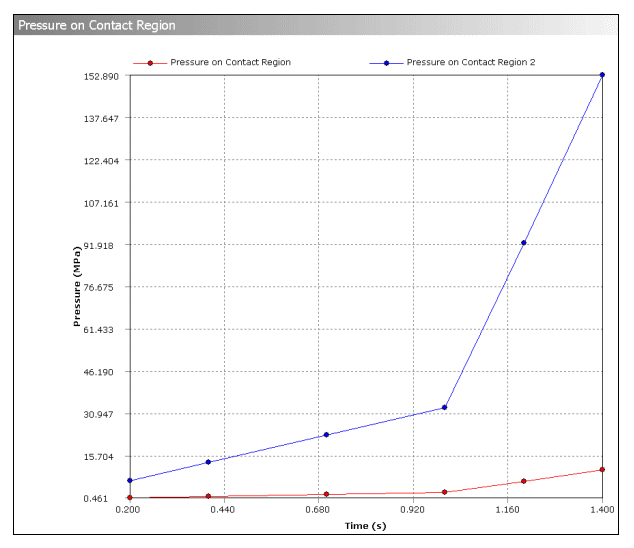
Multiple Result Tracker objects may be selected at the same time to create a combined chart assuming they share the same X and Y output types (such as pressure for Y and time for X). An example is shown here:
The graph can be zoomed by using the ALT key + left mouse button. Moving down and to the right zooms in, and moving up and to the left zooms out.
Caution: Because nodes may be rotated in solutions obtained with the Mechanical APDL application, deformation Result Trackers may not record the expected component of the deformation. Should this occur, a warning message alerting you to this will appear after the solve in the Details view of the Solution object, in the Solver Messages field. This situation can occur when Result Trackers are adjacent to supported faces, lines, or vertices. One possible approach to avoid this situation is to add 3 deformation Result Trackers, one for each of the x, y, and z directions. This will ensure that the tracker is showing all deformation of that vertex of the model.
Renaming a Result Tracker
The Result Tracker has an option for renaming the object based on the definition of the result and the scoping. You choose the option in the right-click (context) menu. This option is useful in having the program create meaningful names of the result trackers. An example would be Result Tracker 5 being renamed to Pressure on Contact Region 2.
Exporting a Result Tracker
Result Tracker objects can be exported to a text file and an Excel file by selecting Export Text File from the context (right-click) menu. This option appears in the menu after the solution is obtained. This option enables you to save a text file of the result data. And, based on the setting of the Automatically Open Excel preference in the Export category of the Options dialog, this option will also open an excel spreadsheet that includes the result data.
Note: You must right-click the selected object to use this feature. On Windows platforms, if you have the Microsoft Office 2002 (or later) installed, you may see an option if you right-mouse click in the Worksheet window. This is not the Mechanical application feature but rather an option generated by Microsoft Internet Explorer.