


For the special case of a pipe with an internal pipe running through it, the flooding options defined in the Ocean Environment object may be overridden by a Pipe-in-Pipe object. You may add as many of these to the analysis as required.
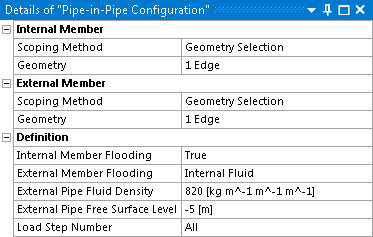
Under the heading of Internal Member, use the Scoping Method and Geometry/Named Selection options to select the line body which represents the internal pipe.
Under the heading of External Member, use the Scoping Method and Geometry/Named Selection options to select the line body which represents the external pipe.
Note: The line bodies selected to represent the internal and external pipes must have their Model Type property set to Pipe.
The Internal Member Flooding option sets the flooding state of the internal pipe. The available options are:
True: the internal pipe is flooded with a fluid, of a density defined by the External Pipe Fluid Density
False: the internal pipe is not flooded
Internal Fluid: the internal pipe is flooded with a fluid, of a density defined by the Internal Pipe Fluid Density, up to the specified Internal Pipe Free Surface Level
The External Member Flooding option sets the flooding state of the external pipe. Where the Default Member Flooding option in the Ocean Environment object Structural Coefficients is set to True, this option must also be True. Otherwise, the available options are:
False: the external pipe is not flooded
Internal Fluid: the external pipe is flooded with a fluid, of a density defined by the External Pipe Fluid Density, up to the specified External Pipe Free Surface Level
In Static Structural and Transient Structural analyses, you may use the Load Step Number option to set the steps at which the Pipe-in-Pipe object is applied. By default the object is applied for All steps; if required, change this to Range and specify the Starting Load Step and Ending Load Step to define a range of steps.