Reversing the Direction of the Clipped View
- Right-click a plane and hover over Clip with Plane to display the entire menu.
- Select Reverse Direction.
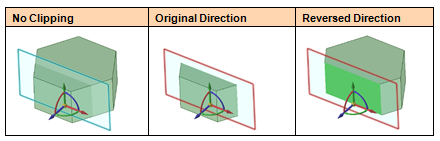
The geometry of your design flips to what is on the other side of the plane. To return to the original clipped view of your design, right-click the plane and select Reverse Direction again.
To view the plane's direction, click the Move tool. The blue arrow on the Move tool indicates the positive direction of the plane. The reversed direction is the opposite direction of the blue Move tool arrow, as shown below:
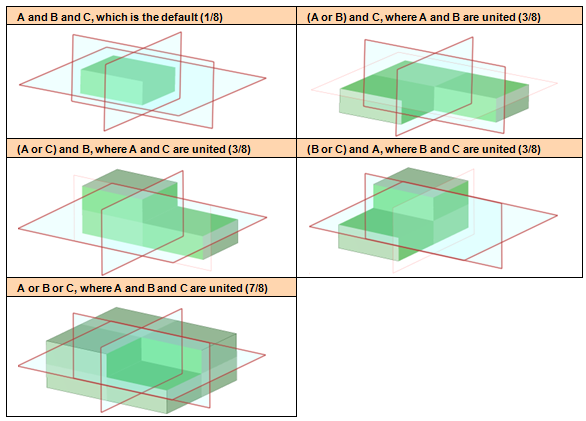
Selecting multiple planes for clipping adds them to an ‘or' set. With a group (2 or more) of planes, you can also right mouse click, then select Union from the Clip with Plane context menu. This option is essentially an "or" operation that defines a plane group that you intend to combine with the rest of the planes. Once you define and unite a group of planes, the Union set is put at the beginning of the logical set, and the rest of the planes follow with their default "and" states. Union is ON by default when more than one clipping plane is selected.
For example, you can select 3 planes and get these logical sets, as shown in the table of images below:
- A and B and C, which is the default (showing 1/8 of the model)
- (A or B) and C, where A and B are united (showing 3/8 of the model)
- (A or C) and B, where A and C are united (showing a different 3/8 of the model)
- (B or C) and A, where B and C are united (showing a different 3/8 of the model)
- A or B or C, where A and B and C are united (showing 7/8 of the model)