Creating a Chamfer Dimension
-
Click the arrow under the
 Dimension tool and select Dimension
.
Dimension tool and select Dimension
.
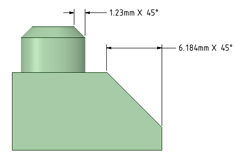
Dimensions for planar and cylindrical chamfers.
You can flip the orientation of chamfer dimensions by setting the Flip Chamfer Dimension property to True.
Flipped chamfer dimensions.

Annotation options in the General page of Detailing option in SpaceClaim Options offers choices for how chamfer dimensions are displayed.
- Default chamfer dimension style:
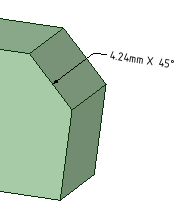
- Linear: Displays the dimension with extensions lines as in the images above.
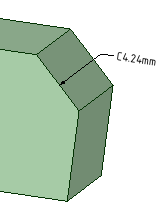
- Normal to chamfer: Displays the dimension with a
leader pointed normal to the chamfer as shown in the image below.
- Default chamfer dimension text format:
- <length> X 45: Text is displayed as in the images above.
- C<length>: Text is shown as in the image
below.