Creating a Curve Table for Manufacturing
- Open the Detail tab and click Curve Table in the Annotation group.
- Click Interactive in the Options panel to enable the manufacturing options.
- Check the Create table for manufacturing option.
Check the Use diameters about axis option and choose a Turning Axis if you want to list arc radius in the table.
Check Use IJK values for radius centers if you want to list arc Center in the table.
Check Absolute IJK if you want to measure arc centers from the machine origin, which you select in the next step.
Uncheck Absolute IJK if you want to measure arc centers relative to the arc start point.
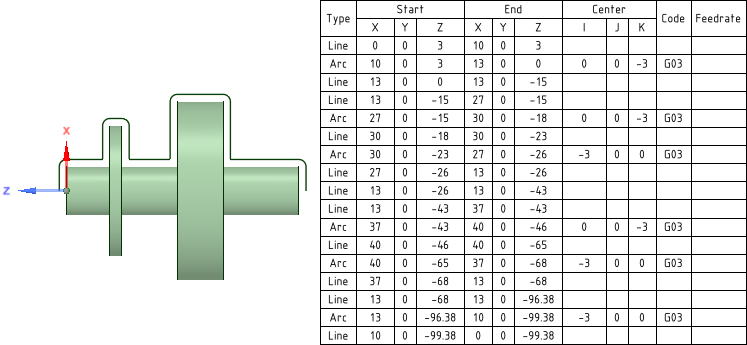
I, J, and K are defined as follows:
- I - The distance with direction measured from the start point to the center of the arc parallel to the X-axis
- J - The distance with direction measured from the start point to the center of the arc parallel to the Y-axis
- K - The distance with direction measured from the start point to the center of the arc parallel to the Z-axis
- Select an Origin for locating the curves.
- Select one or more curves to include in the table. Box-selection is available.
- Click Complete.
- Place the table. If all the curves are in the same plane, that plane is used for placement by default. If the curves are in multiple planes, drag the cursor over the model to highlight planes and select one.
The image below shows a Curve Table using I, J, K values.